How to integrate 3rd-party services?
In Interactor, communication with third-party services is facilitated through Connectors.
A Connector is a component used within Interactor that handles communication with third-party services. Examples include the Gmail Connector and Jira Connector.
This page explains how to use pre-built Connectors available in Interactor.
Step1. Obtaining an API Key
An API Key is an authentication key used for communication with Interactor.
It can be obtained under the Environment section of Development.
When you first log in to Interactor, you will see the following screen.
Click on App Integrations at the top to proceed to the next step.
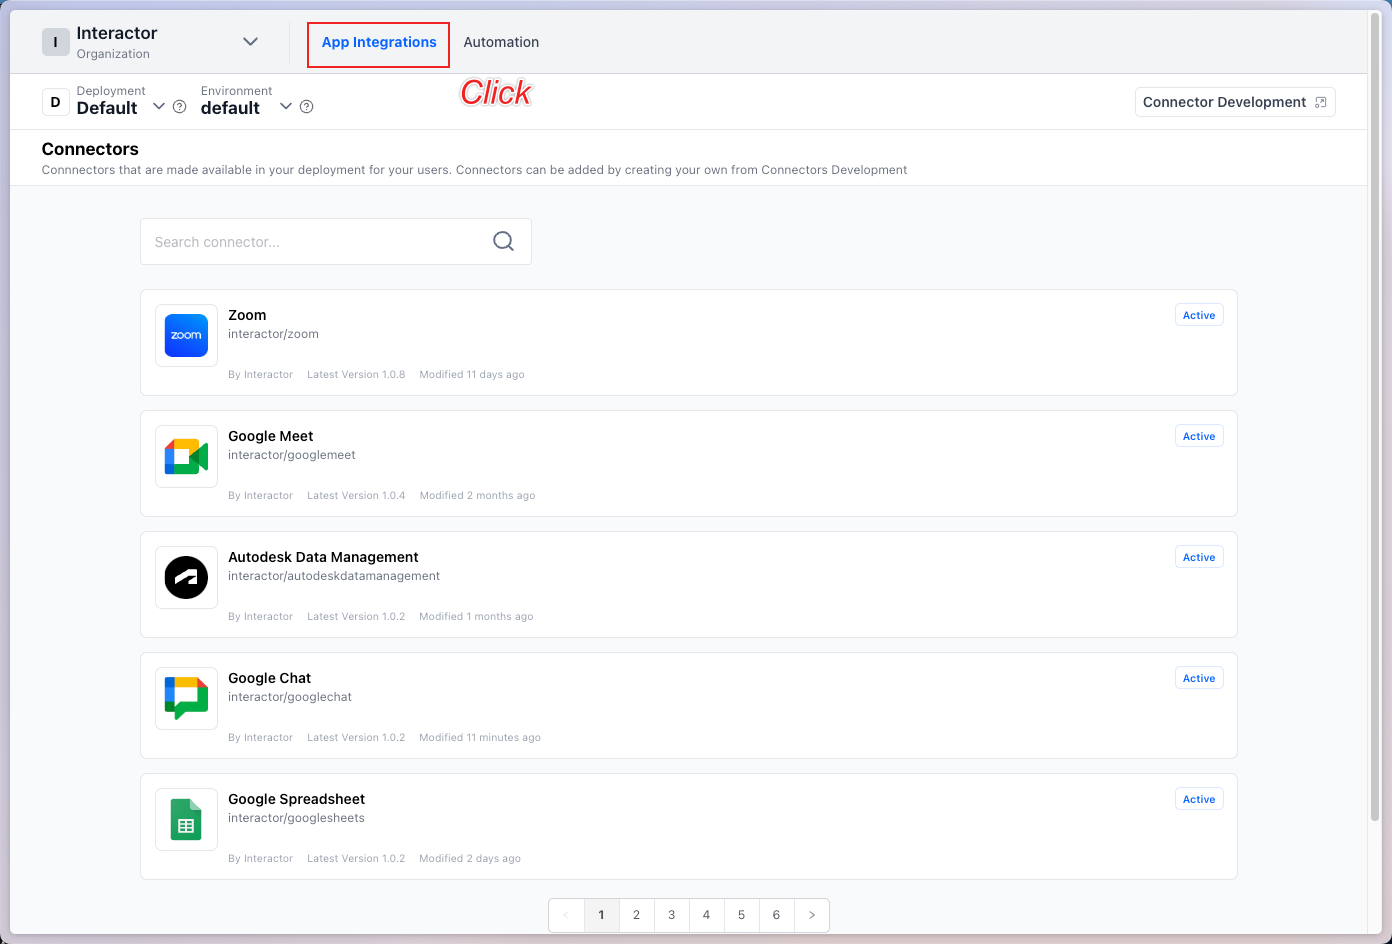
Clicking on the App Integration navigation will display various Connectors as shown below.
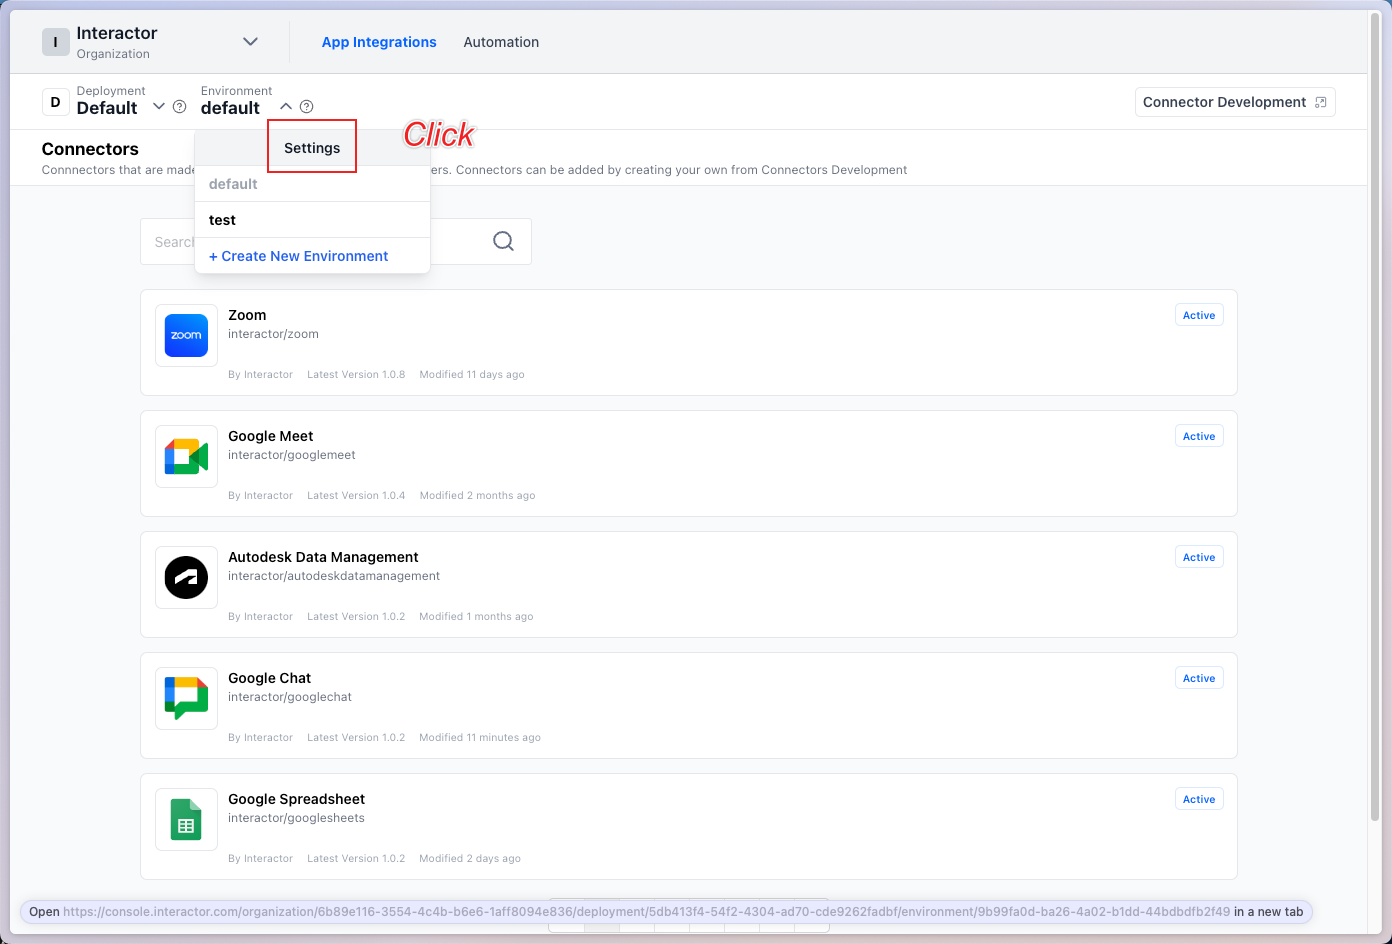
To obtain an API Key, select the Environment at the top and click the Settings button.
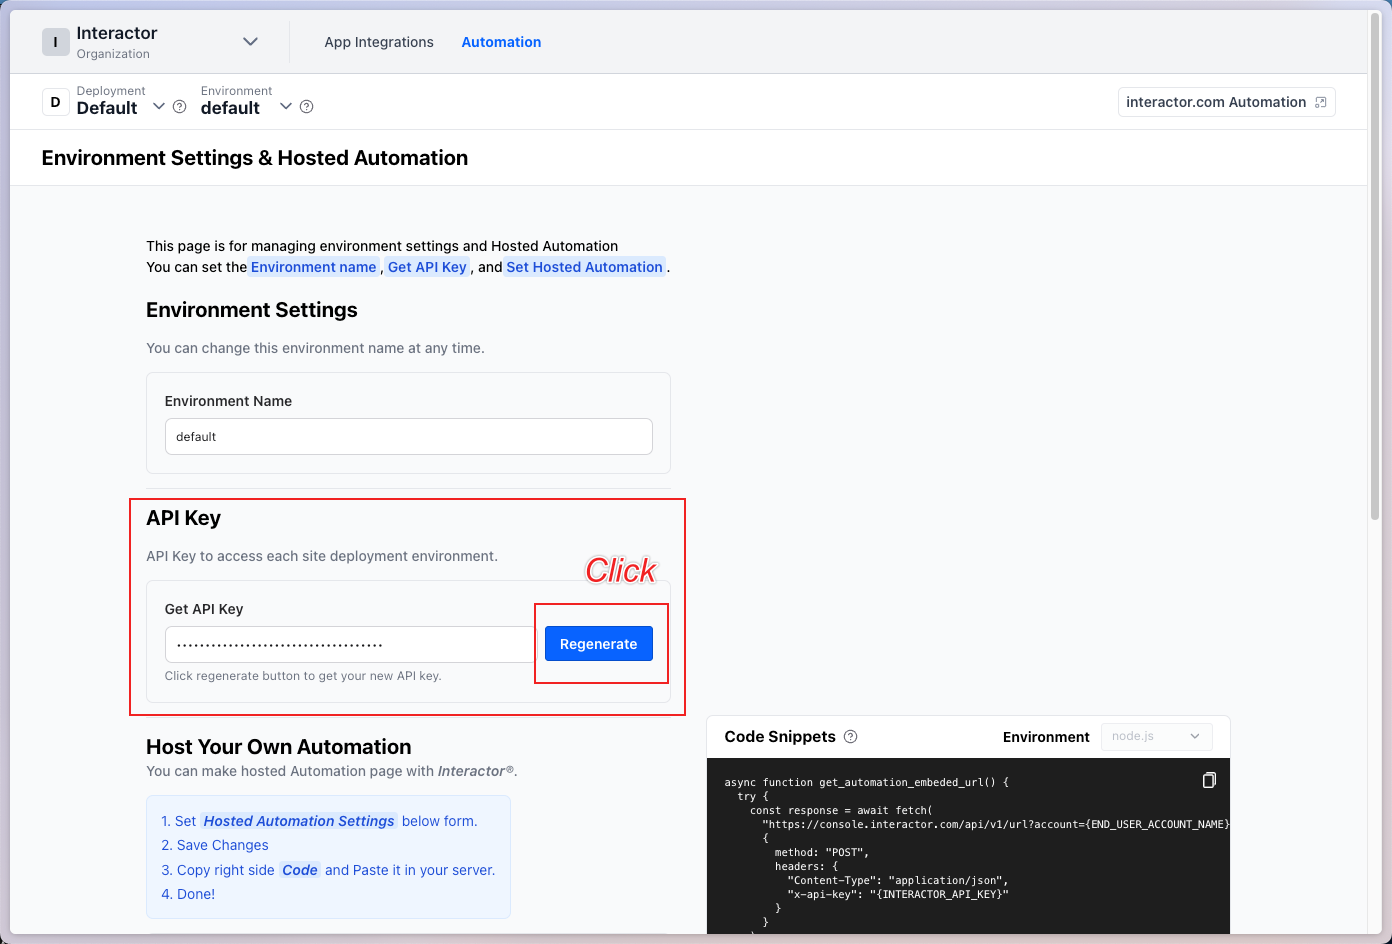
The following screen will appear. Click the blue Generate button in the API Key section to generate an API Key.
This API Key is an authentication key for communication with Interactor.
If you generate a new key later, a different API Key will be issued.
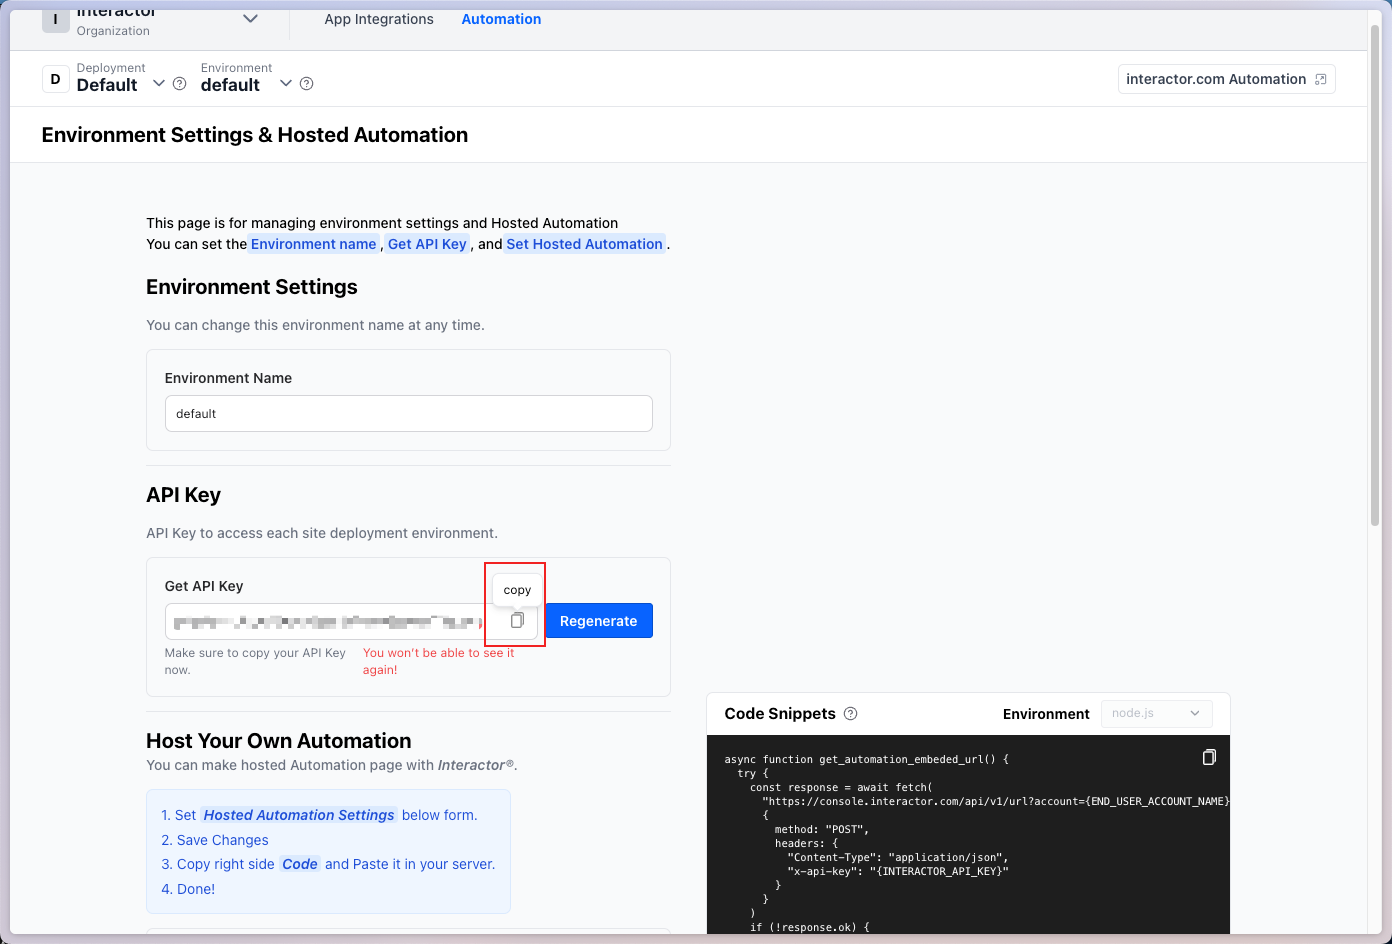
You can copy the issued Key using the Copy button on the right. Always keep your API Key secure.
Step2. Testing Actions Using the Issued API Key
An Action refers to sending requests to third-party services through a Connector in Interactor.
Step 2-1. Testing Actions via UI
- Click
App Integrationsat the top and select the Connector for Action testing.
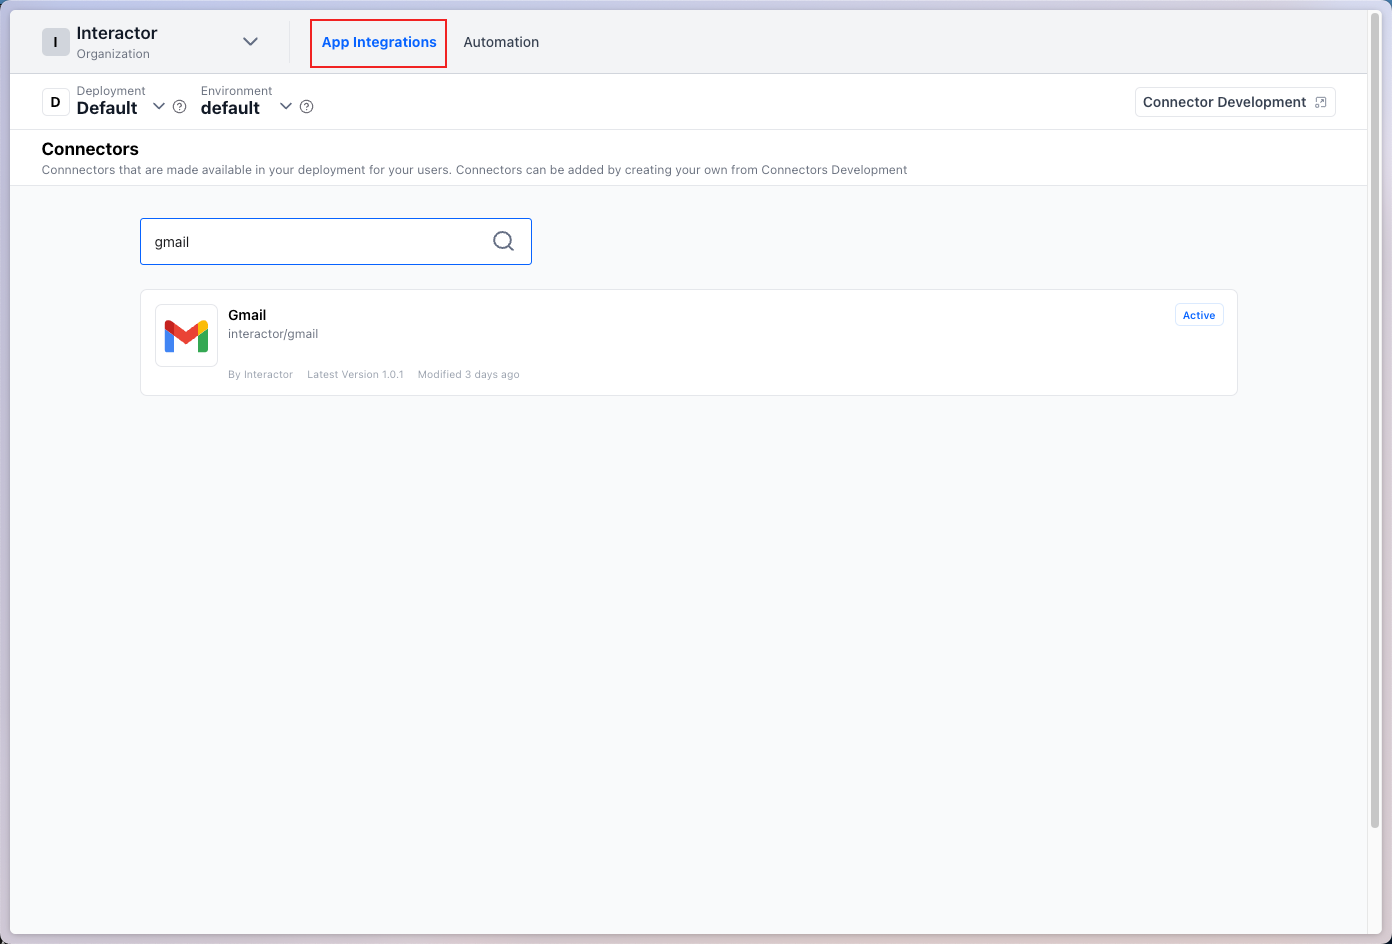
For this example, we will use the Gmail Connector. Click on the Gmail Connector.
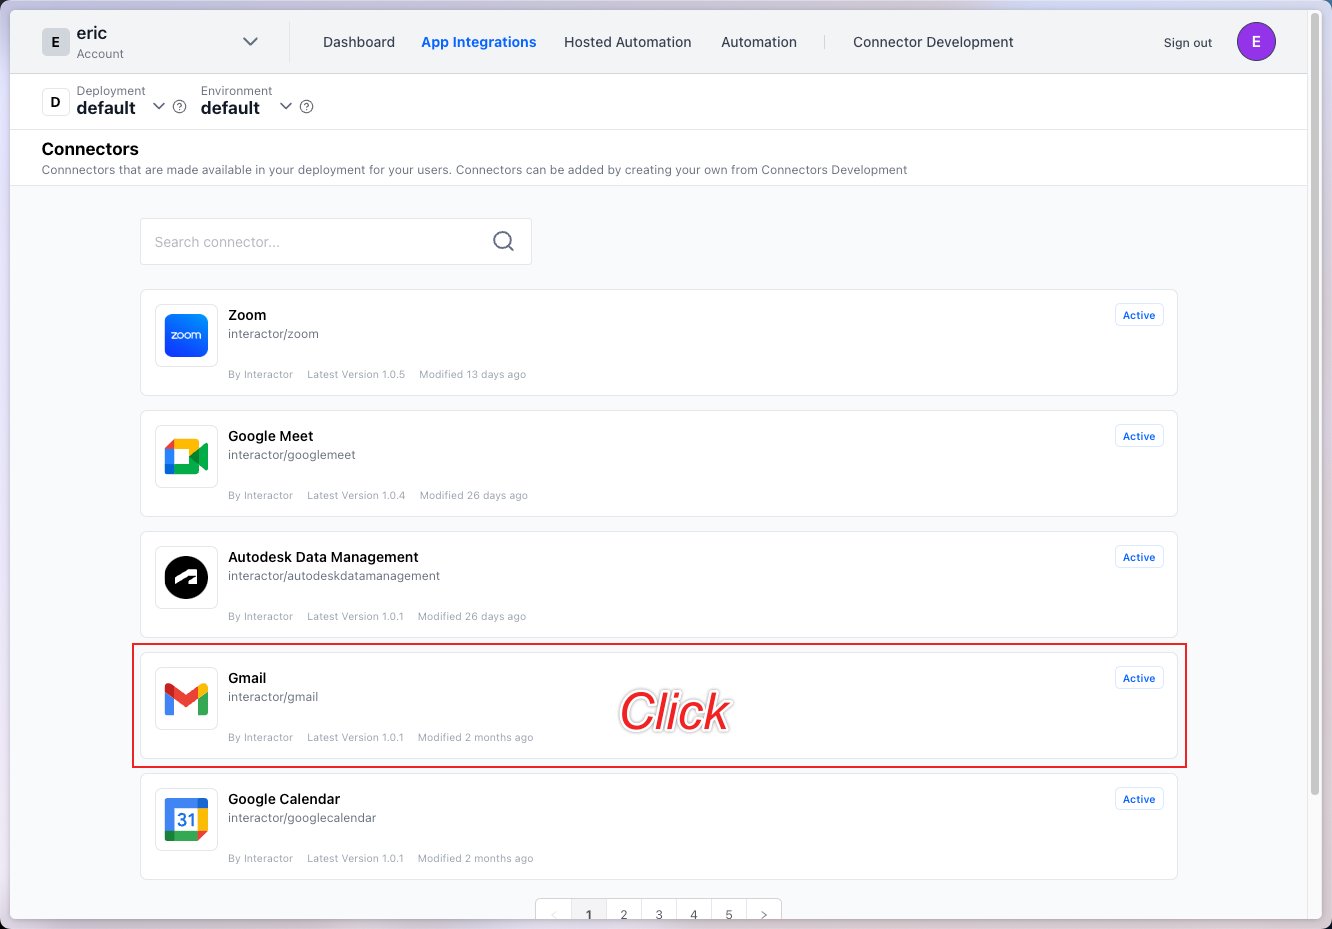
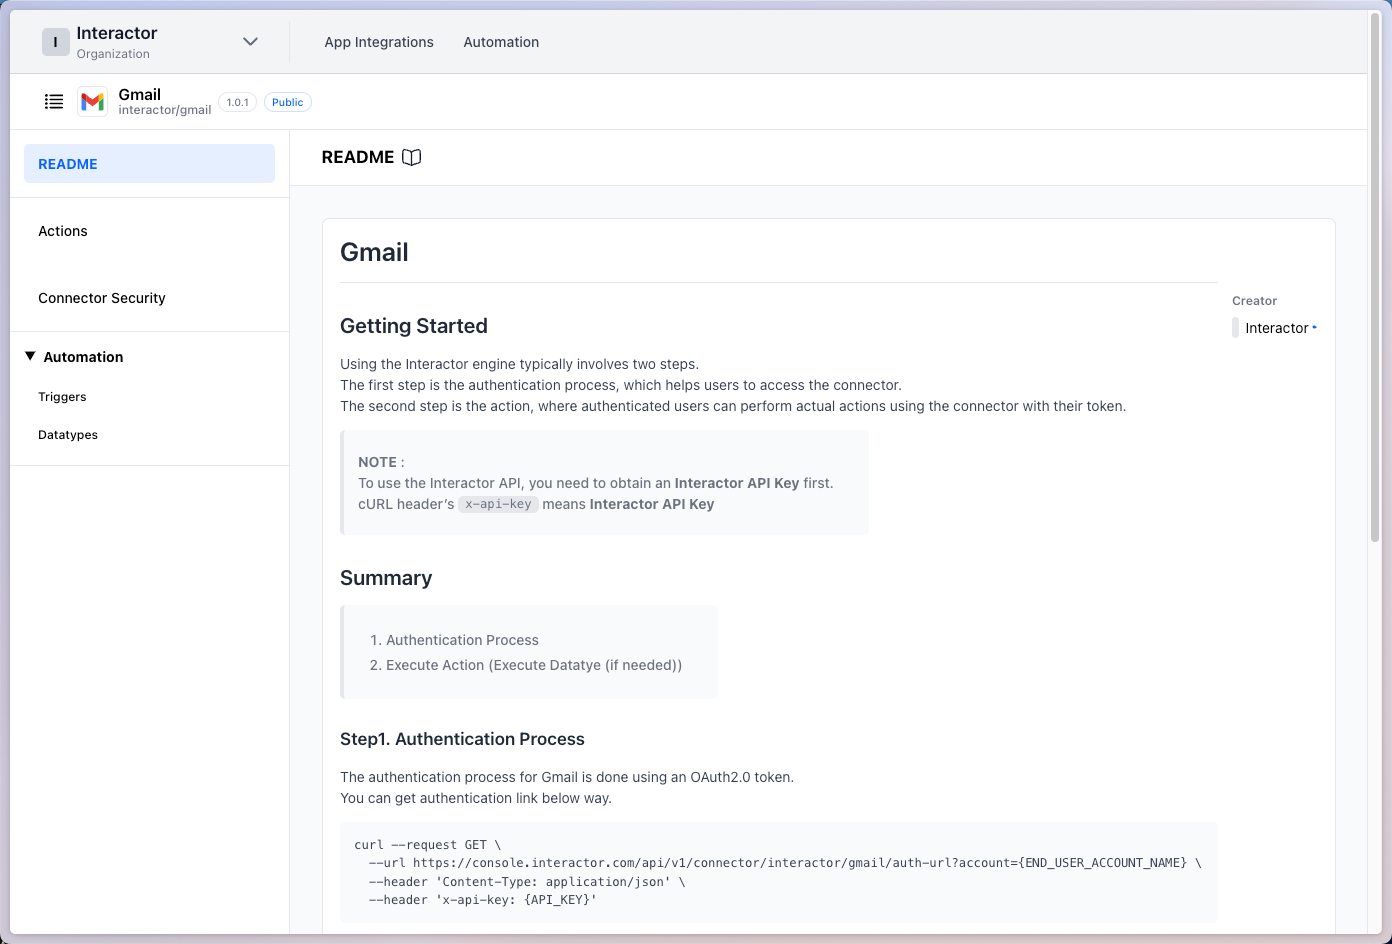
Clicking on Gmail will display the following screen, where you can also find information on testing with code through the README page.
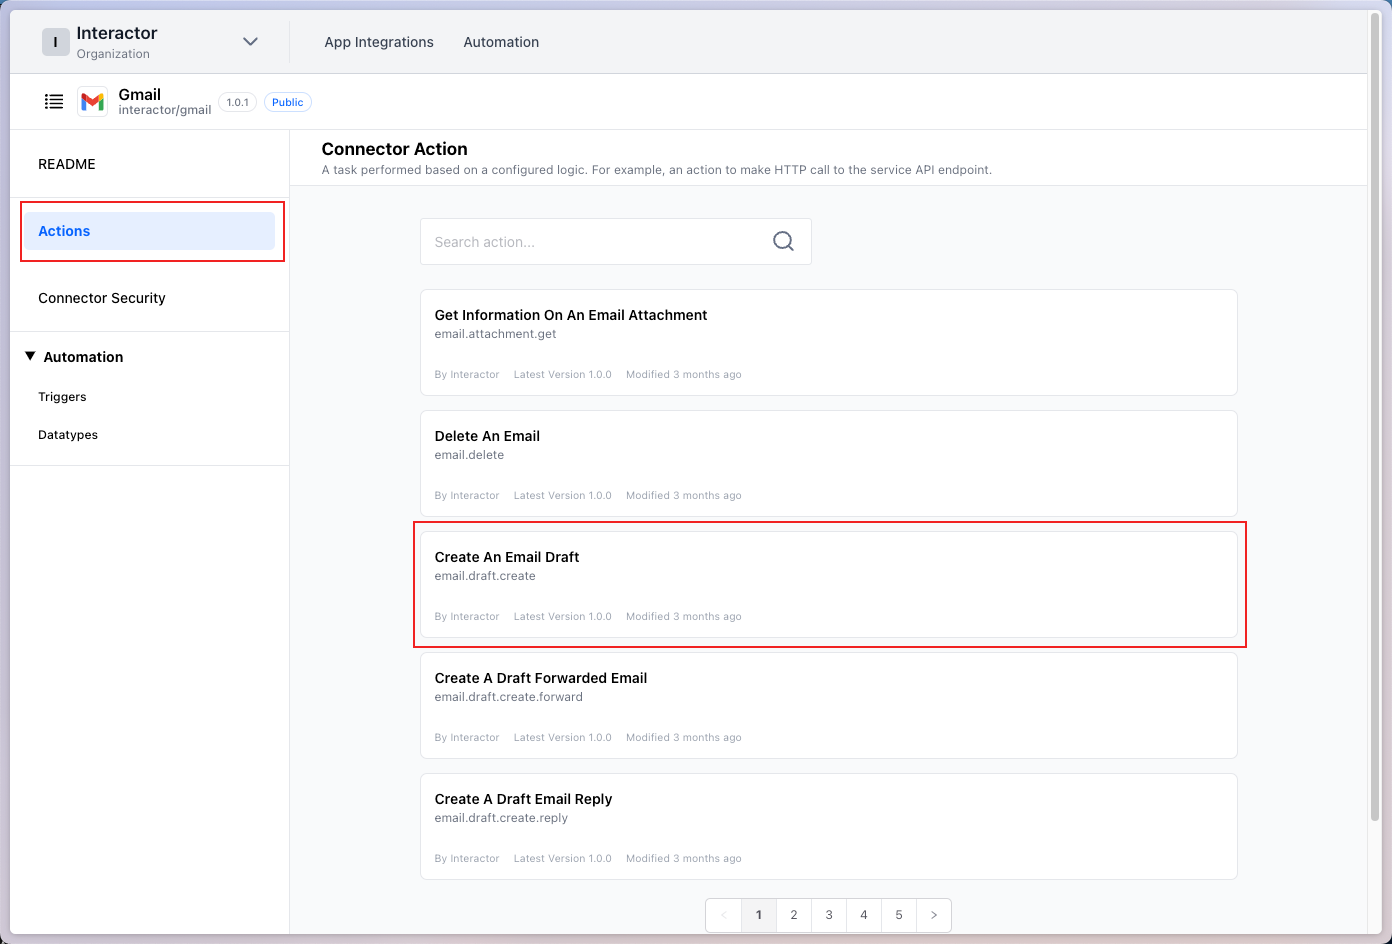
Among the various Actions available, we will test Create an Email Draft.
On this screen, the left page provides schema details required for the action, and the Test button at the top right allows you to test the Action.
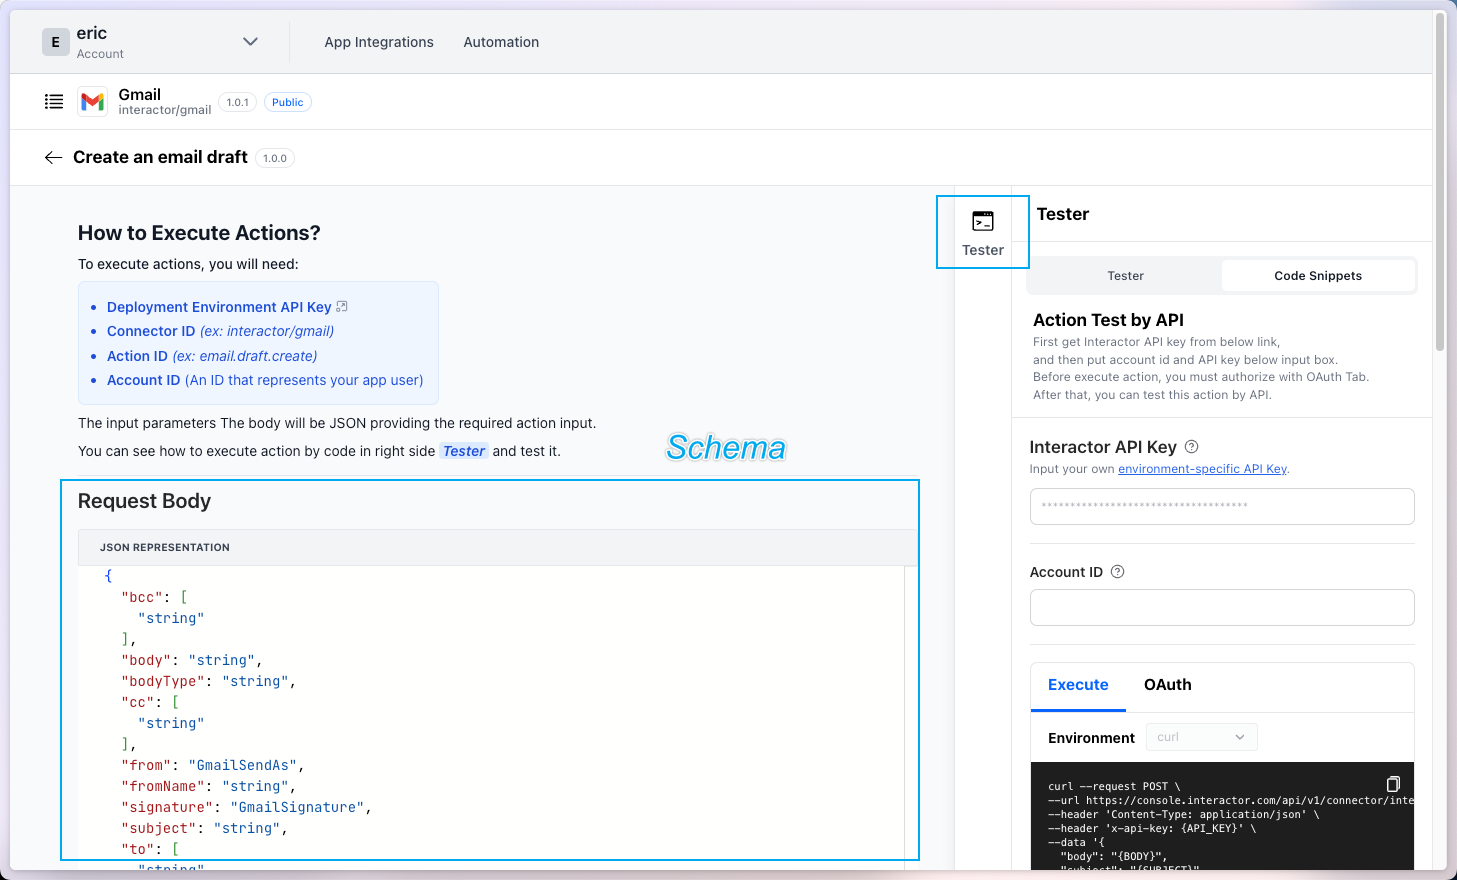
Step 2-1-1. Authentication
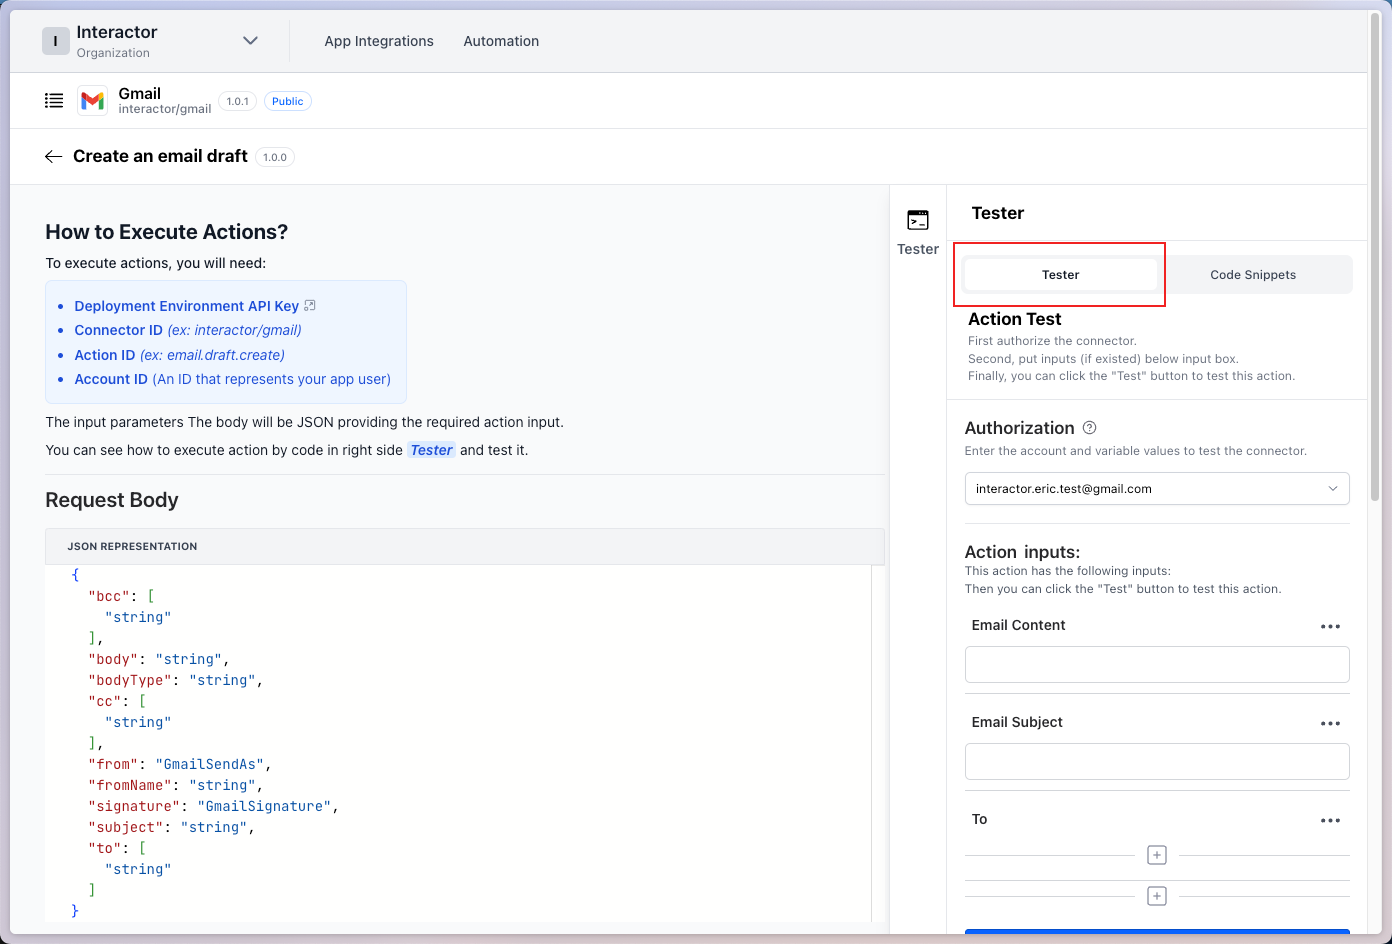
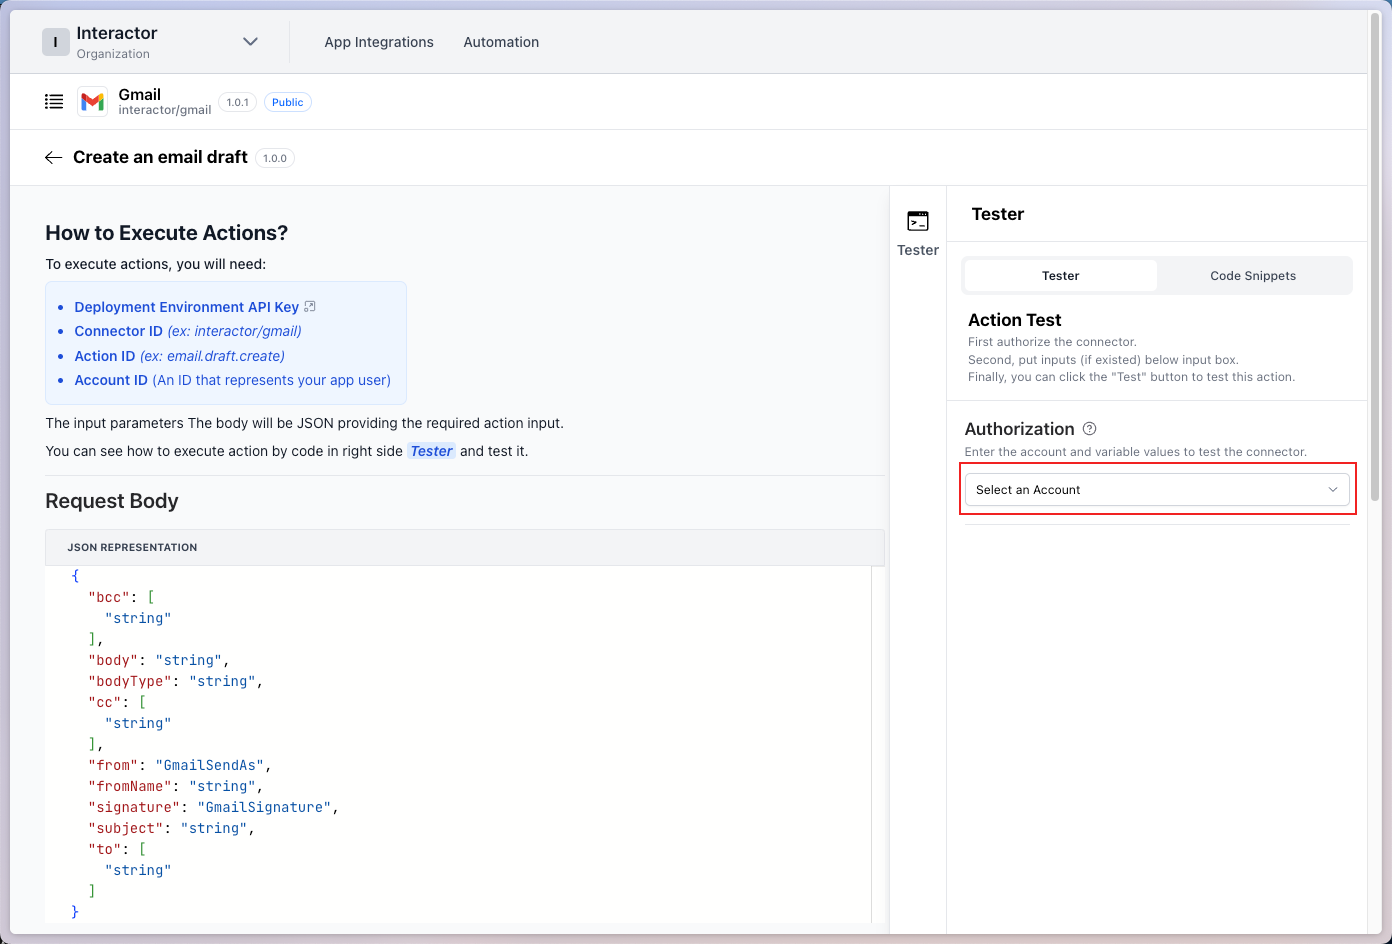
Clicking the Test button will display the following screen. Click Tester.
Enter your information and click Connector a new account to attempt linking the account to the Connector.
When the OAuth screen appears, log in with the relevant account and grant permissions.
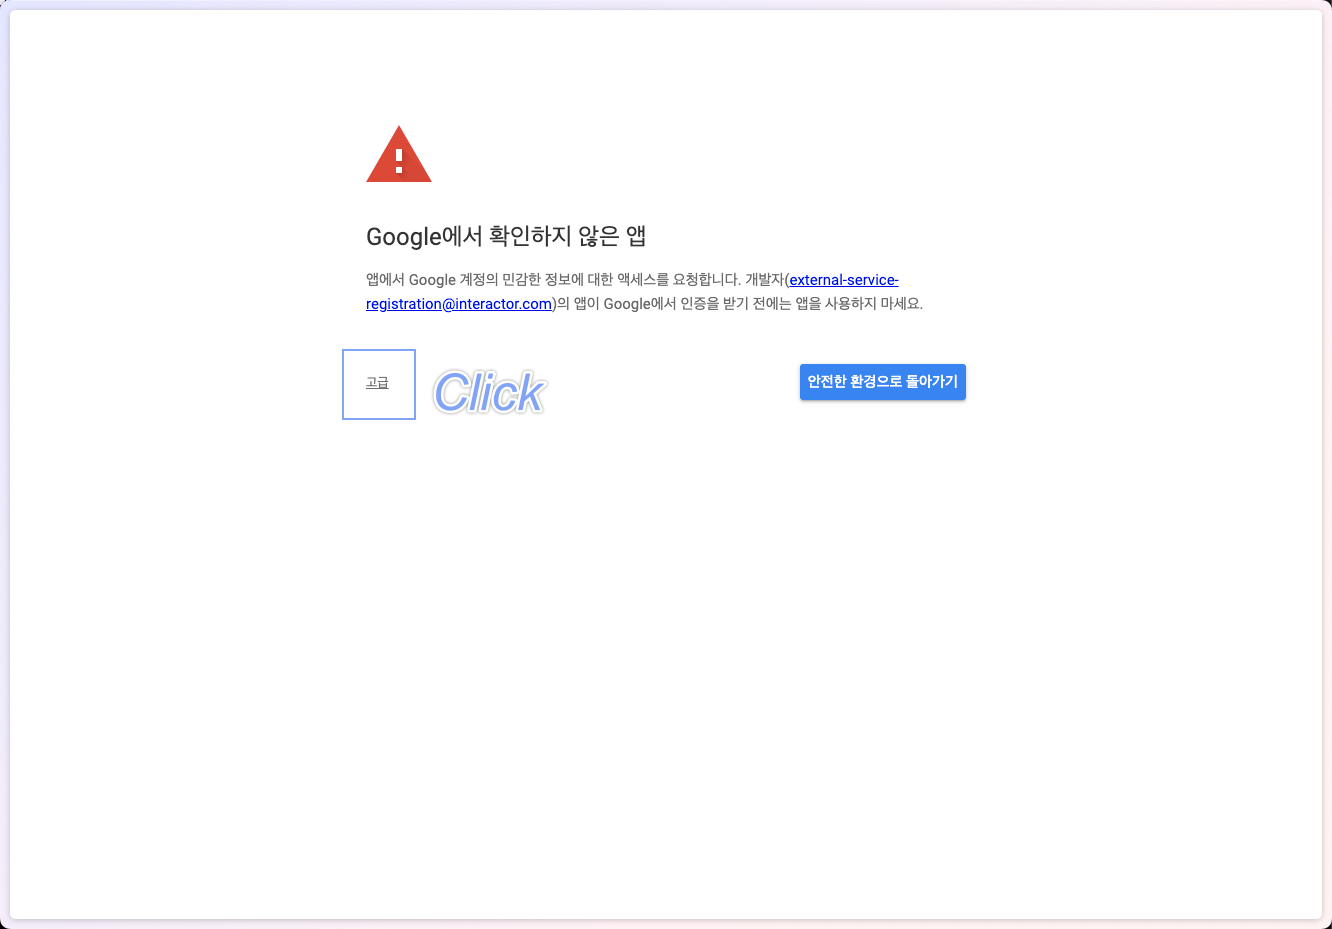
During the authorization process, click the Advanced button on the page as shown below.
This page appears because the default environment is used for testing.
If you use an actual Google Developer APP, this page will not appear.
Step 3 explains how to use an actual APP.
Once authorization is granted, the logged-in Gmail account will be registered as shown below. Click on the registered Gmail account.
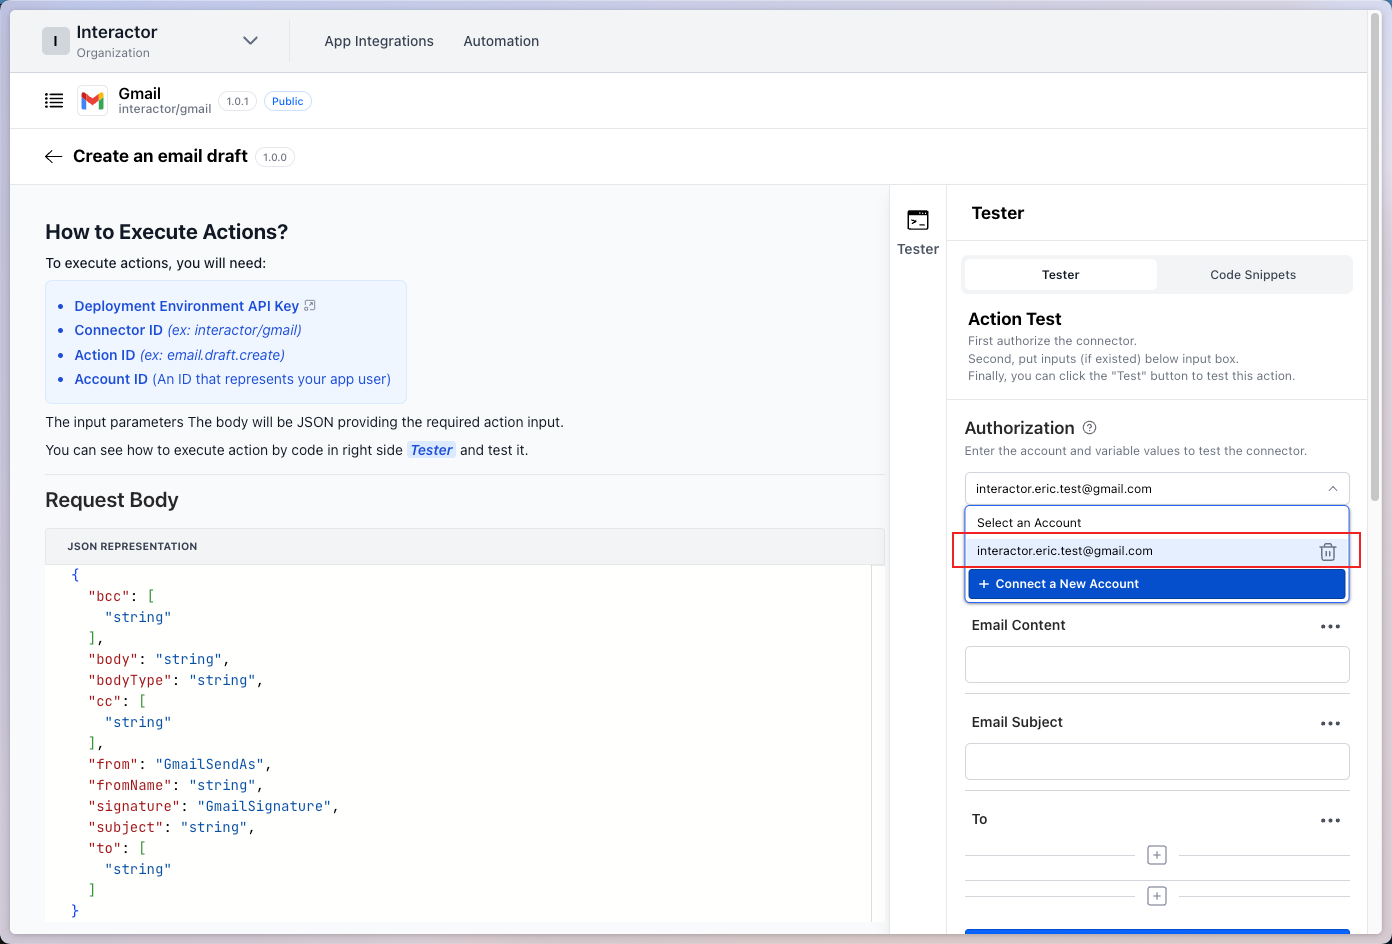
Step 2-1-2. Action Test
After selecting the account, enter the required fields such as Email Content and Email Subject.
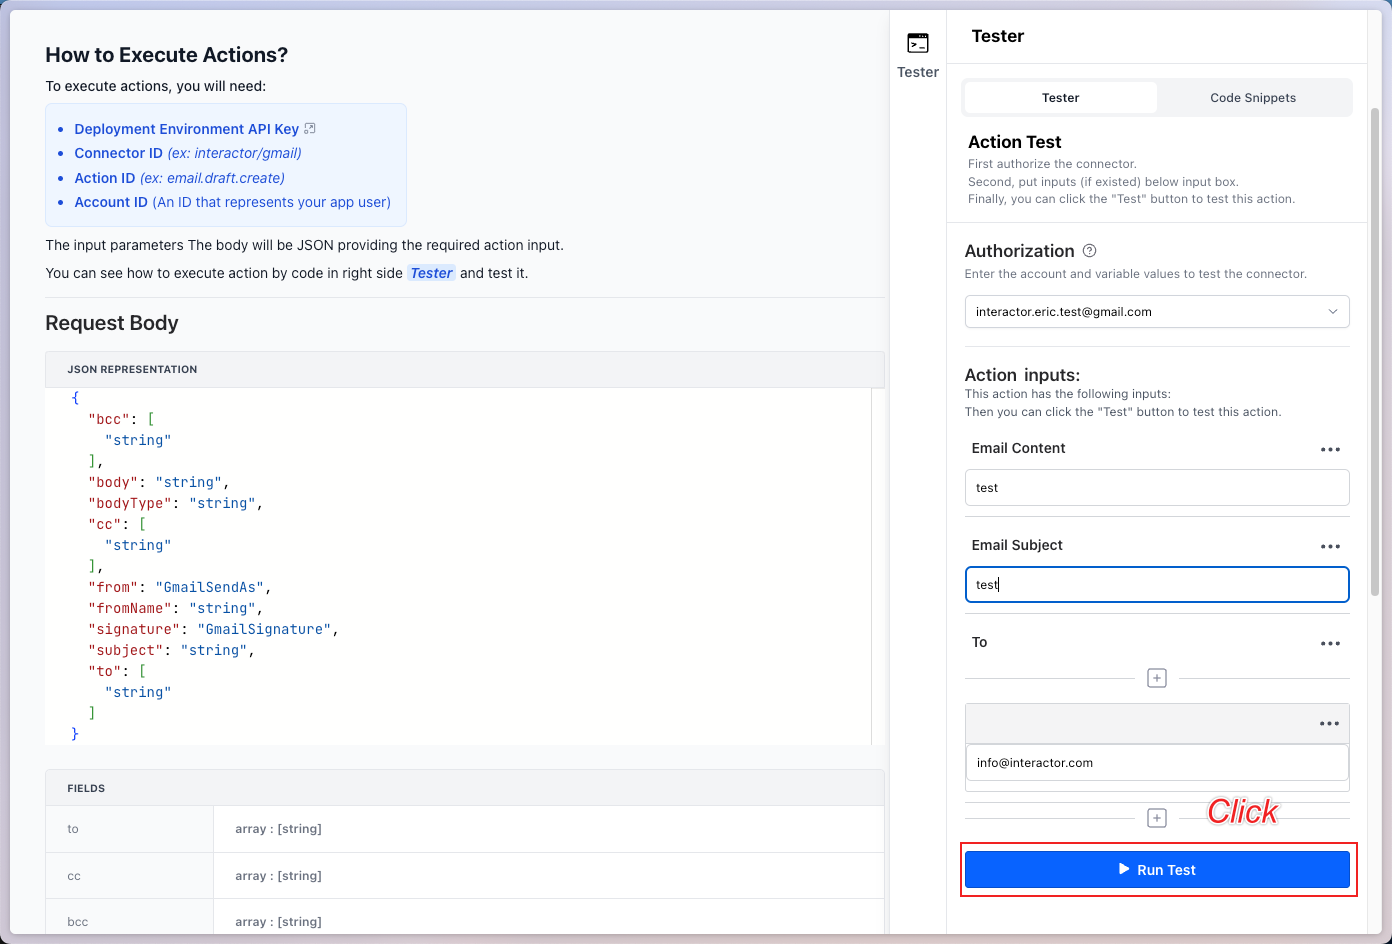
Click Run Test to execute the action.
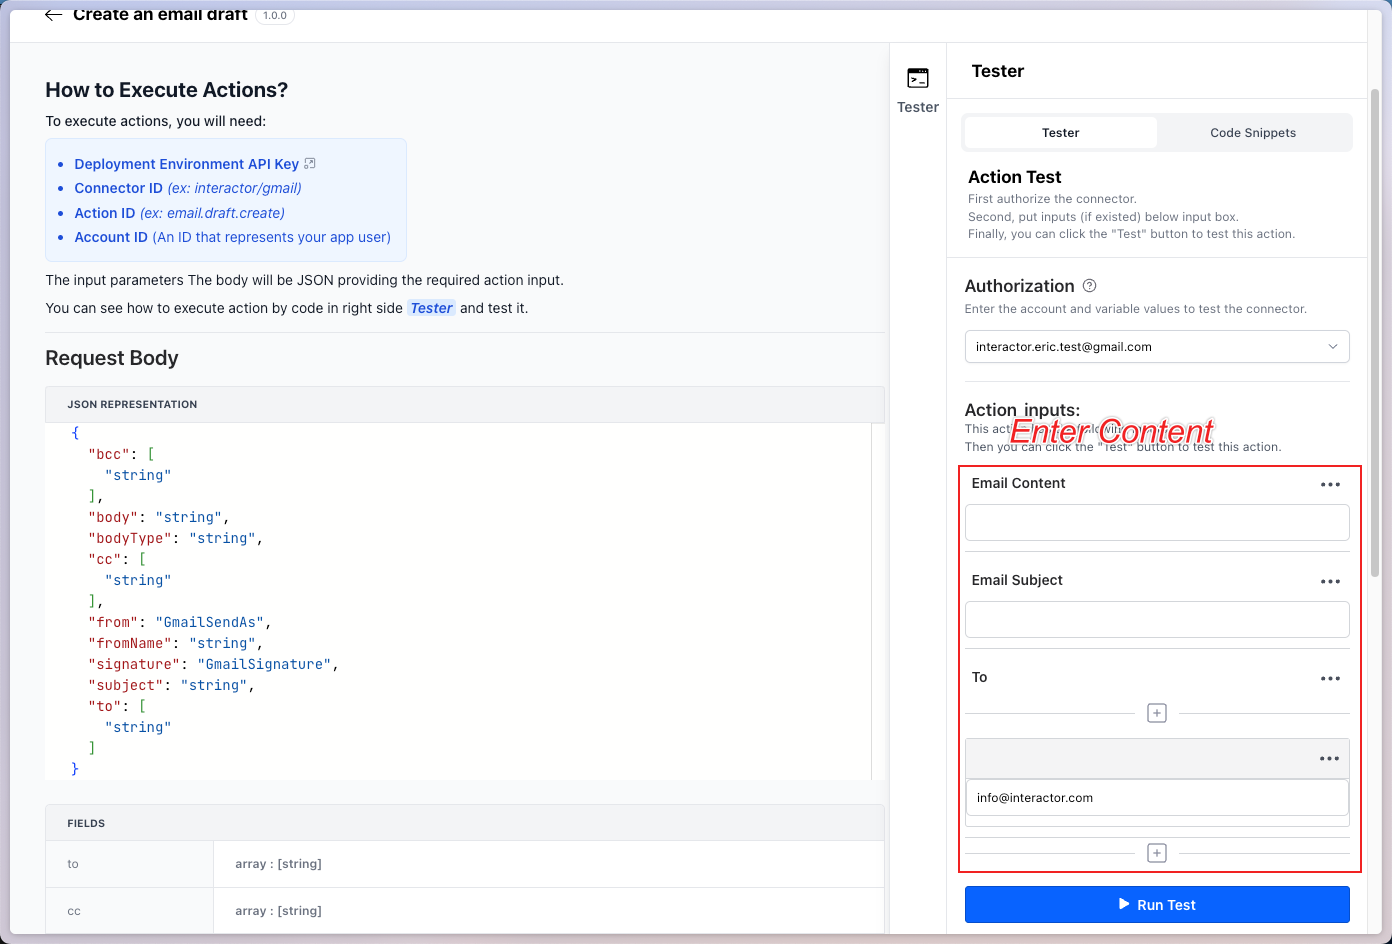
Enter the details as shown below and click Test.
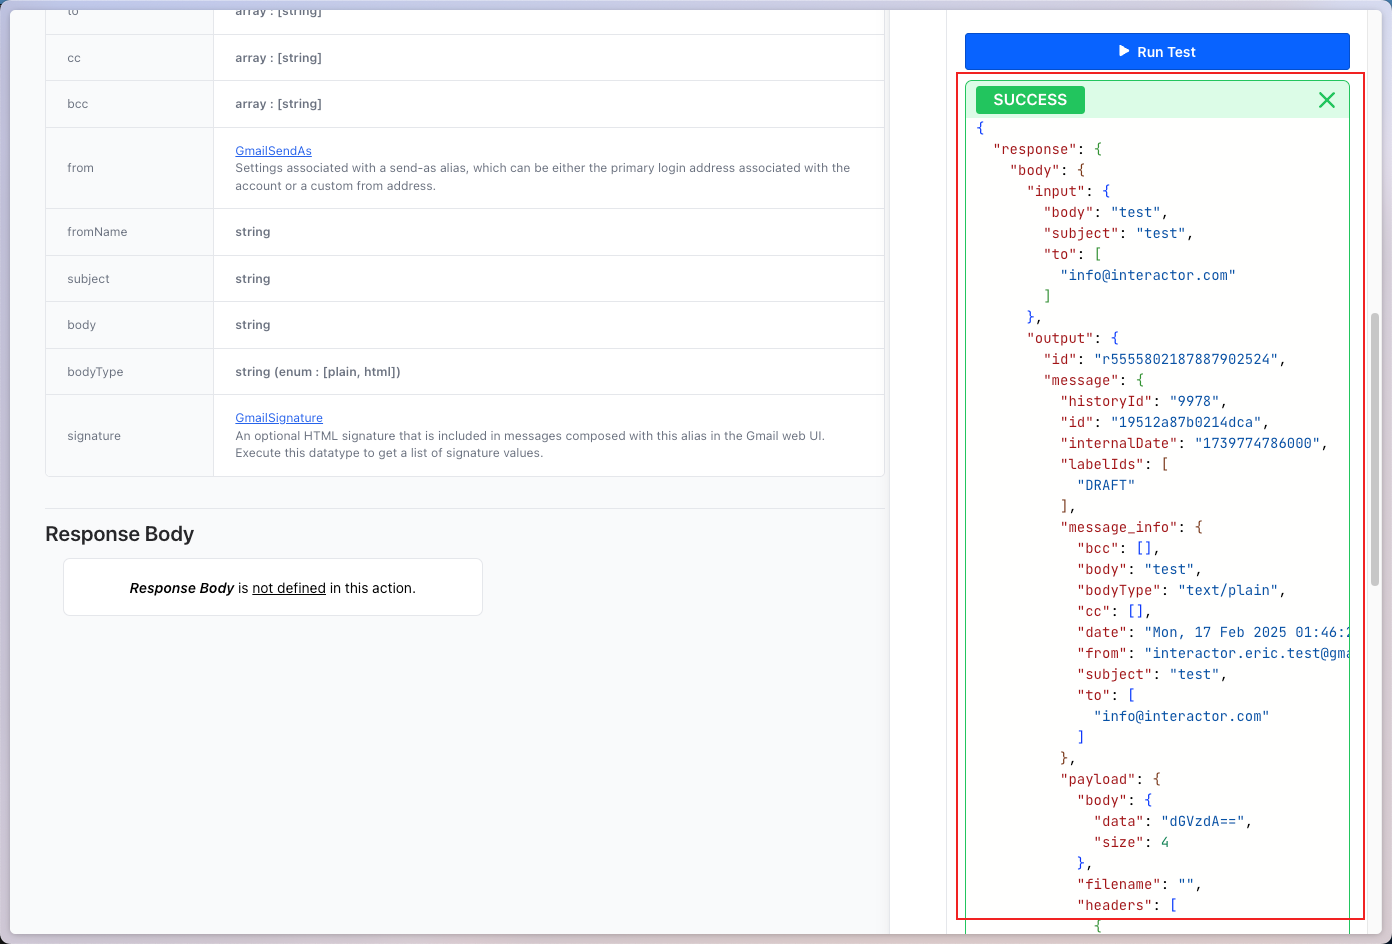
If the test is successful, the result will appear under the Result section.
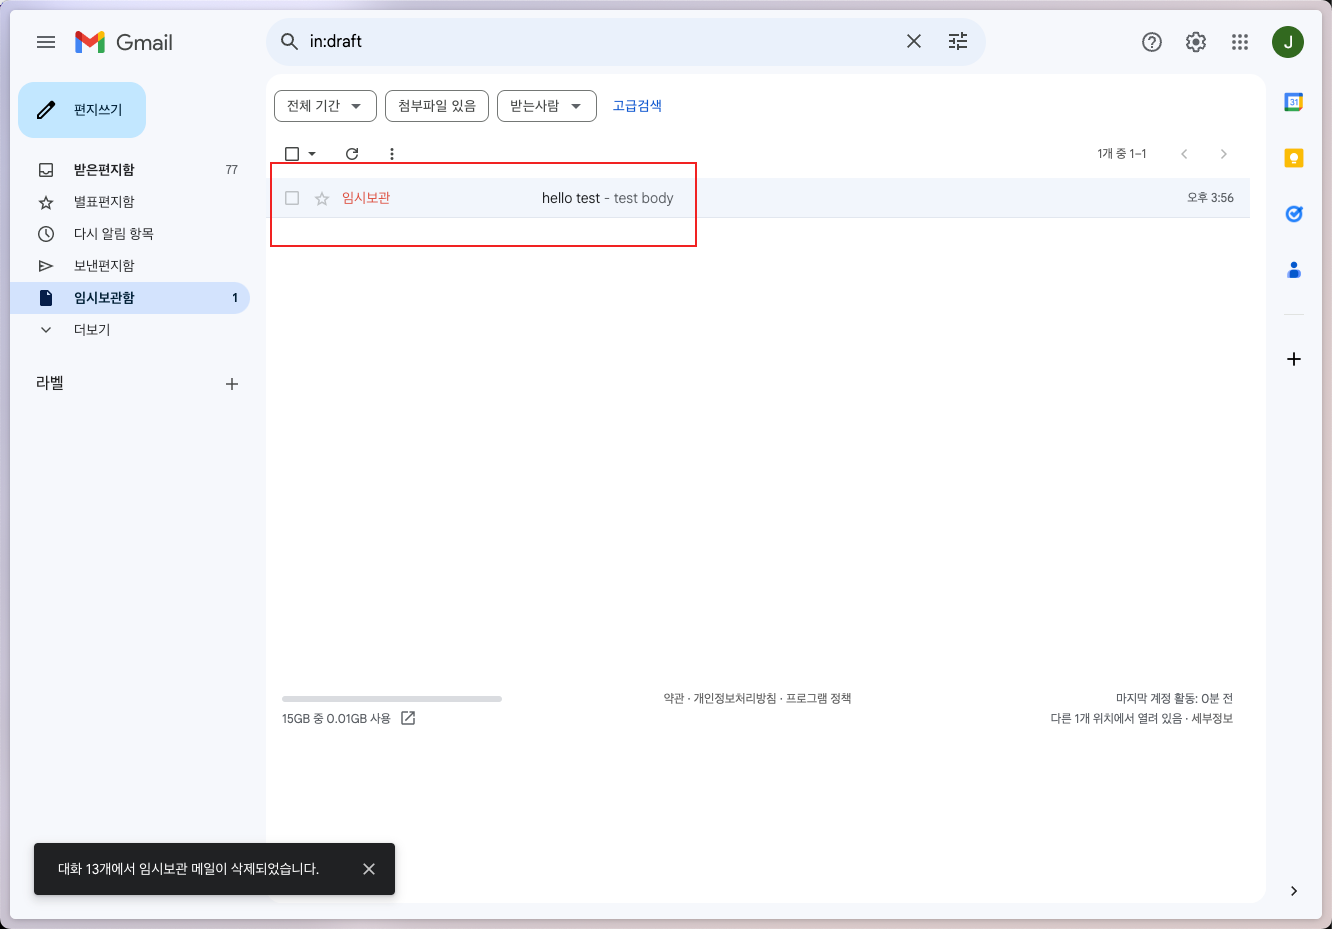
Checking Gmail will confirm that a draft has been created.
Step 2-2. Testing Actions via API (Postman, cURL)
Now, we will test Actions using API instead of UI.
Step 2-2-1. Authentication
Authentication must be performed first.
[cURL]
curl --location 'https://console.interactor.com/api/v1/connector/interactor/gmail/auth-url?account=hello' \
--header 'x-api-key: {{your-x-api-key}}'
[PostMan]
Send a request using the GET method to the URL below.
Include the API Key obtained in Step 1 in the request header.
For the account query parameter, provide the client of the user who is making the request.
GET https://console.interactor.com/api/v1/connector/interactor/gmail/auth-url?account={{hello}}
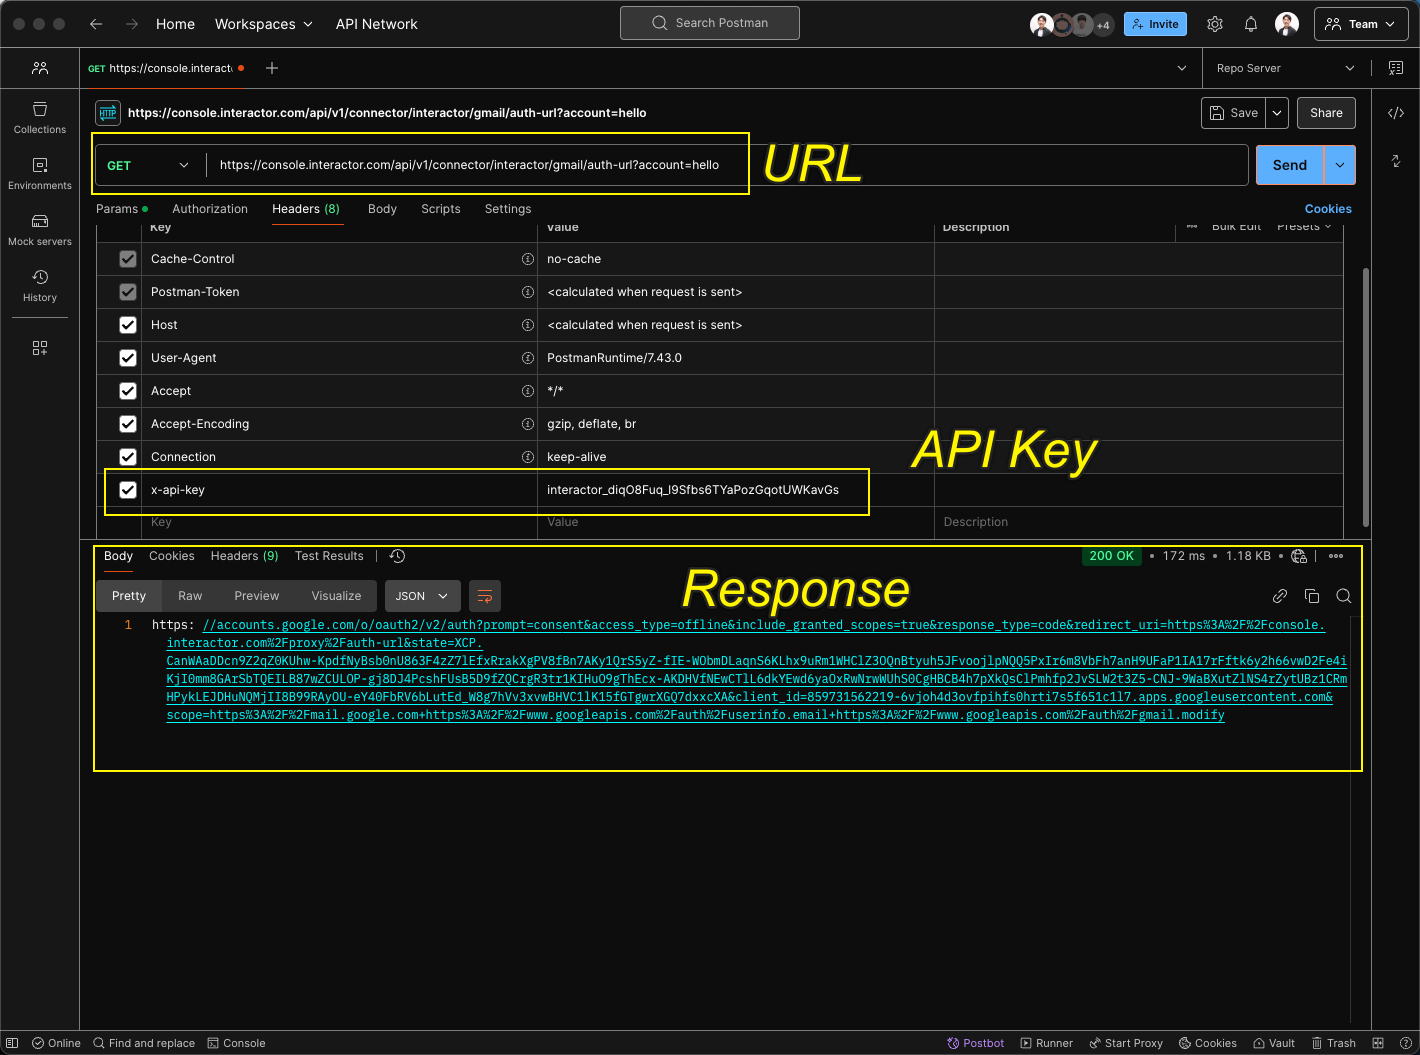
Copy and paste the URL from the response into your browser.
An authentication page will appear. Log in with the relevant account and grant the required permissions.
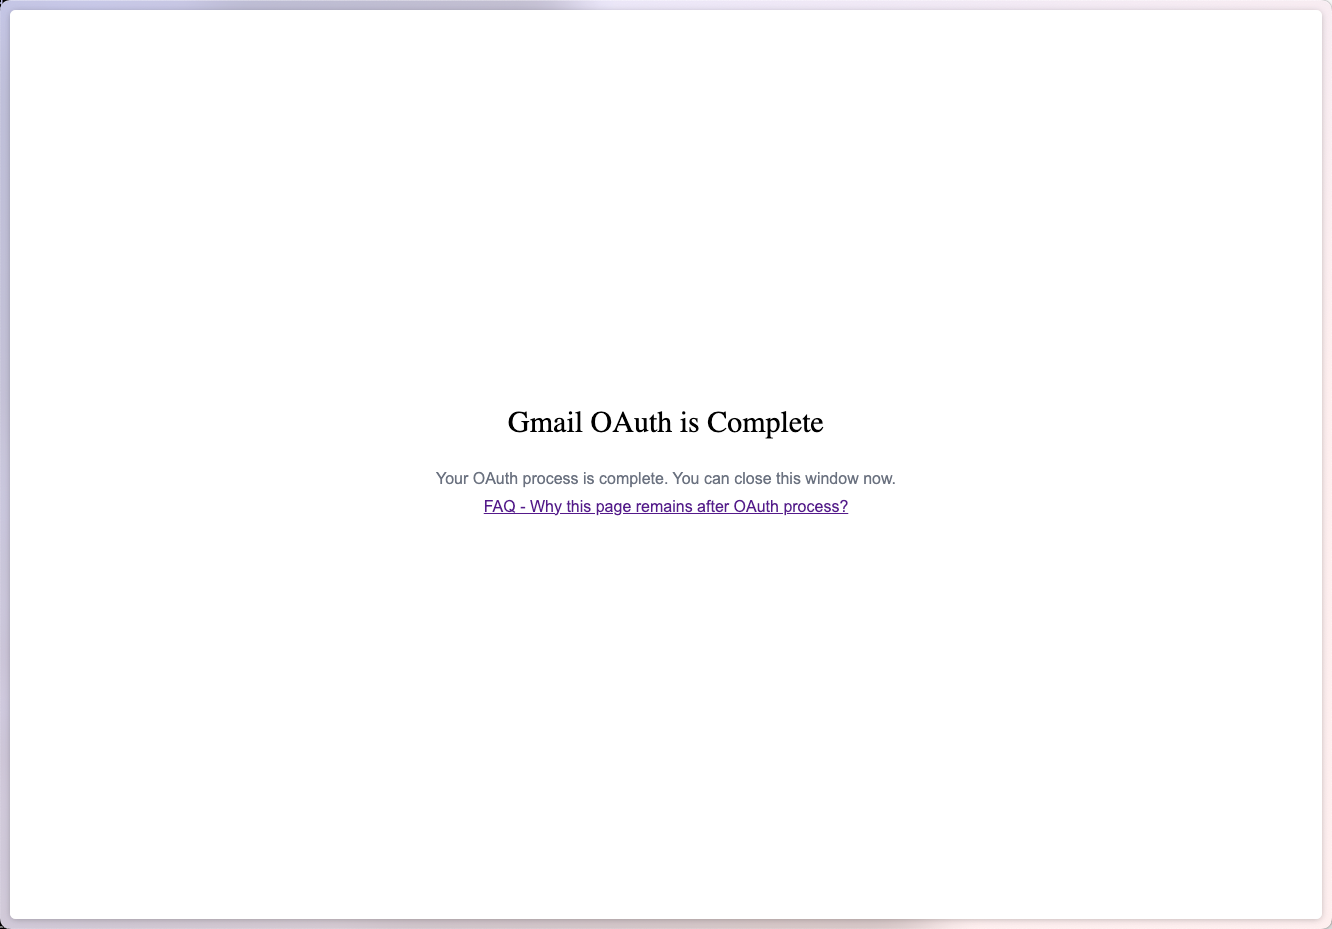
Once authentication is complete, a token for the connector will be issued, allowing you to proceed with an action test.
Step 2-2-2. Action Test
Similar to the test performed in the UI, this test will use Gmail’s Create an Email Draft action.
[cURL]
curl --request POST \
--url https://console.interactor.com/api/v1/connector/interactor/gmail/action/email.draft.create/execute?account={{account}} \
--header 'Content-Type: application/json' \
--header 'x-api-key: {API_KEY}' \
--data '{
  "body": "{BODY}",
  "subject": "{SUBJECT}",
  "to": "{TO}"
}'
[PostMan]
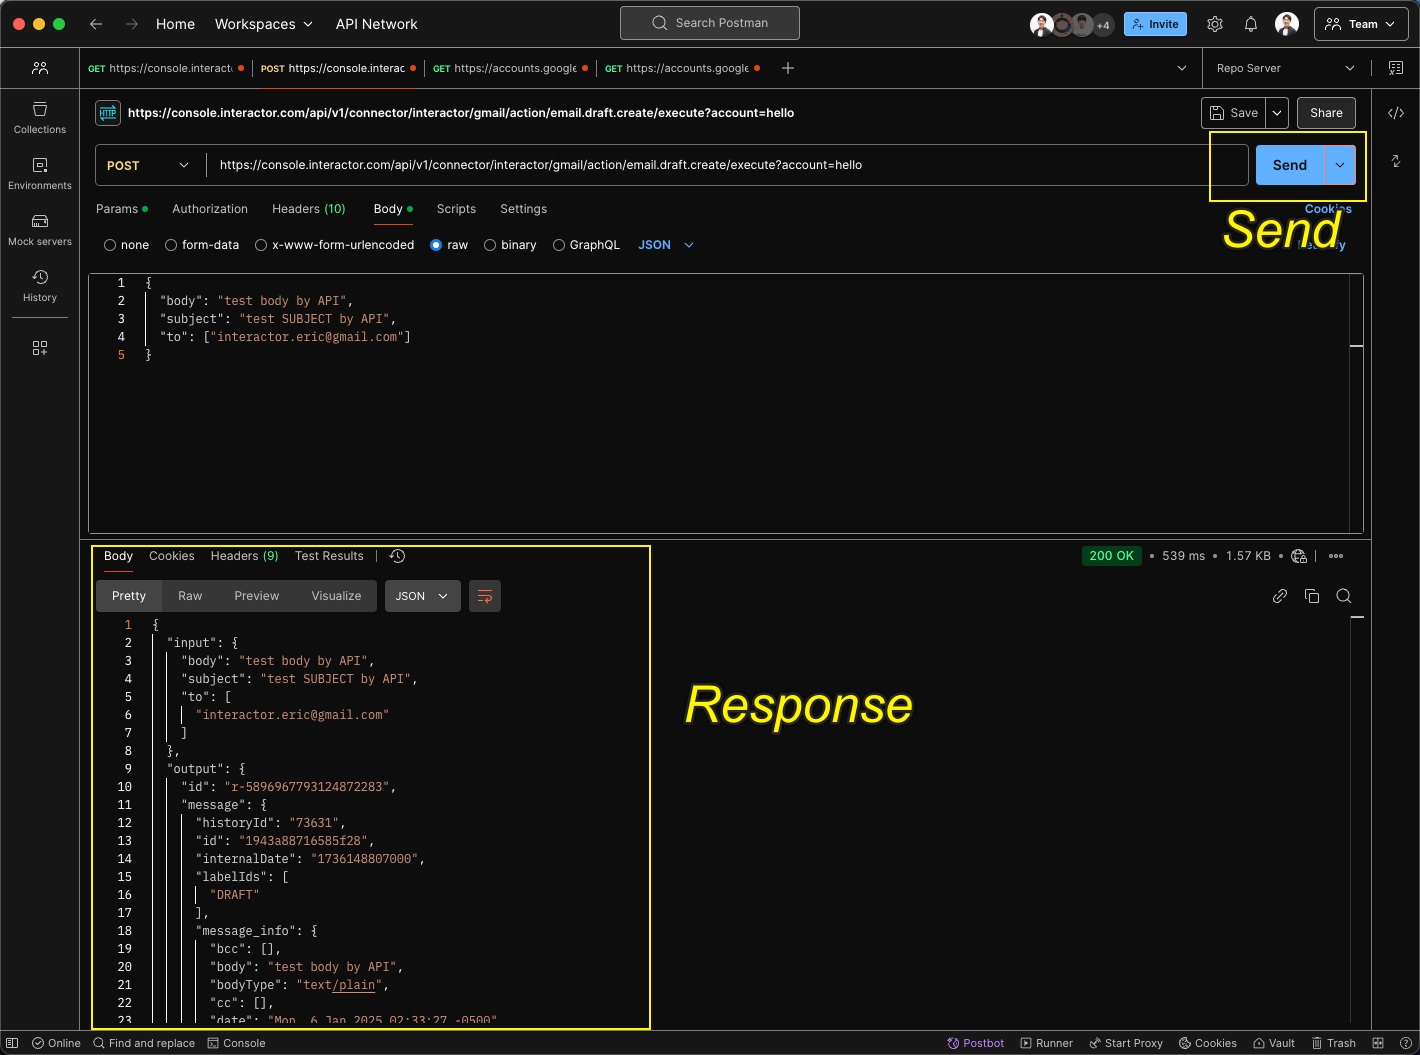
Enter the details below and click the Send button to execute the action. The response will display the results.
URL
POST https://console.interactor.com/api/v1/connector/interactor/gmail/action/email.draft.create/execute?account=hello
Body
{
  "body": "test body by API",
  "subject": "test SUBJECT by API",
  "to": ["interactor.eric@gmail.com"]
}
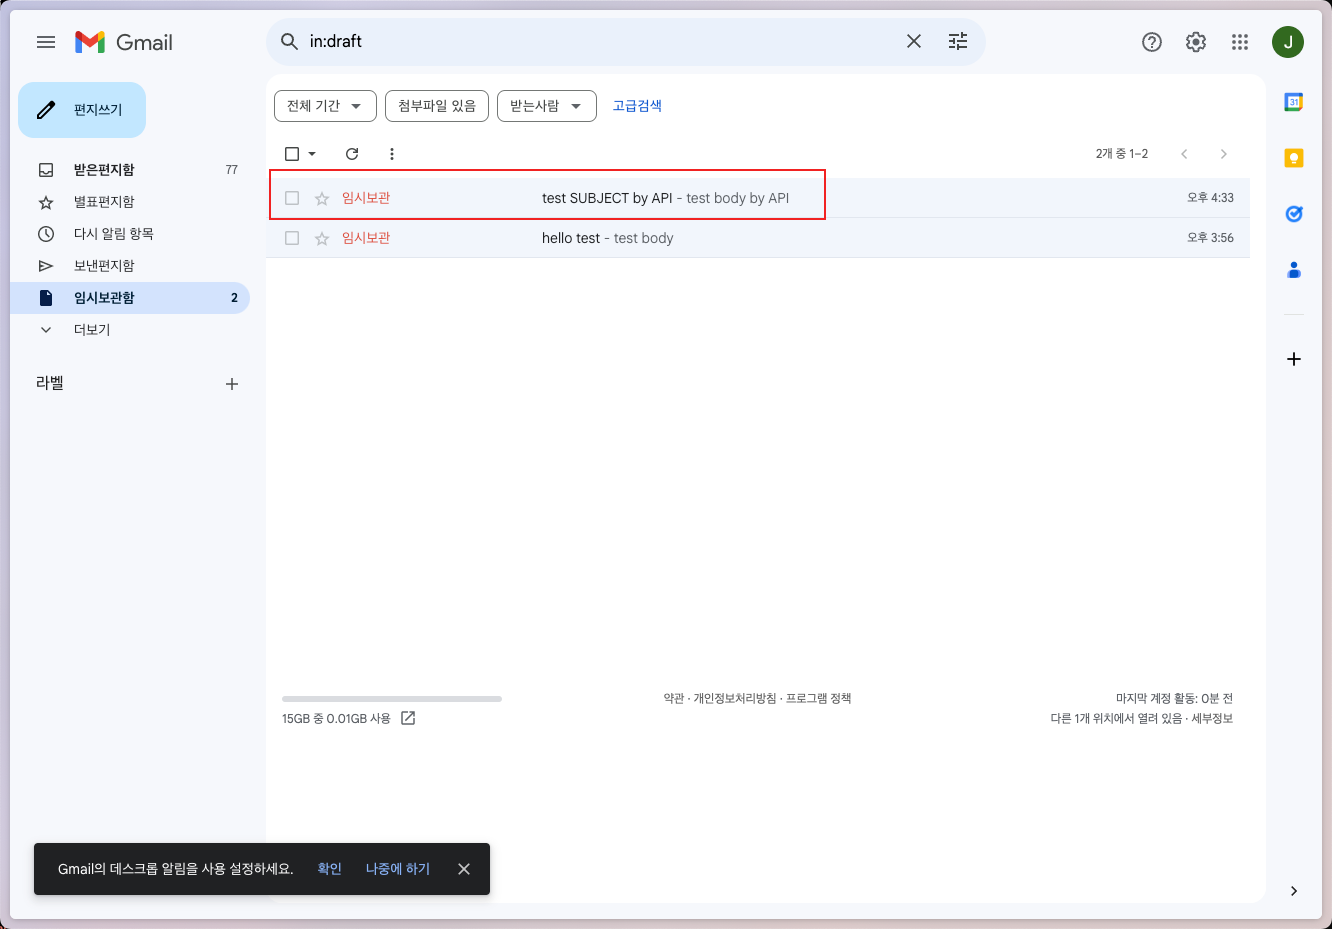
If you check Gmail, you will see that a draft has been created as shown below.
Step 3. Updating the client_id and client_secret used in the Connector for your service
You can update the Client ID and Secret used in the Connector through the page linked below.