Updating Connector
By default, Interactor's Connector includes:
Action- Automation and subscription
TriggerEvent
- Reusables
DataTypeVariableScript
Among these, Variable and Script are optional and do not necessarily need to be used.
The required components vary depending on how the Connector is used.
Case 1. Using Only REST API Call
→ In this case, only Action and DataType are needed.
Case 2. Using Trigger
→ In this case, Trigger, Event, and DataType are required.
Case 3. Using REST API Call + Trigger
→ In this case, Action, DataType, Trigger, and Event are needed.
When should Script and Variable be used?
Script is not mandatory, but it is useful when you want to consolidate duplicate code into a single function.
Currently, Variable is only used for client ID and client secret.
Updating the Connector
First, go to console.interactor.com and log in.
After logging in, click the navigation button in the upper left corner.
Then, click on your Organization.
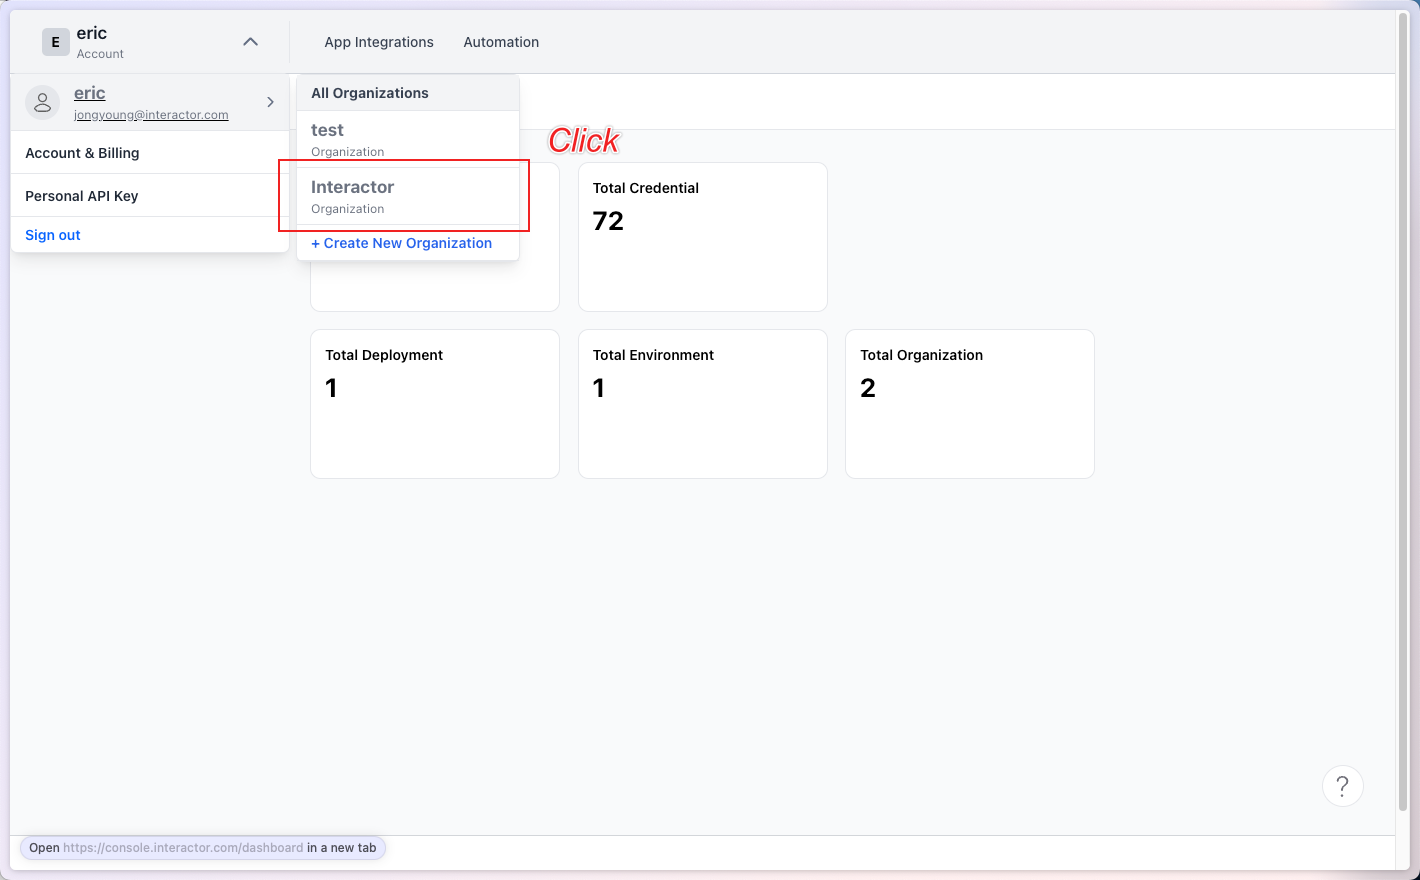
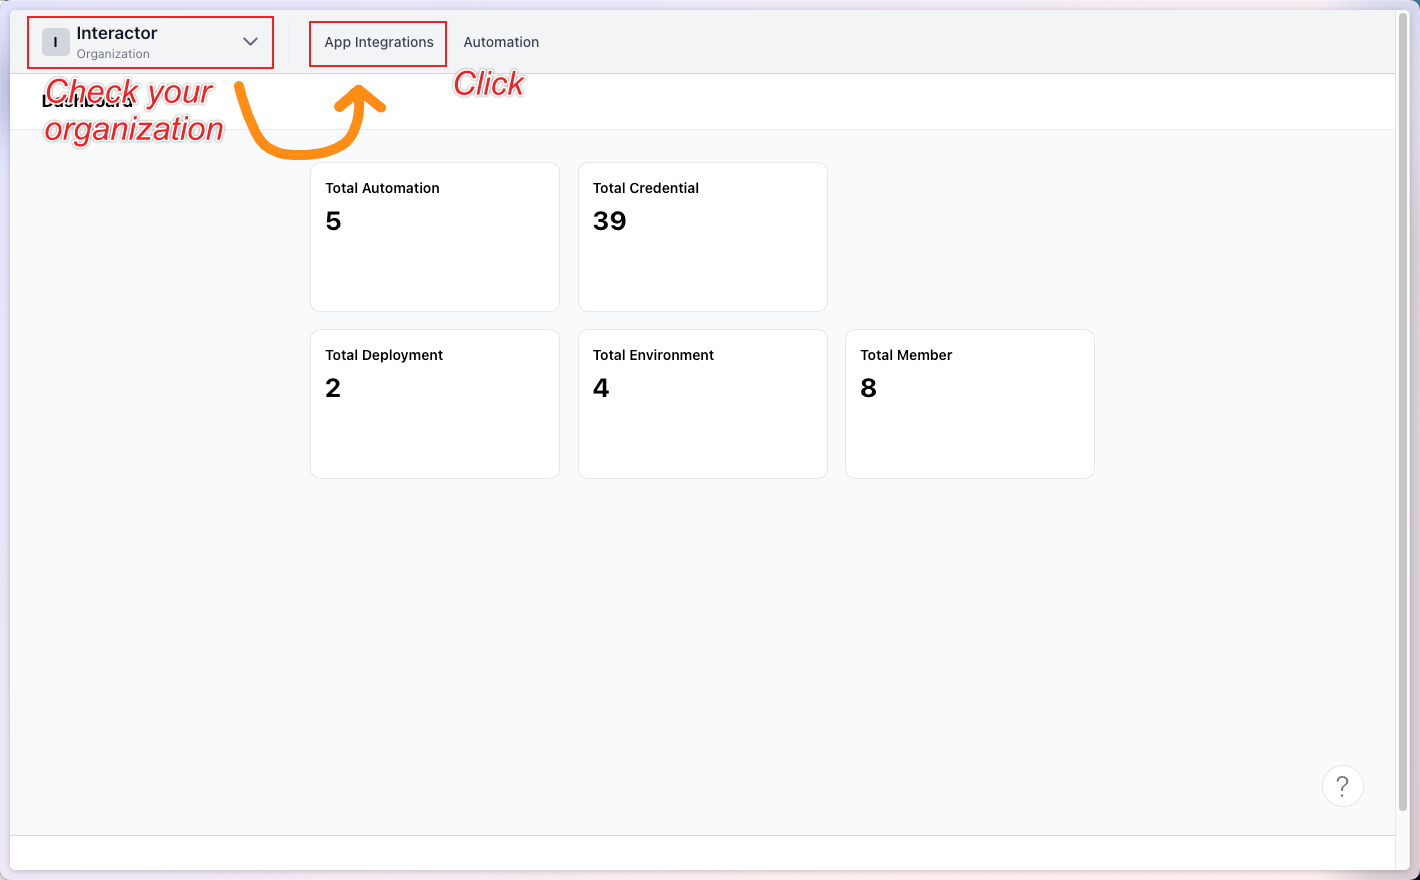
Verify that your Organization has changed, then click App Integration.
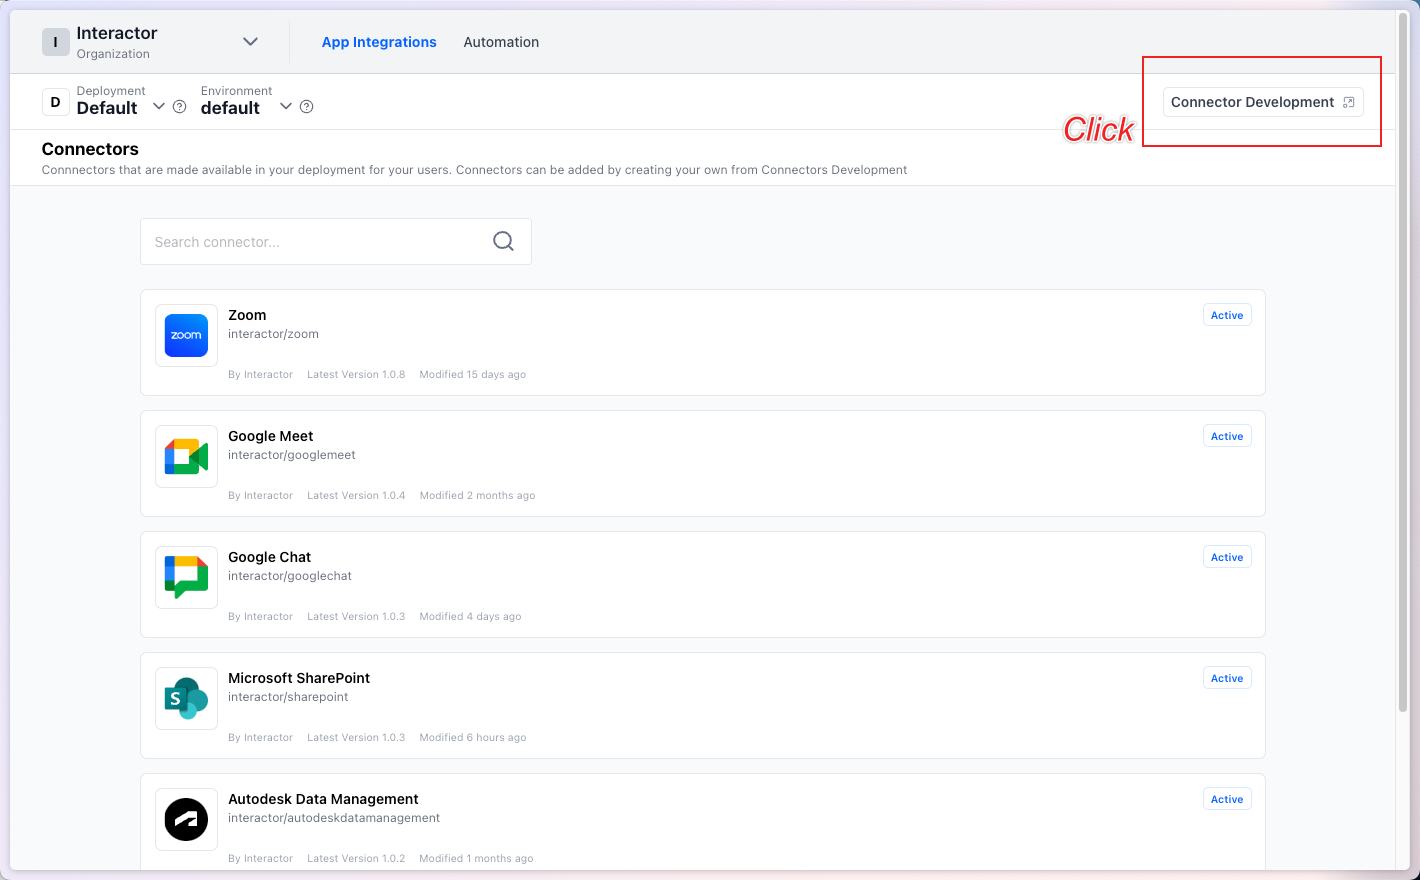
Next, click Connector Development in the upper right corner.
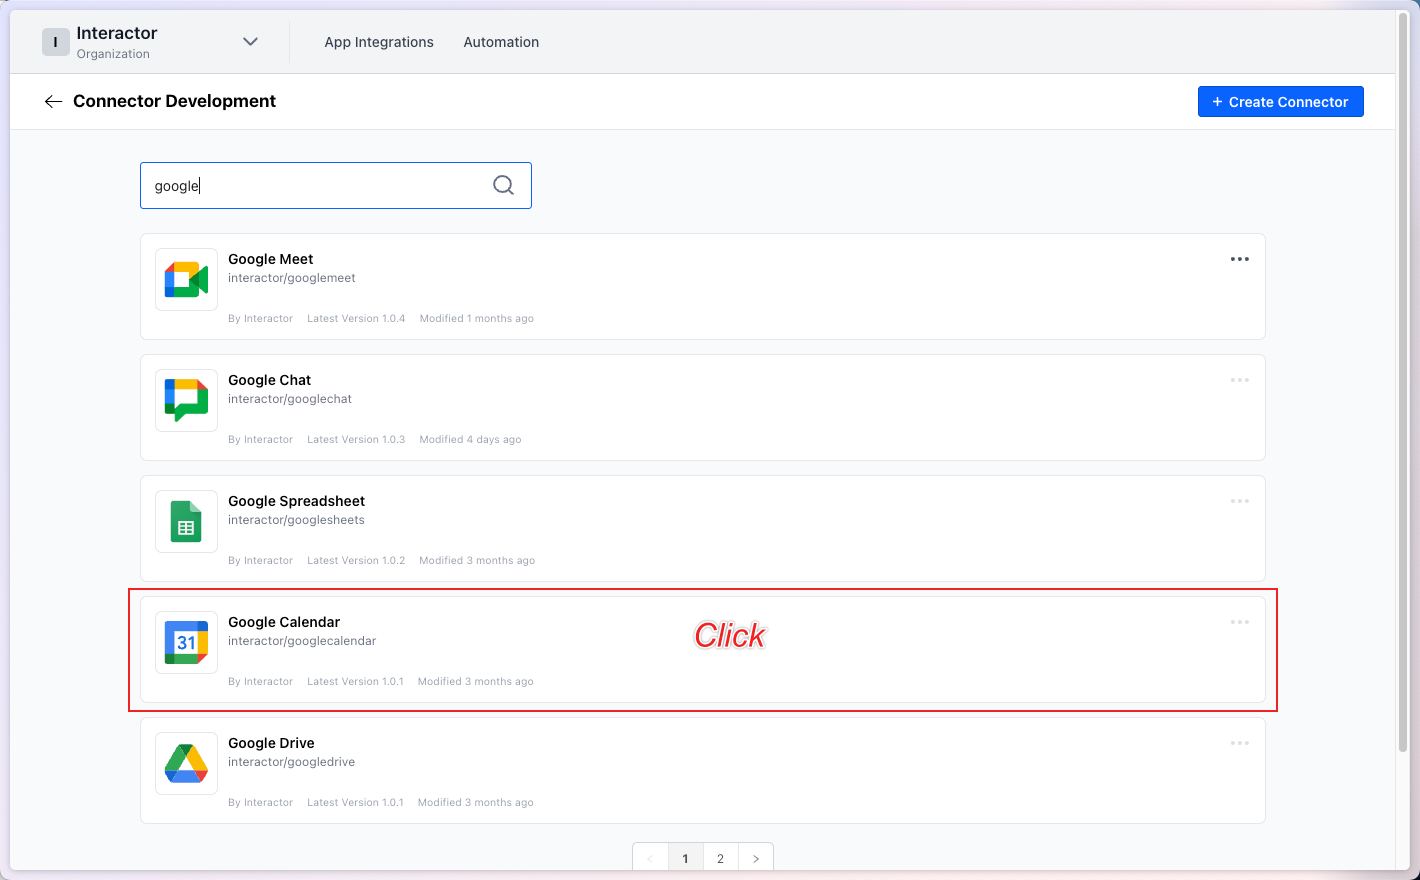
Ensure that the interface changes to Connector Development in the upper left corner. Then, enter the Connector you want to modify in the search bar and click on the corresponding card.
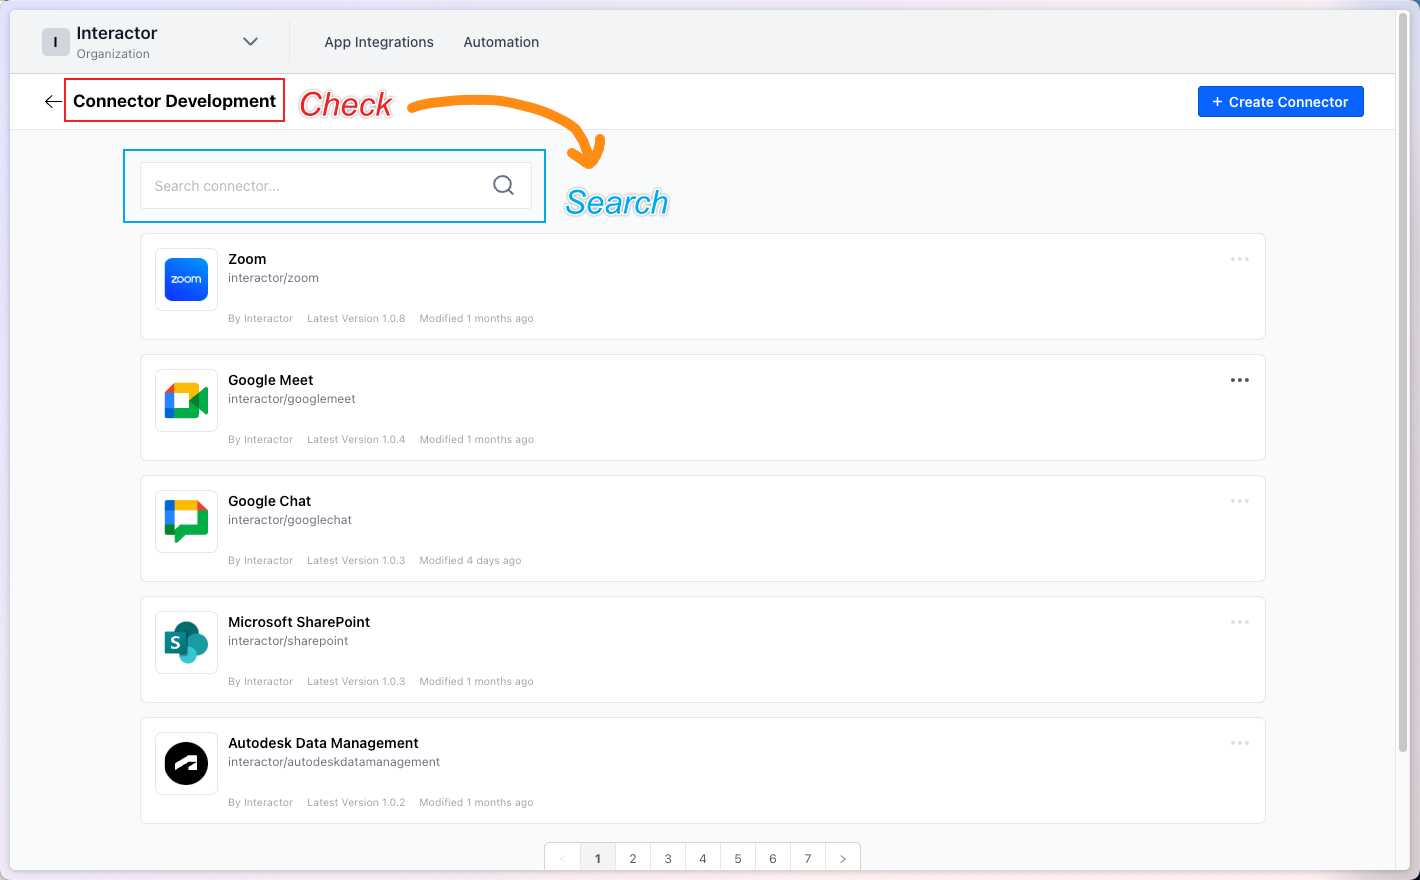
For this example, I will modify Google Calendar.
Step 1. Updating Connector Settings
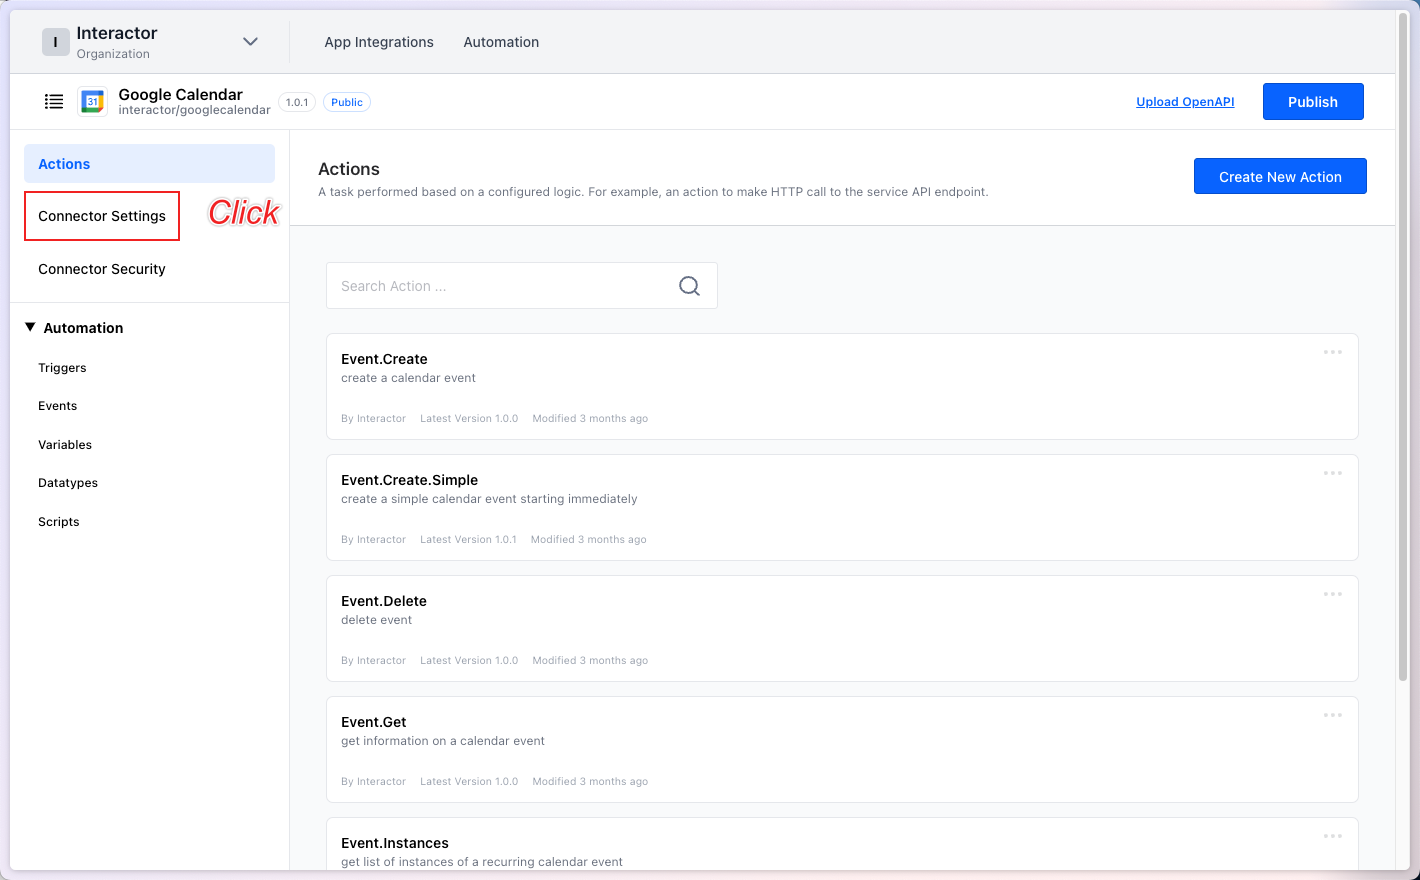
I will modify the Connector Settings.
Click Connector Settings from the left navigation menu.
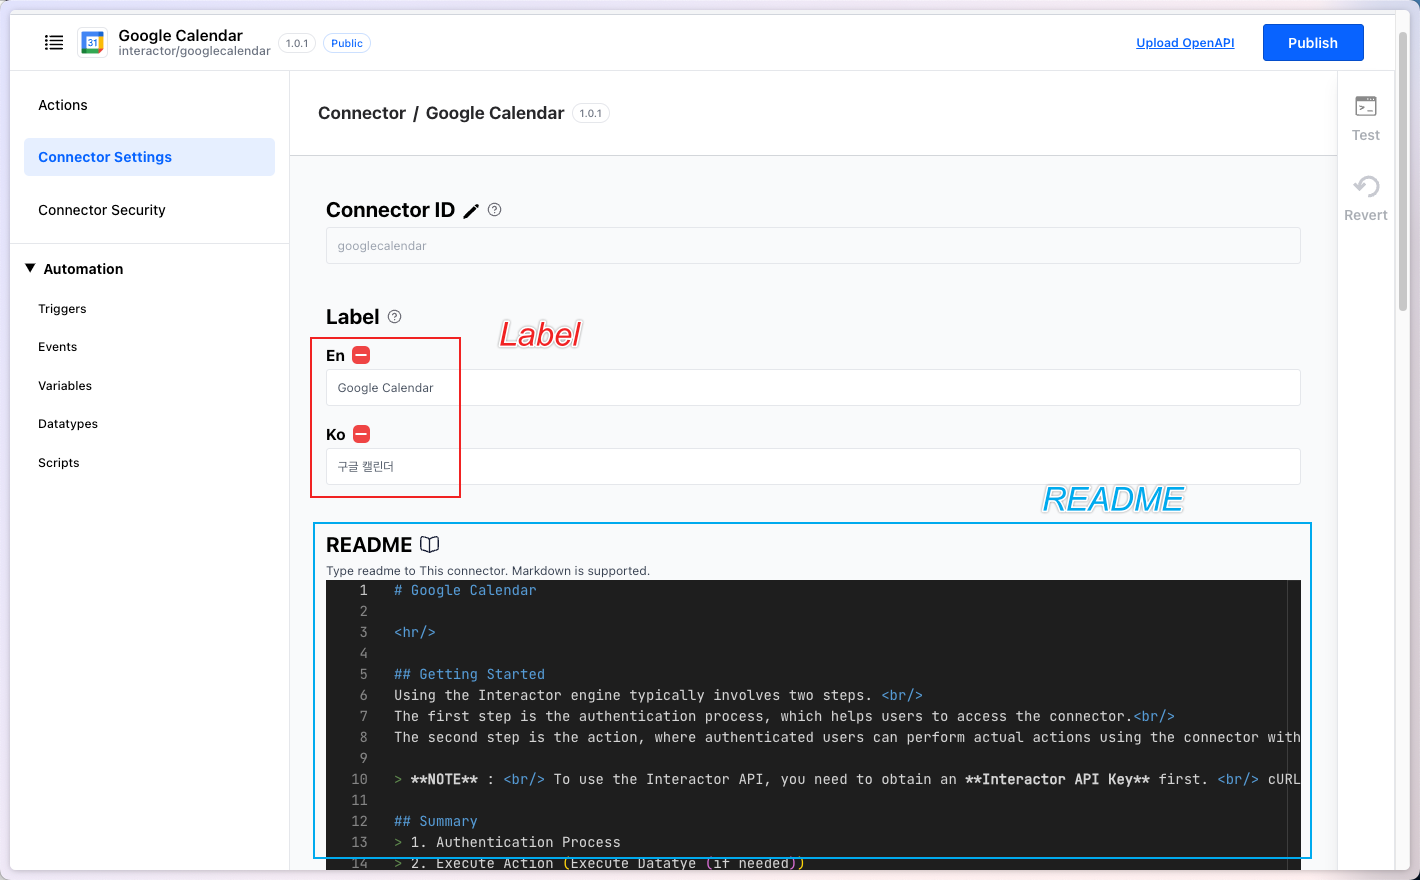
In the Connector Settings page, you can modify the Label and README.
Label→ Used for labeling externally, different from the Connector ID.README→ Used to create the README for the Connector Integration page. Markdown is supported.
Step 2. Updating Connector Security
In the Connector Security page, you can update the security settings for the Connector.
You can update the Authorization type for the respective Connector.
OAuth2.0→ Used when the Connector utilizes OAuth2.0API Keys→ Used when the Connector relies on an API Key
Other authentication methods like Service Token and HTTP Basic Auth are currently under development.
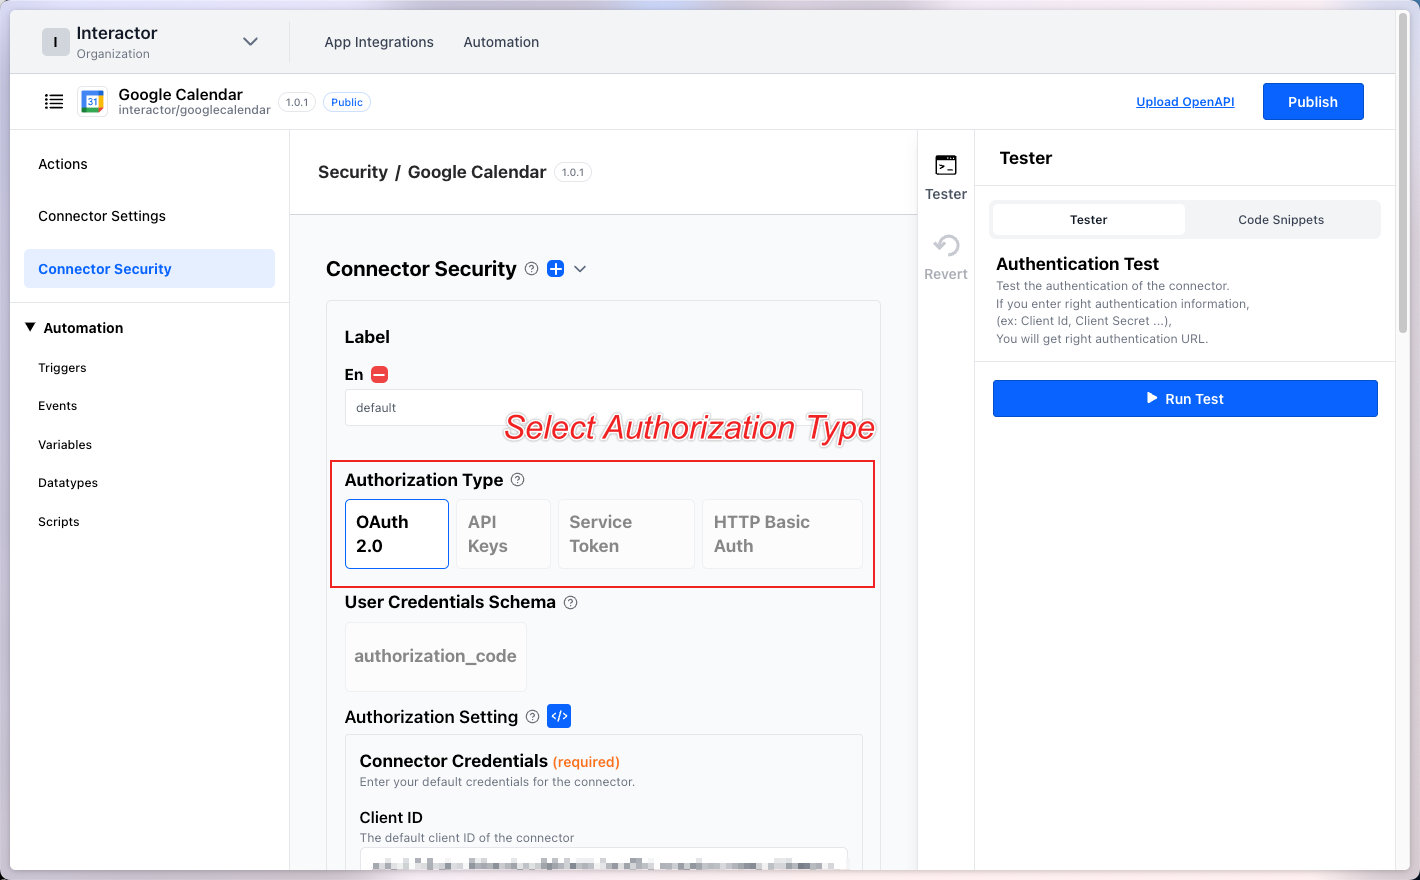
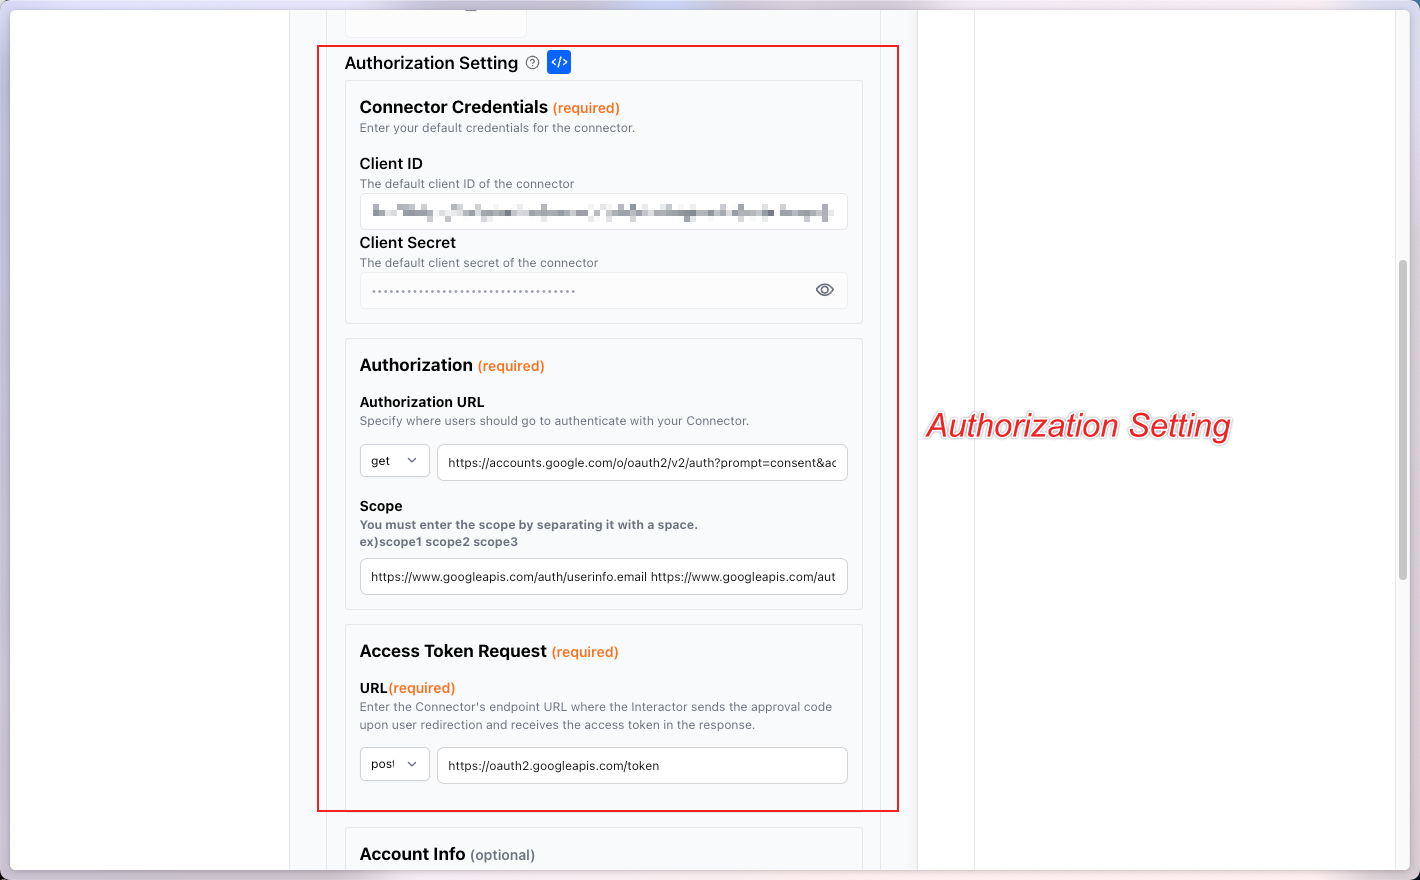
Scroll down to modify the Connector information based on the OAuth 2.0 type.
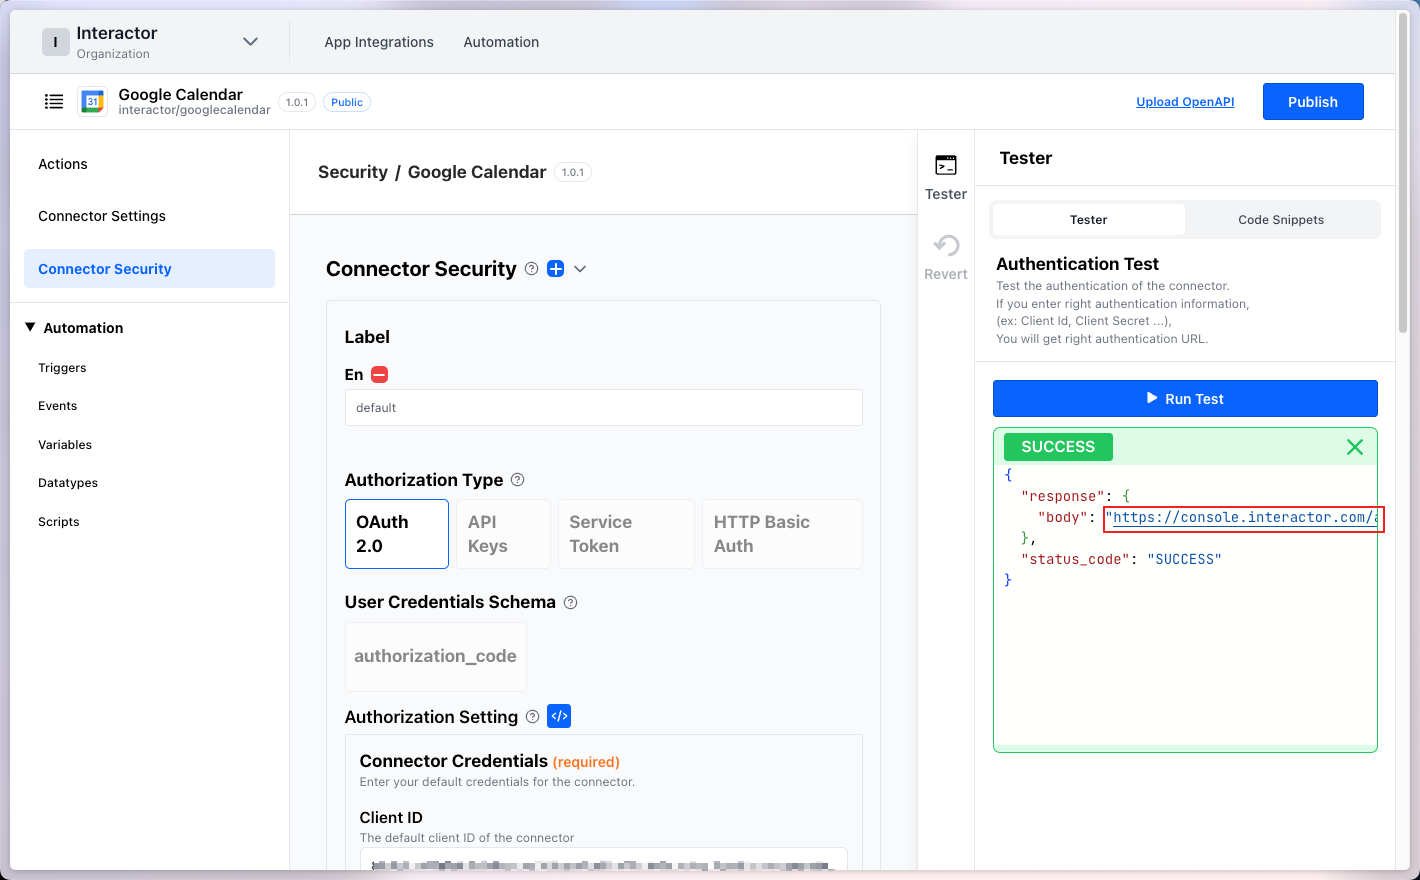
Additionally, you can test how the auth URL is generated in the Tester section on the right.
Step 3. Updating Actions
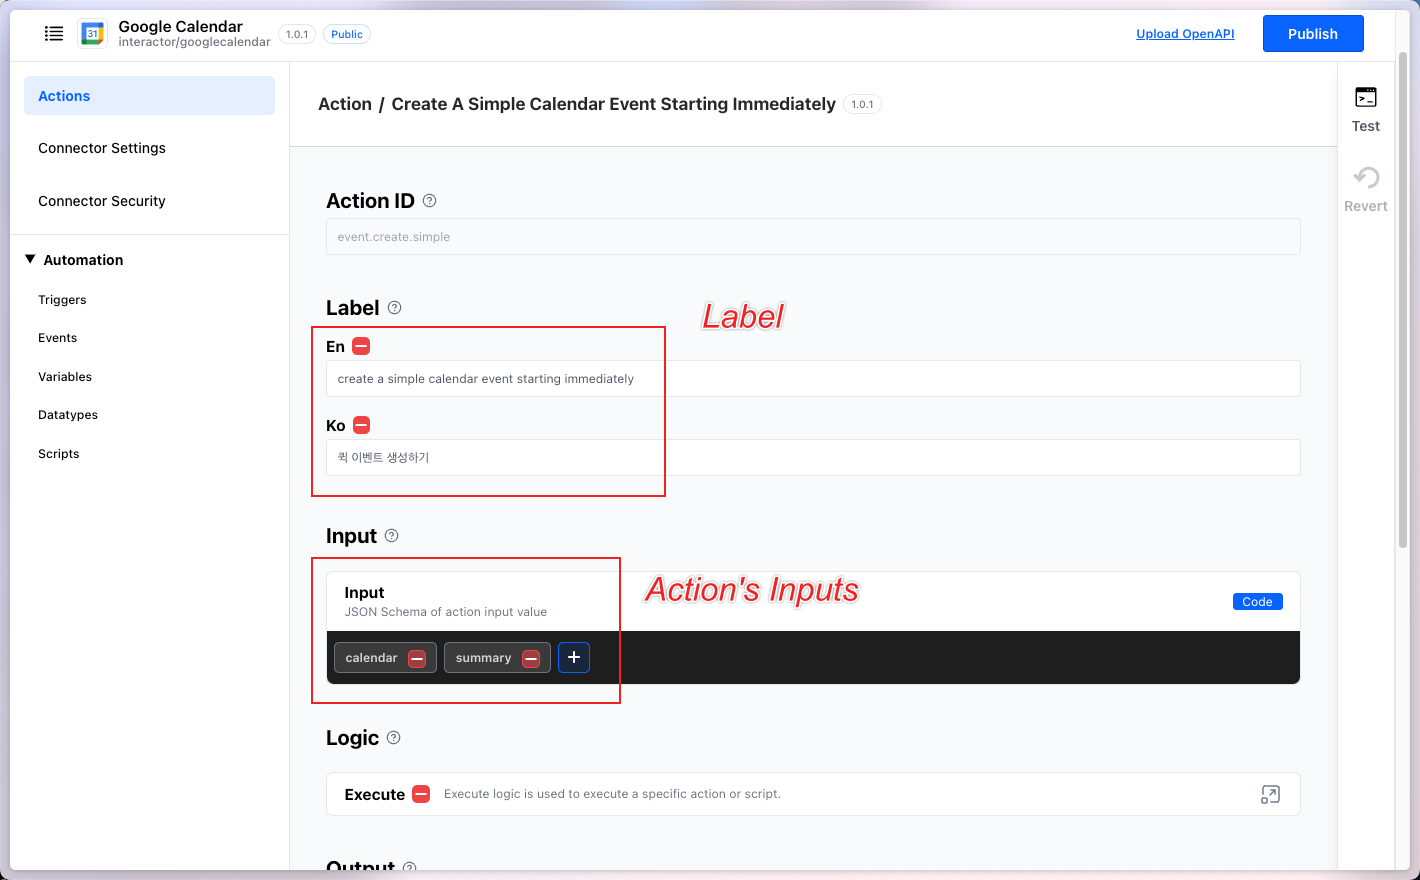
To update an Action, click Actions in the left navigation menu.
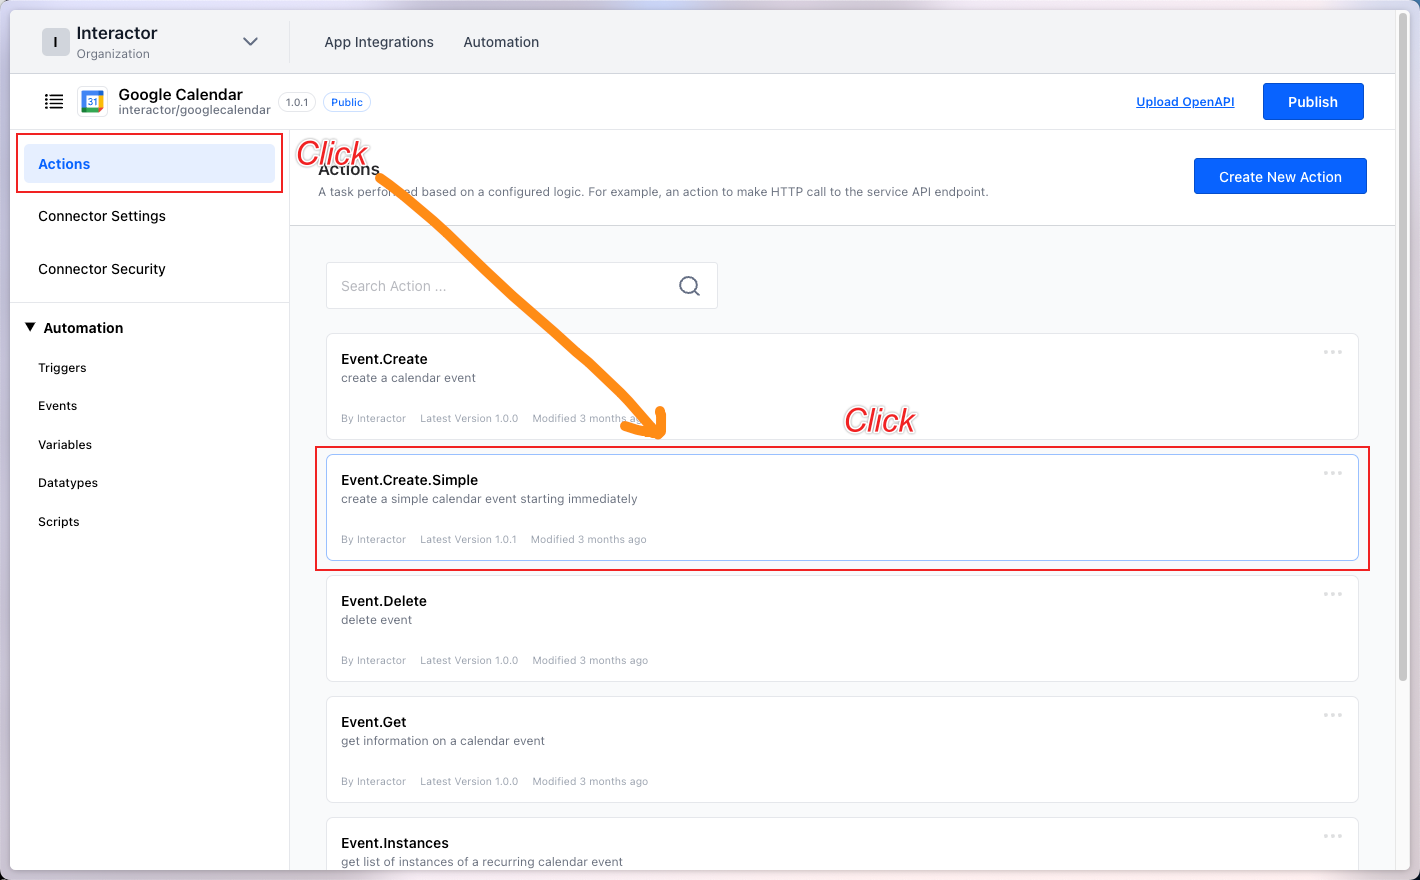
Label→ Modify the Action label.Input→ Modify the input values for the Action.Logic Execute→ Modify the execution logic of the Action, such as HTTP calls.Output→ Modify the output values of the Action.
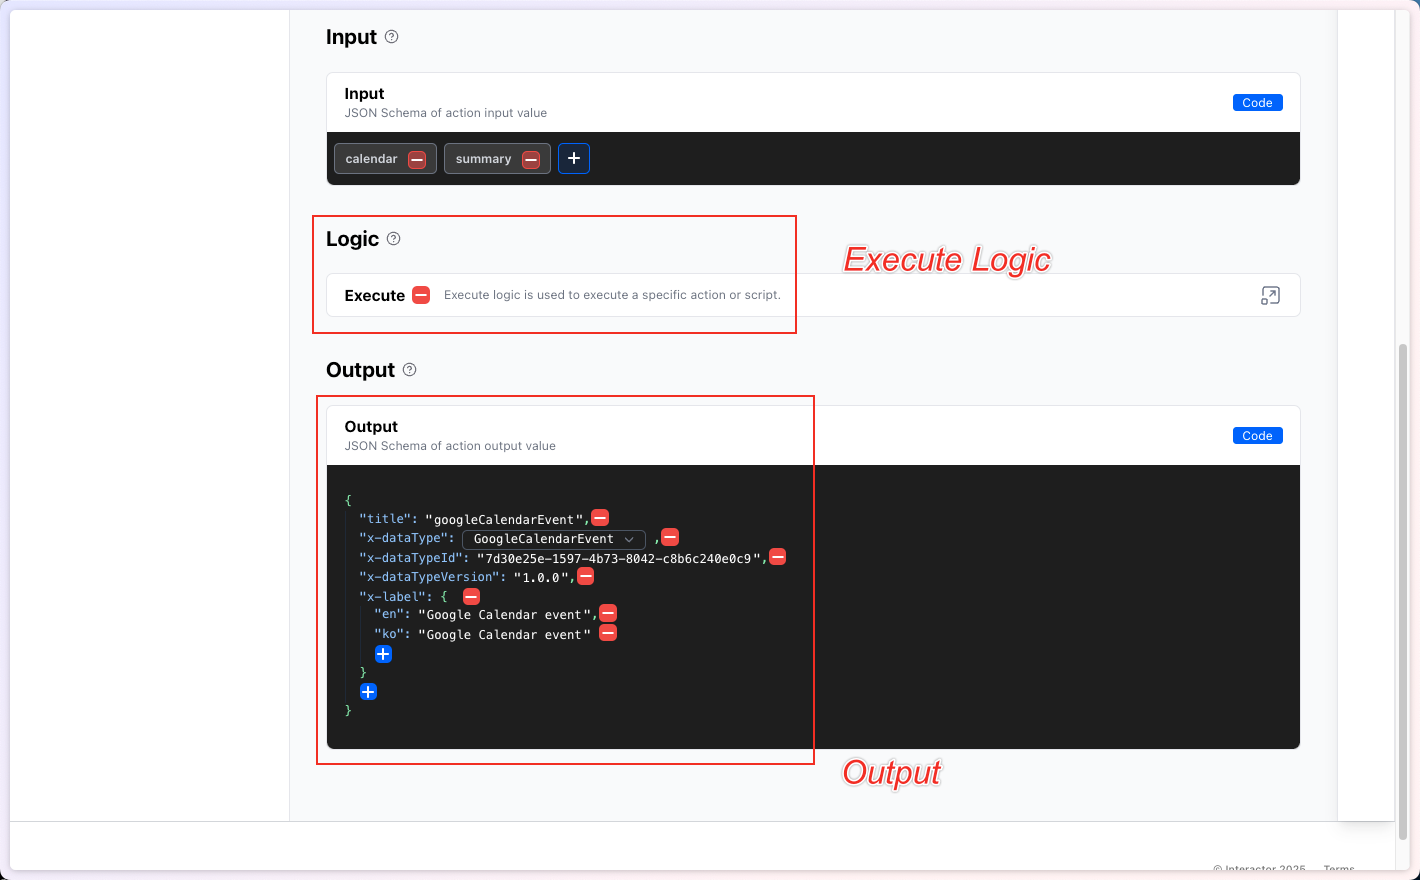
The most crucial part is the Execute Logic.
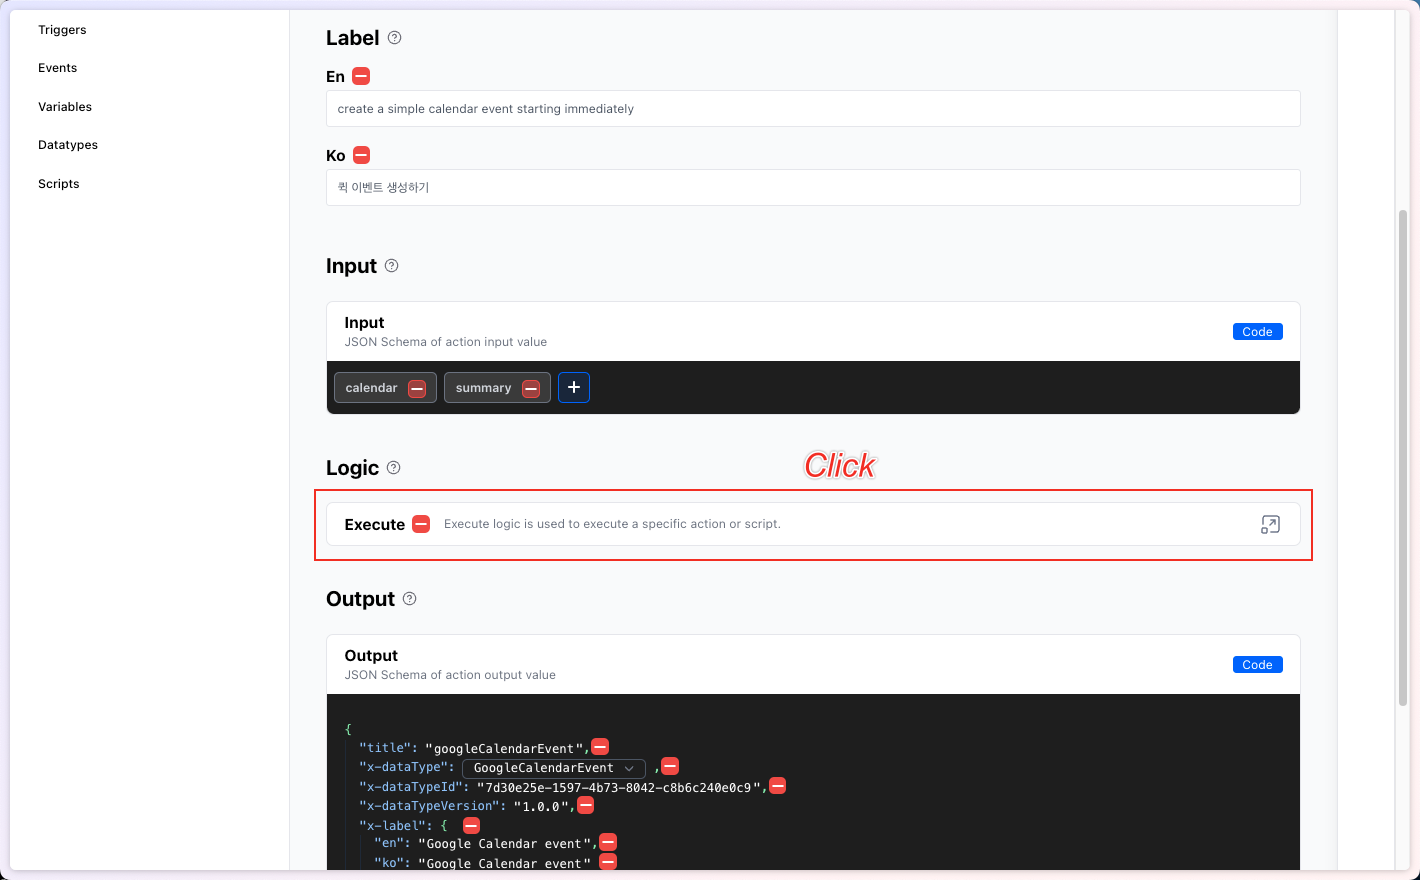
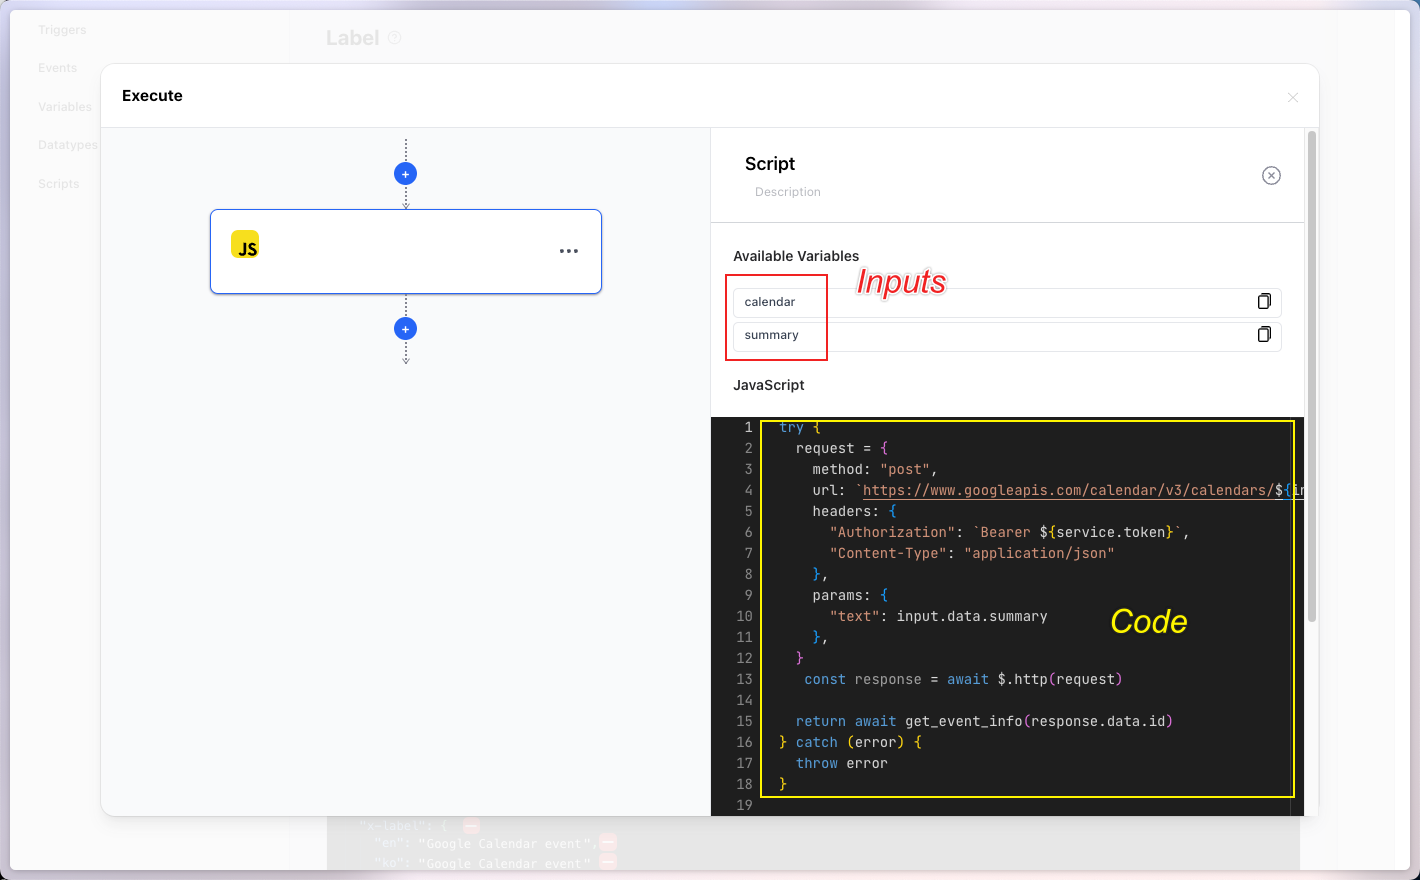
Click it to modify the execution code.
Step 4. Updating Datatypes
To update a Datatype, click Datatypes in the left navigation menu and select the desired Datatype.
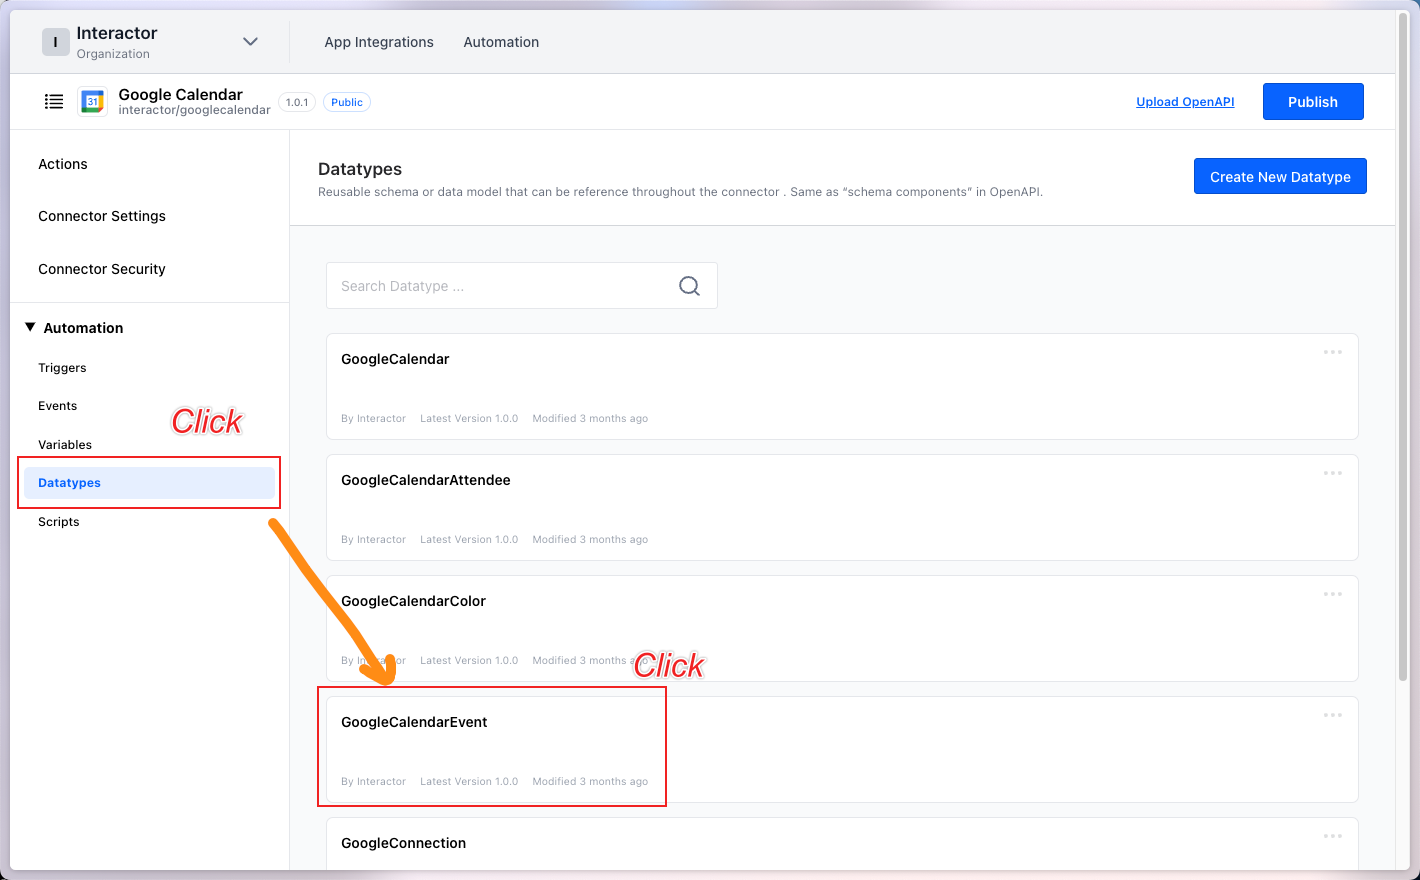
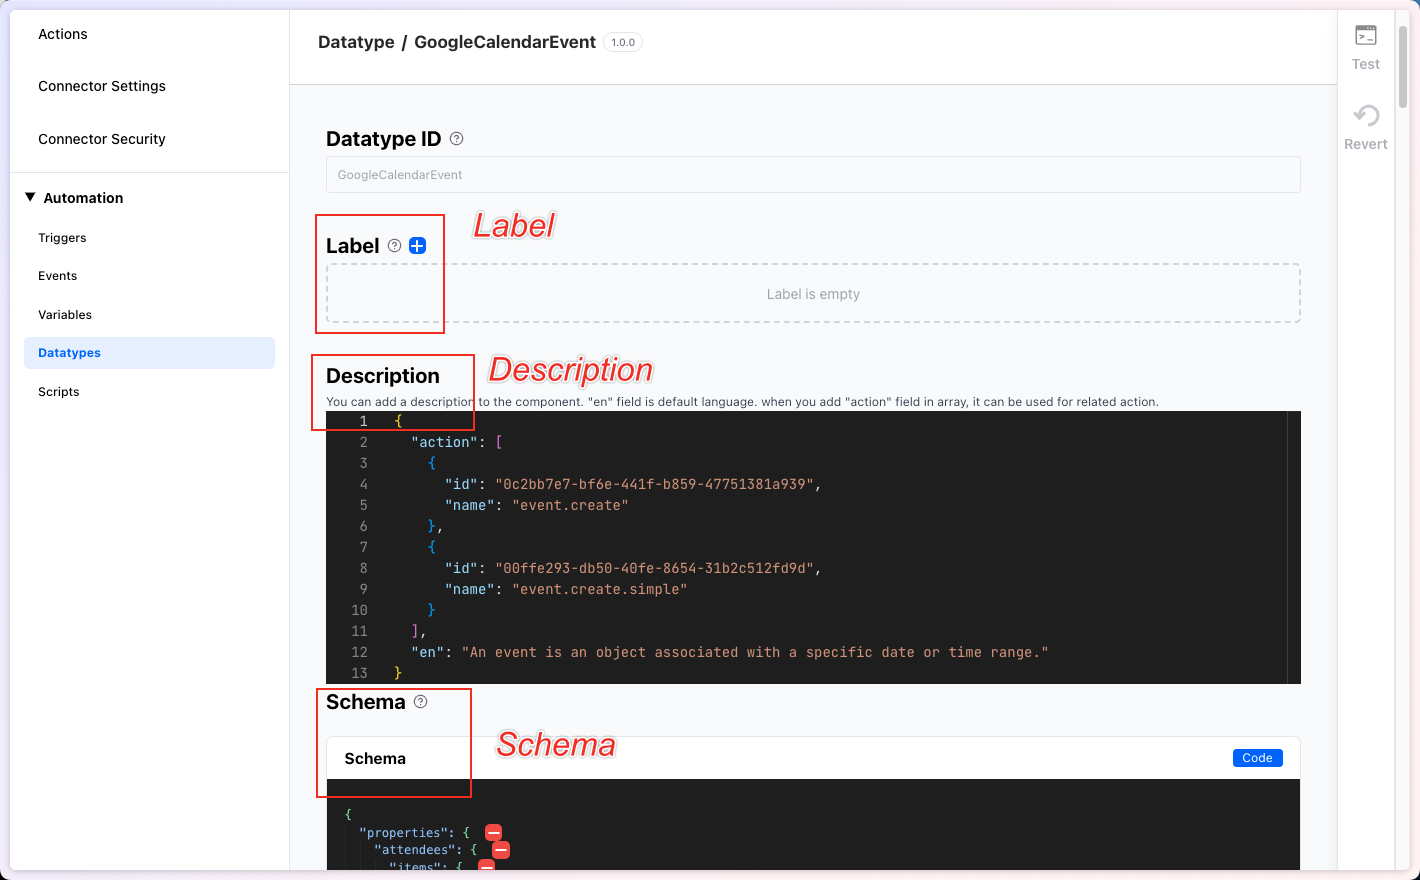
Modifiable elements include:
Label→ Datatype labeling.Description→ Optional description displayed on the App Integration Page.Schema→ Defines the JSON schema for the Datatype.Logic→ Optional logic execution for the Datatype.
Step 5. Updating Triggers
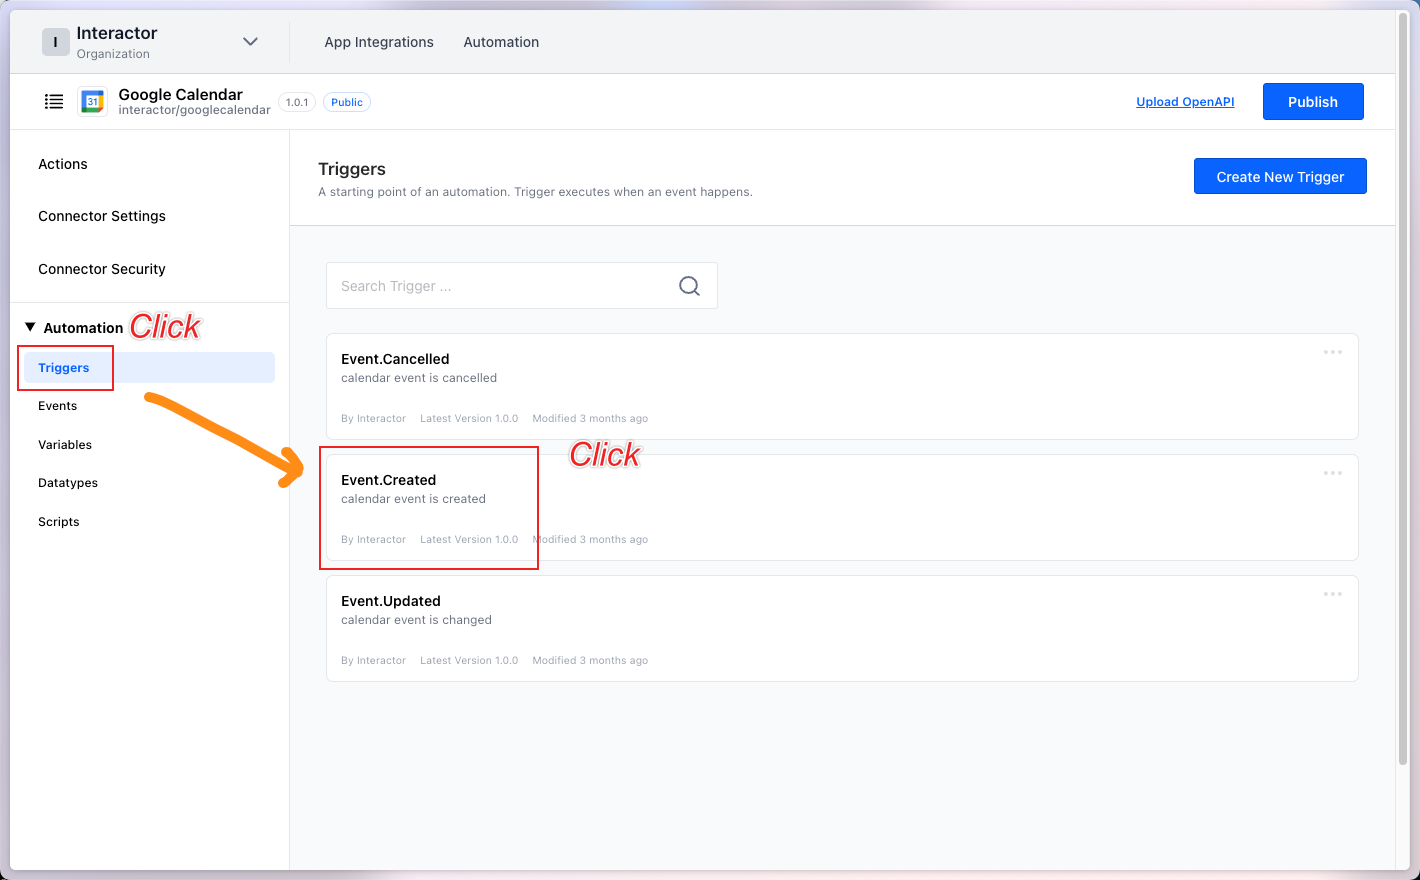
To update a Trigger, click Triggers in the left navigation menu and select the desired Trigger.
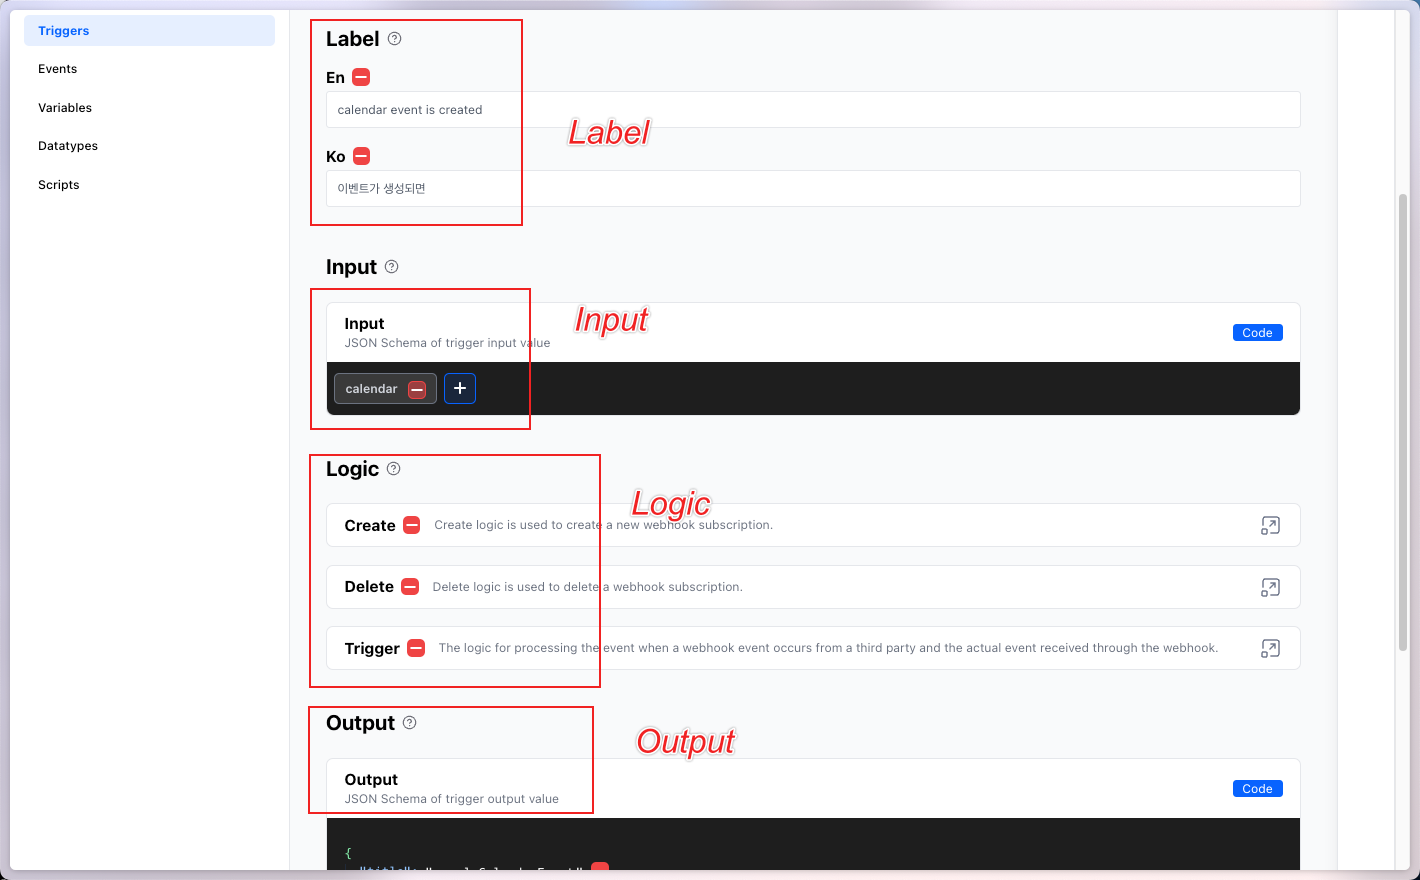
Label→ Modify the Trigger label.Input→ Define the input values required for the Trigger.LogicCreate→ Calls an API to register a webhook with a third party.Delete→ Calls an API to delete the webhook from a third party.Trigger→ Defines the information to be passed when the Trigger is activated.
Output→ Defines the JSON schema for the Trigger’s output.
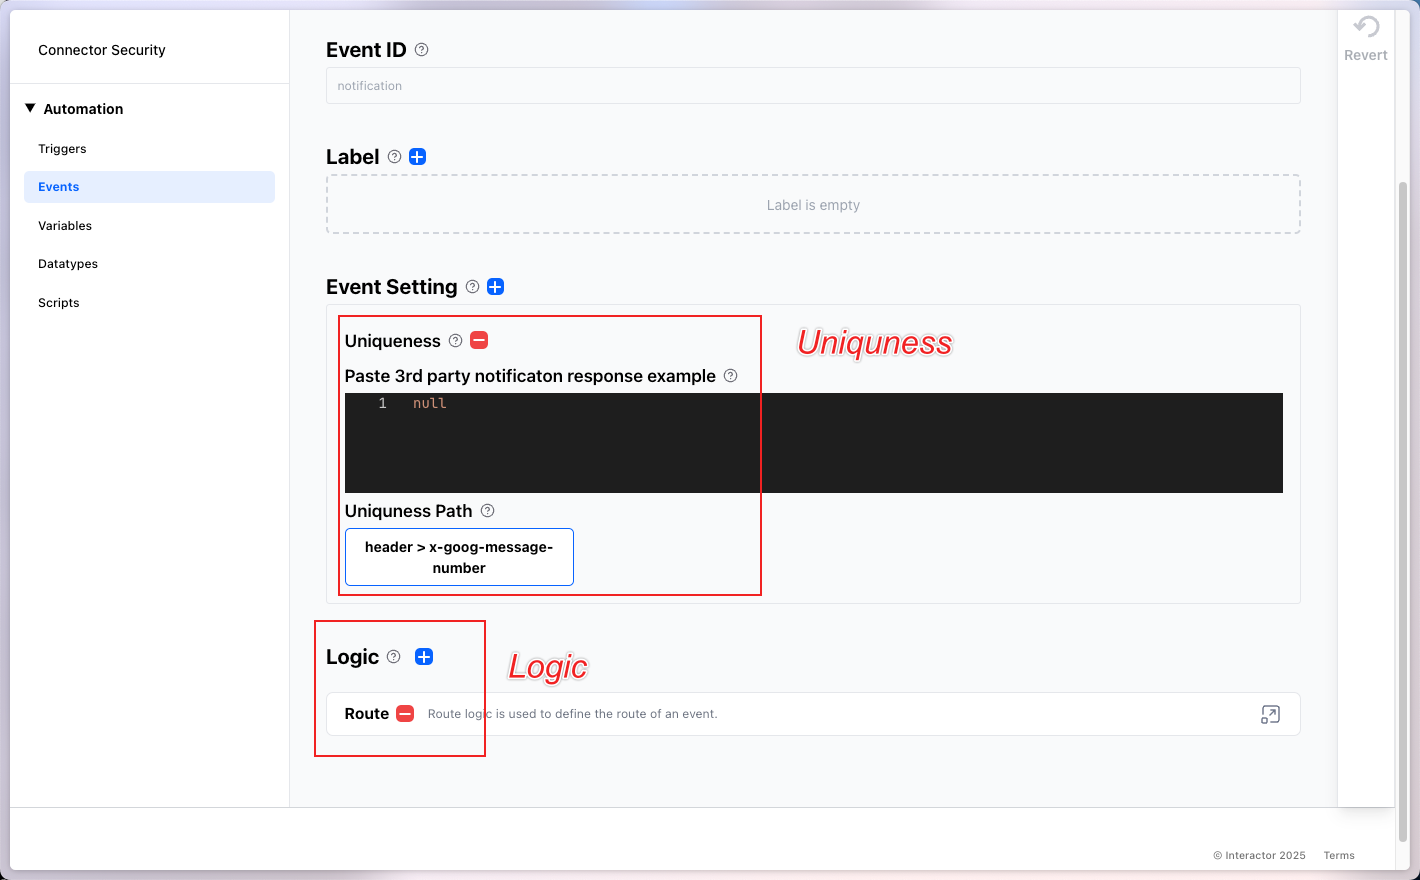
Step 6. Updating Events
To update an Event, click Events in the left navigation menu and select the desired Event.
Since Interactor Engine needs to define Notifications from third parties, click Notification.
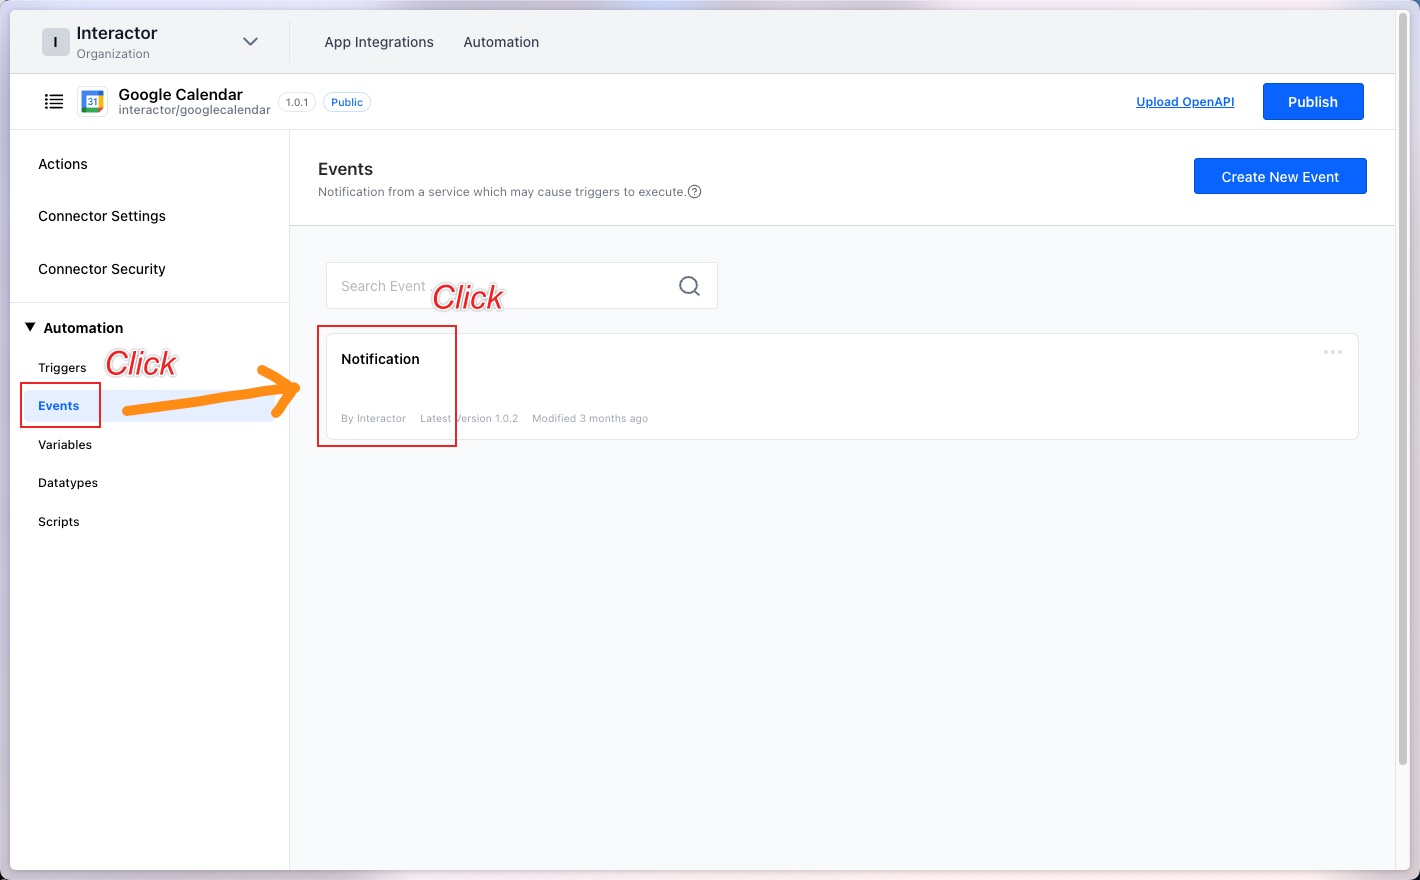
Uniqueness→ Prevents duplicate notifications from a third party.LogicRoute→ Defines which Trigger receives the notification.Response→ Some third parties require a response upon receiving a notification.
