Documentation Automation | Interactor
Below is the translated text while preserving the original Markdown structure.
How to do Webhook?
In Interactor, communication with 3rd-party services is handled through Connectors.
A Connector is a component used in Interactor that manages communication with 3rd-party services.
For example, there are Connectors such as Gmail Connector, Jira Connector, and so on.
On this page, we will look into Trigger Forwarding, which uses the Webhook of a pre-implemented Connector in Interactor.
Index
- Step 1. Setting up Trigger Forwarding
- Step 1-1. Setting the Forwarding URL
- Step 1-2. Adding a Trigger
- Step 2. Testing Trigger Forwarding
- Step 2-1. Issuing an Interactor API Key
- Step 2-2. Testing Trigger Forwarding
What is Trigger Forwarding?🤔
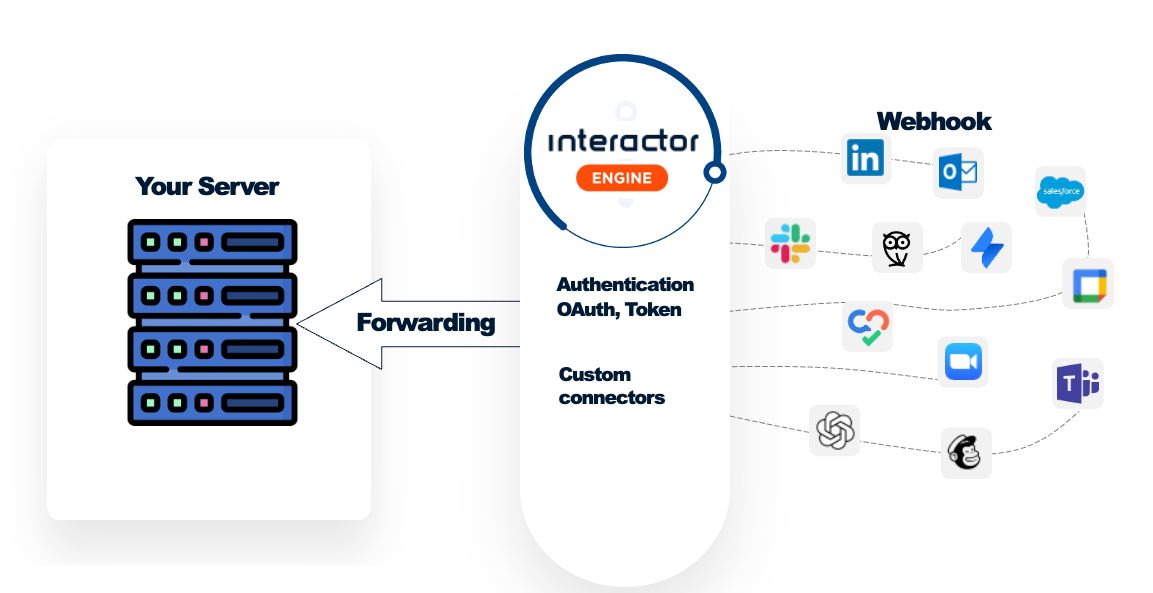
Trigger Forwarding refers to a method of forwarding webhook data to a desired server using the Webhook of a Connector provided by Interactor.
For example, when a Webhook Event from Gmail is triggered (e.g., “when an email is sent”), you can forward that “when an email is sent” event from Gmail to the user’s server.
Step1. Setting up Trigger Forwarding
You can set up Trigger Forwarding in the settings page of the Interactor Deployment you are using.
(Deployment? Environment? )
First, go to console.interactor.com and log in.
After logging in, access the Organization of your choice.
(If there is no Organization, please create one through Create Organization.)
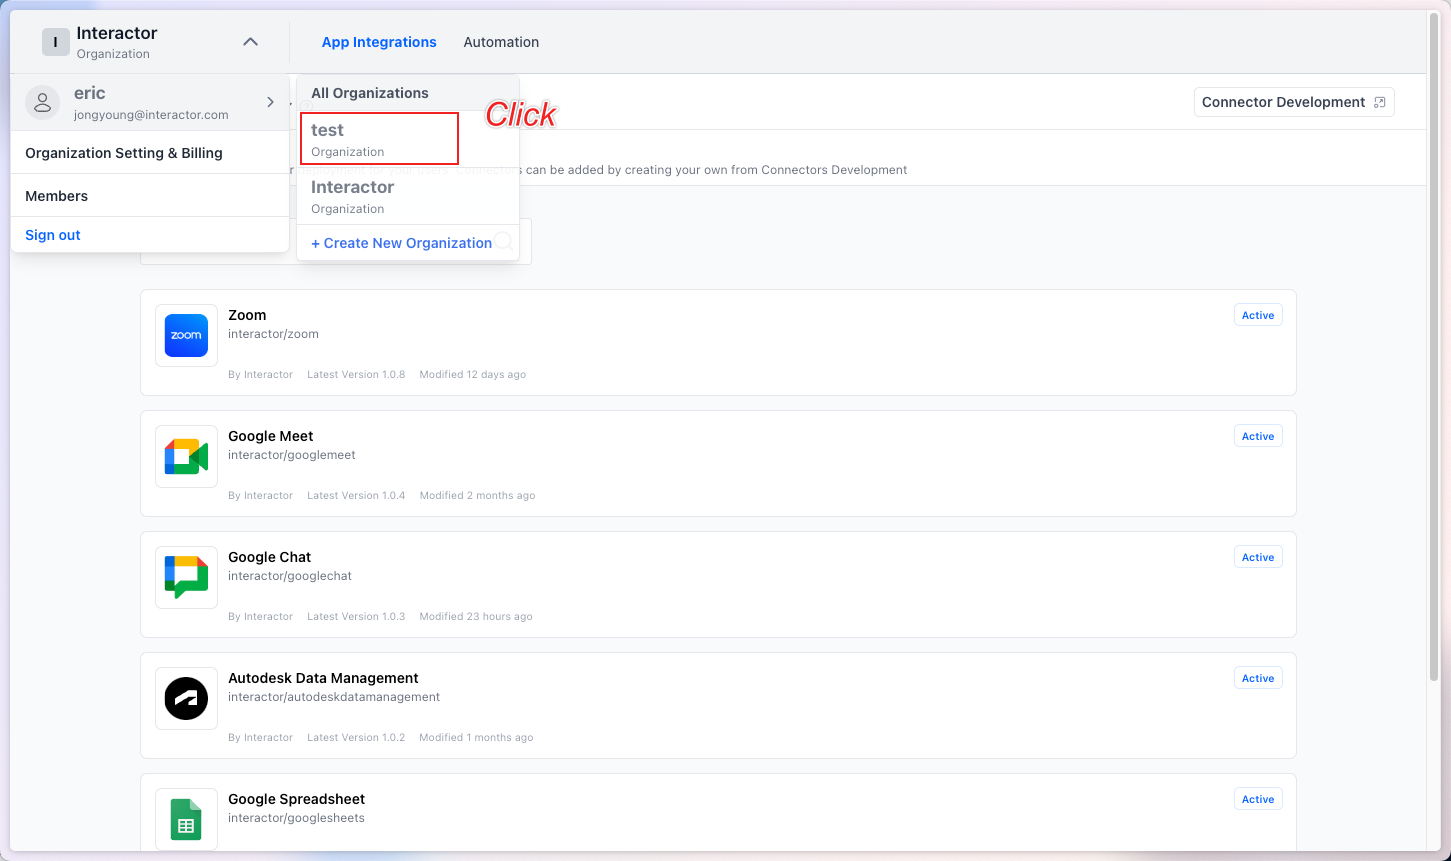
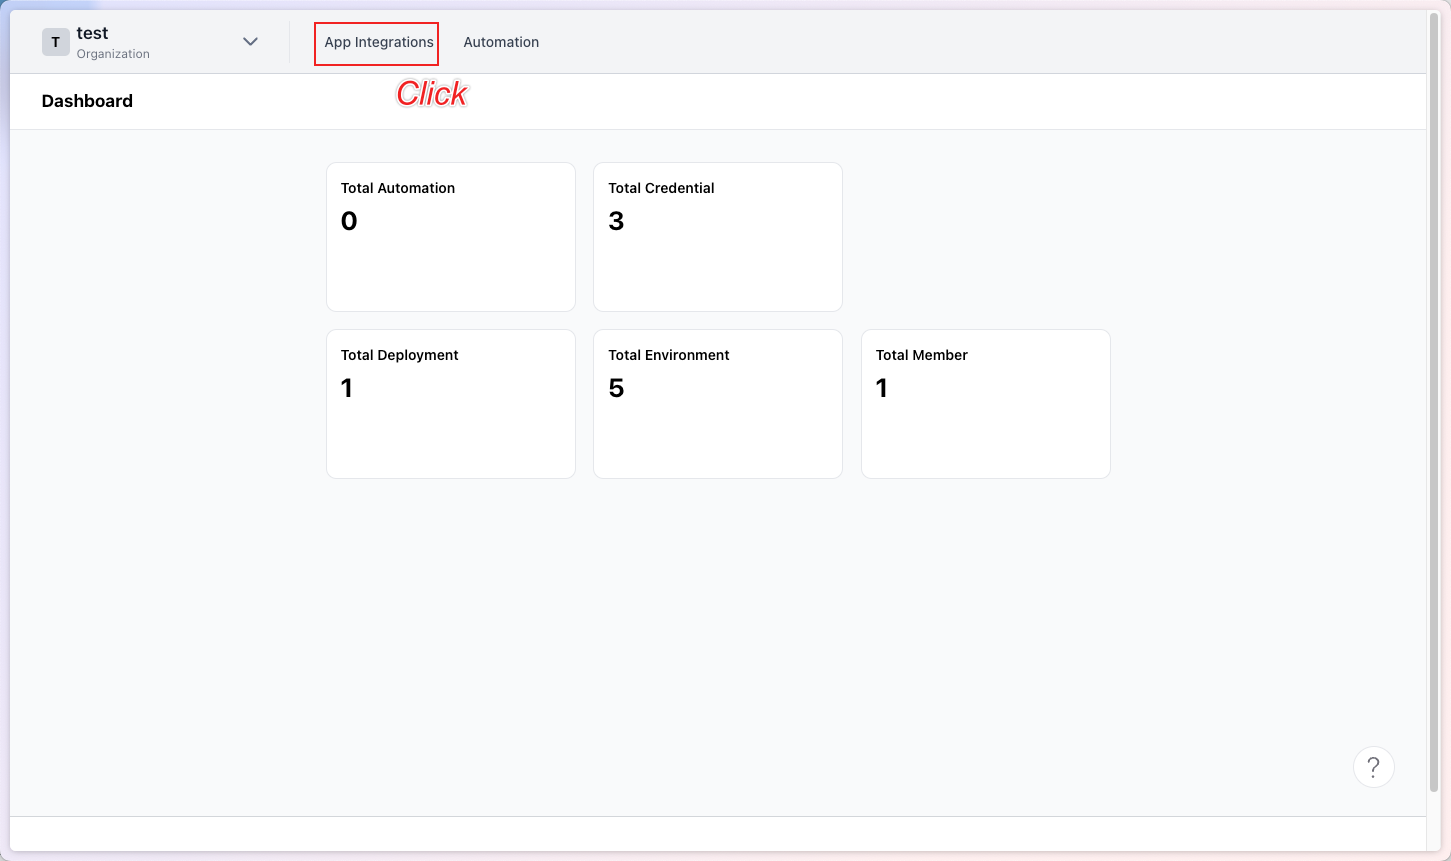
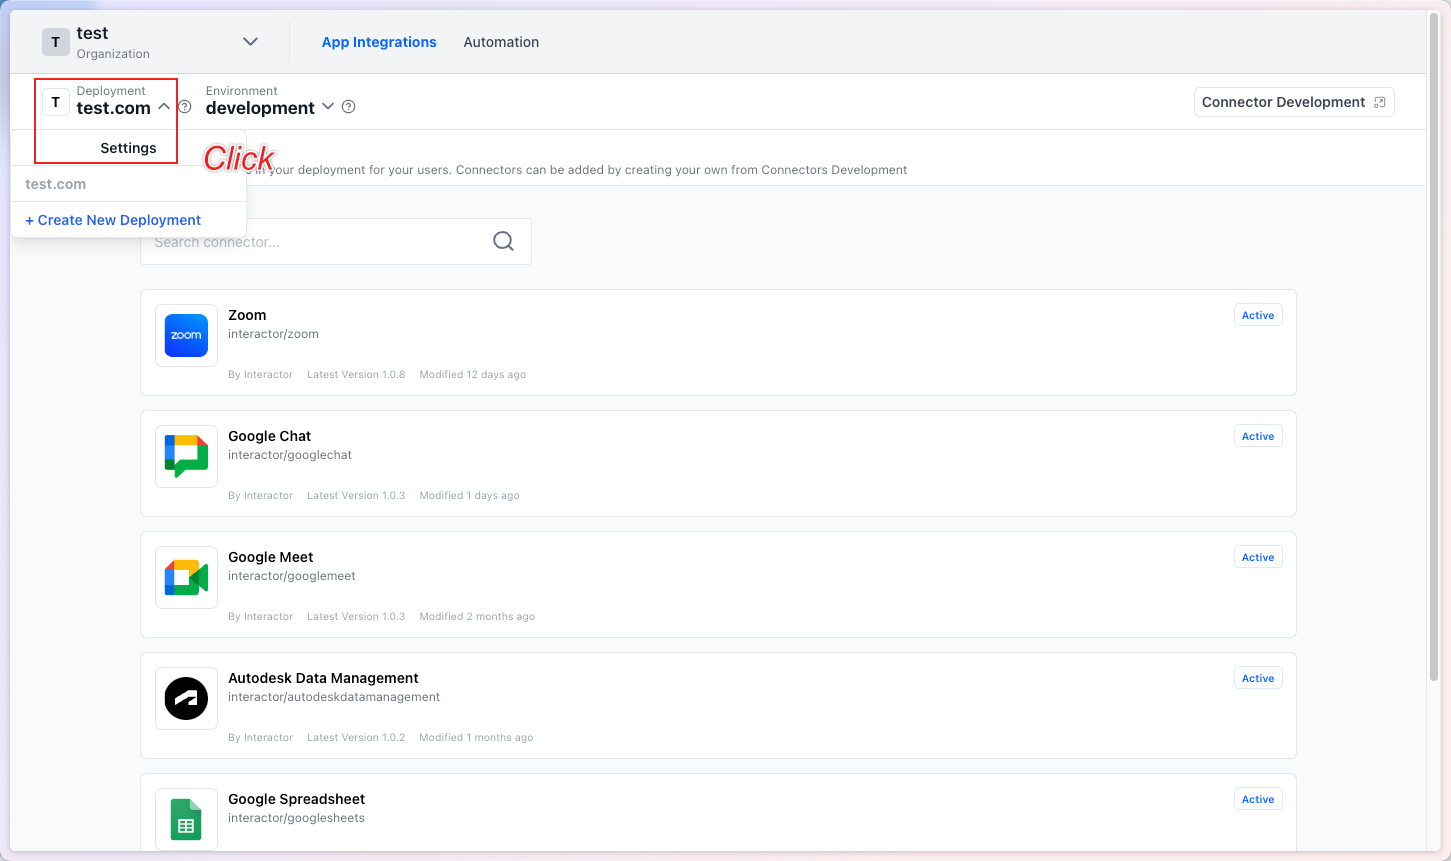
Then click the App Integration button.
After clicking, go to the Deployment page and click the Settings button.
Clicking this button will display a page as shown below, which briefly explains how to use it on the left side.
On the right side, you will see Trigger Forwarding Settings, which we will configure this time.
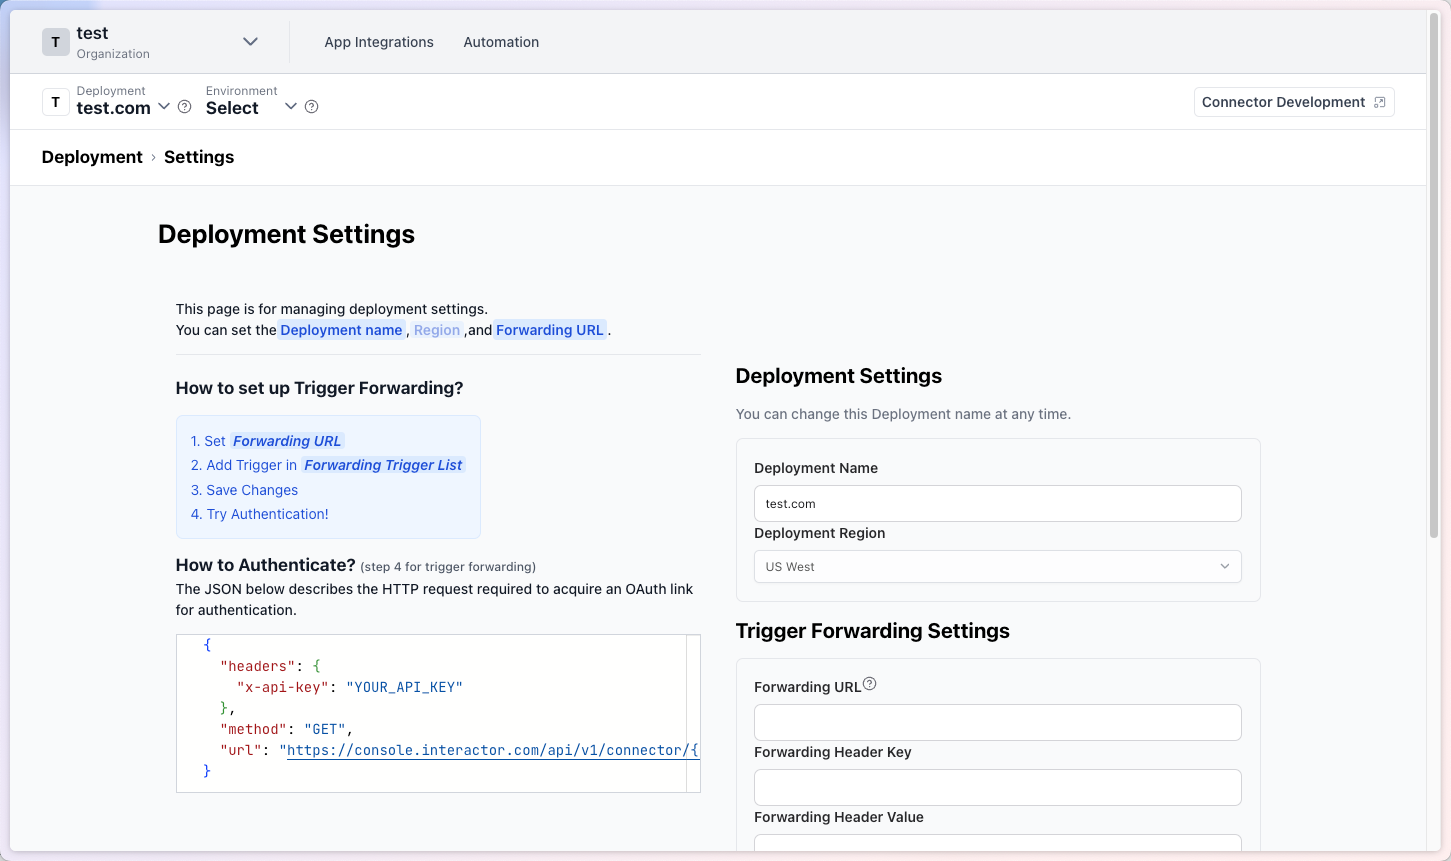
In sequence:
- Step 1-1: Enter the Forwarding URL
- Step 1-2: Add the desired Trigger list
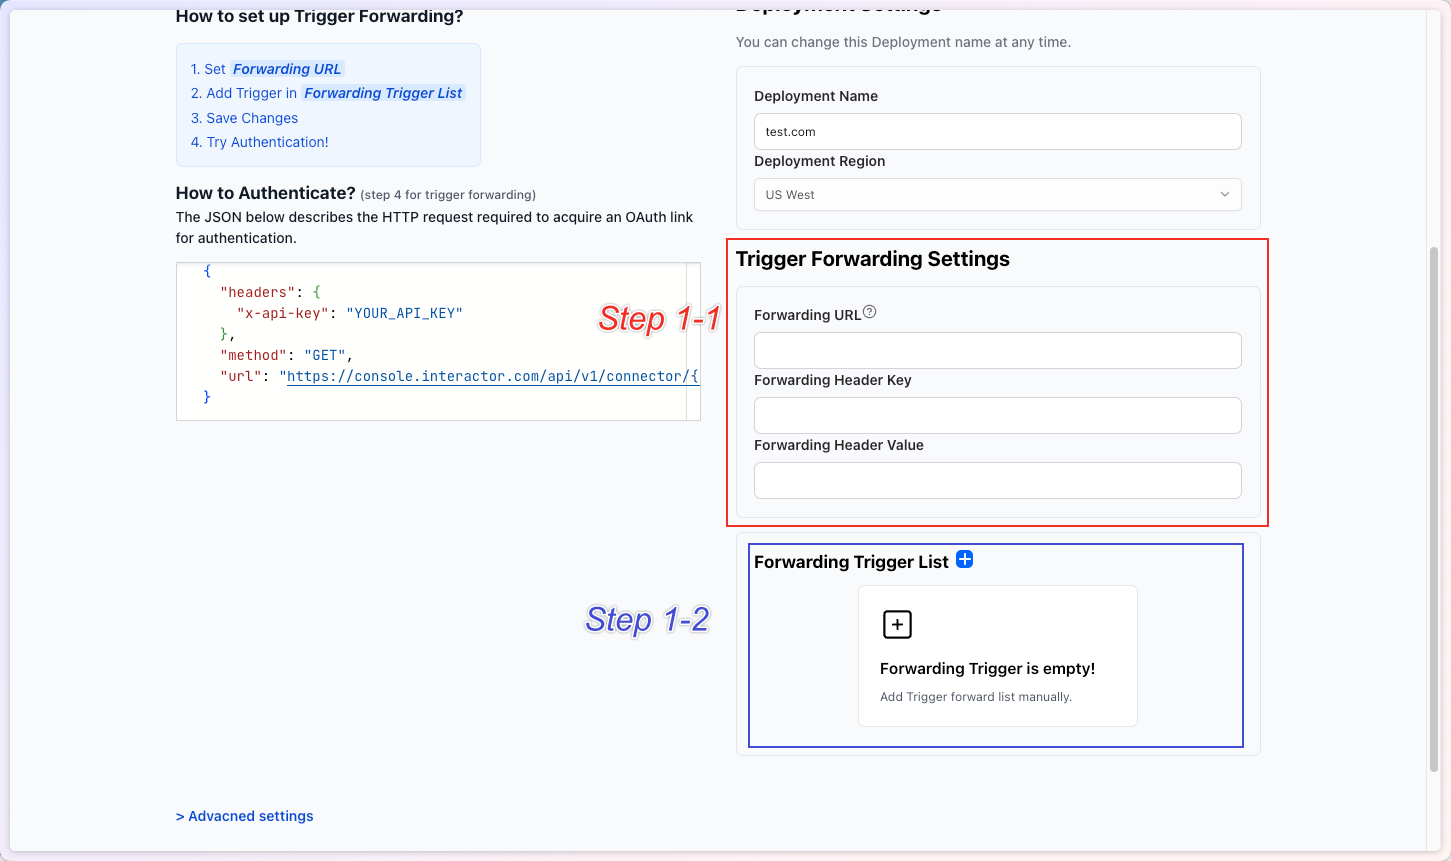
Step 1-2. Forwarding URL Setting
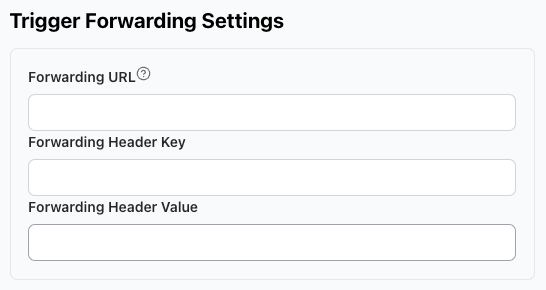
In the Trigger Forwarding Settings, there are three input fields:
| property | required | description |
|---|---|---|
| Forwarding URL | required | Set the URL to use for Trigger Forwarding. |
| Forwarding Header Key | optional | The header key for Trigger Forwarding; use if needed. |
| Forwarding Header Value | optional | The header value for Trigger Forwarding; use if needed. |
I will only set the mandatory value, Forwarding URL.
Please enter the URL where you want to receive the webhook response,
and then click the Save Changes button at the bottom.
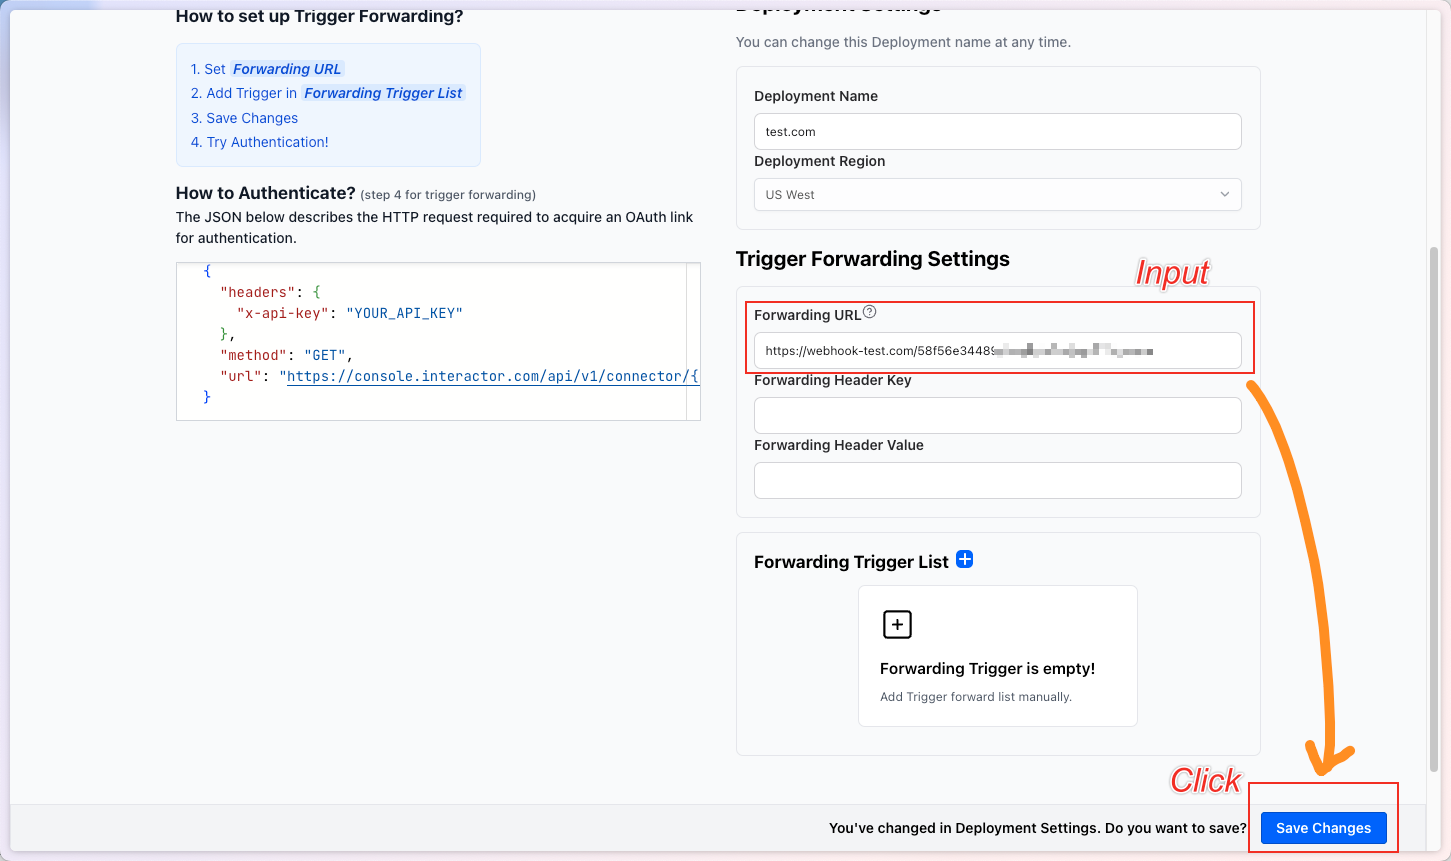
Step 1-2. Adding a Trigger
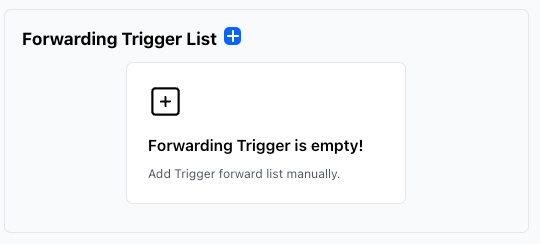
Now, let’s add the Trigger we want to forward.
Click the + button at the top or click the white box.
After clicking the add button, you will see a screen like the one below.
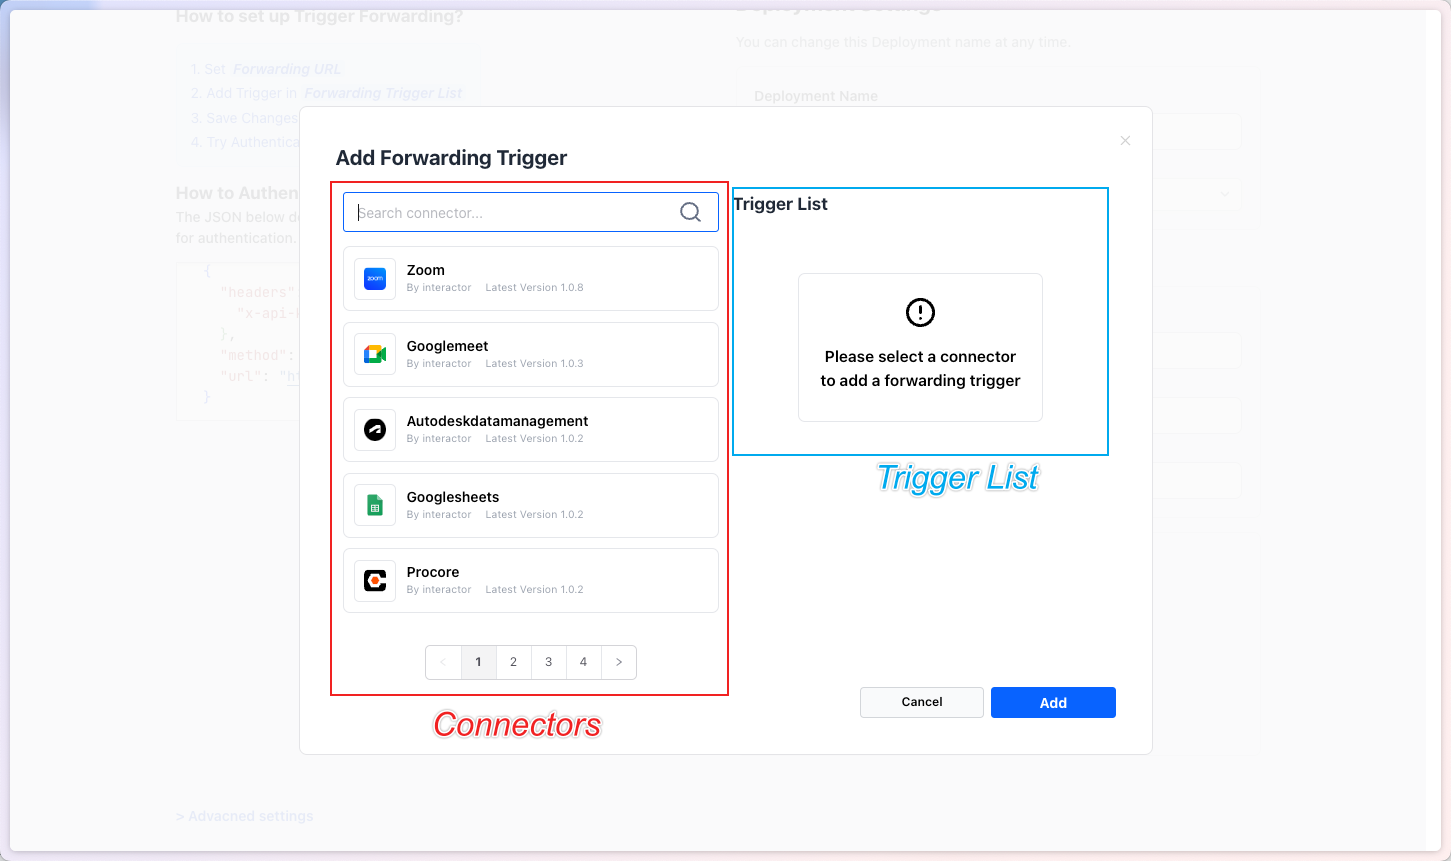
On the left, click the Connector you want to add. The list of available Triggers for that Connector will appear in the blue box on the right.
In this test, we will use the Gmail Trigger “An Email is Sent.”
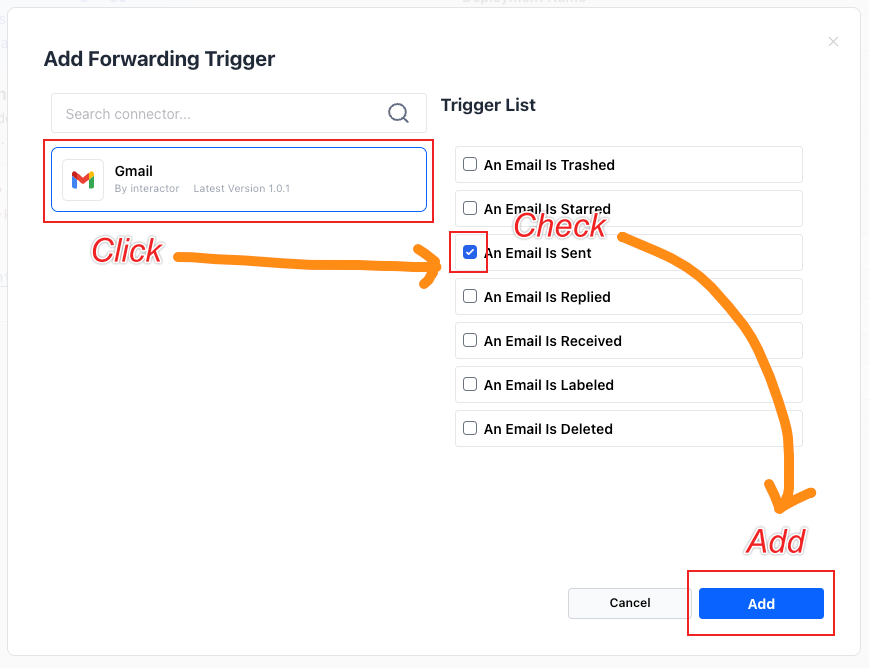
Click the Add button, and you will see that the An Email is Sent Trigger is added to the Forwarding Trigger List, as shown below.
Click Save Changes at the bottom.
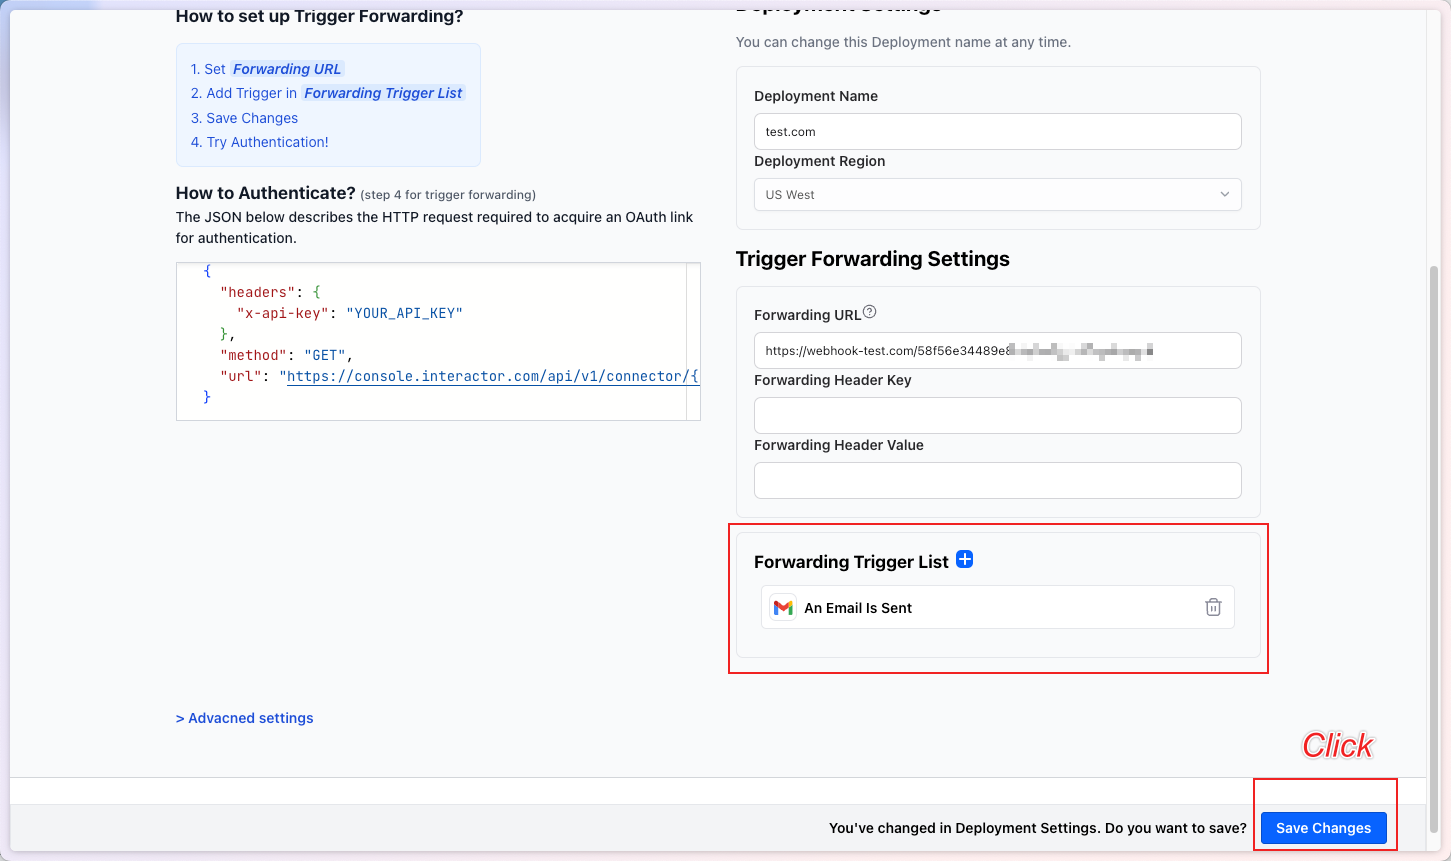
This completes the Trigger Forwarding Setting.
Step 2. Testing Trigger Forwarding
Now that we have finished setting up Trigger Forwarding, let’s check if it works properly.
First, you need to issue an Interactor API Key in order to use Interactor.
Step 2-1. Issuing an Interactor API Key
An API Key is an authentication key for communicating with Interactor.
It can be issued under the Environment in Development.
When you first log in to Interactor, you will see a screen like the one below.
Click App Integrations at the top to proceed to the next step.
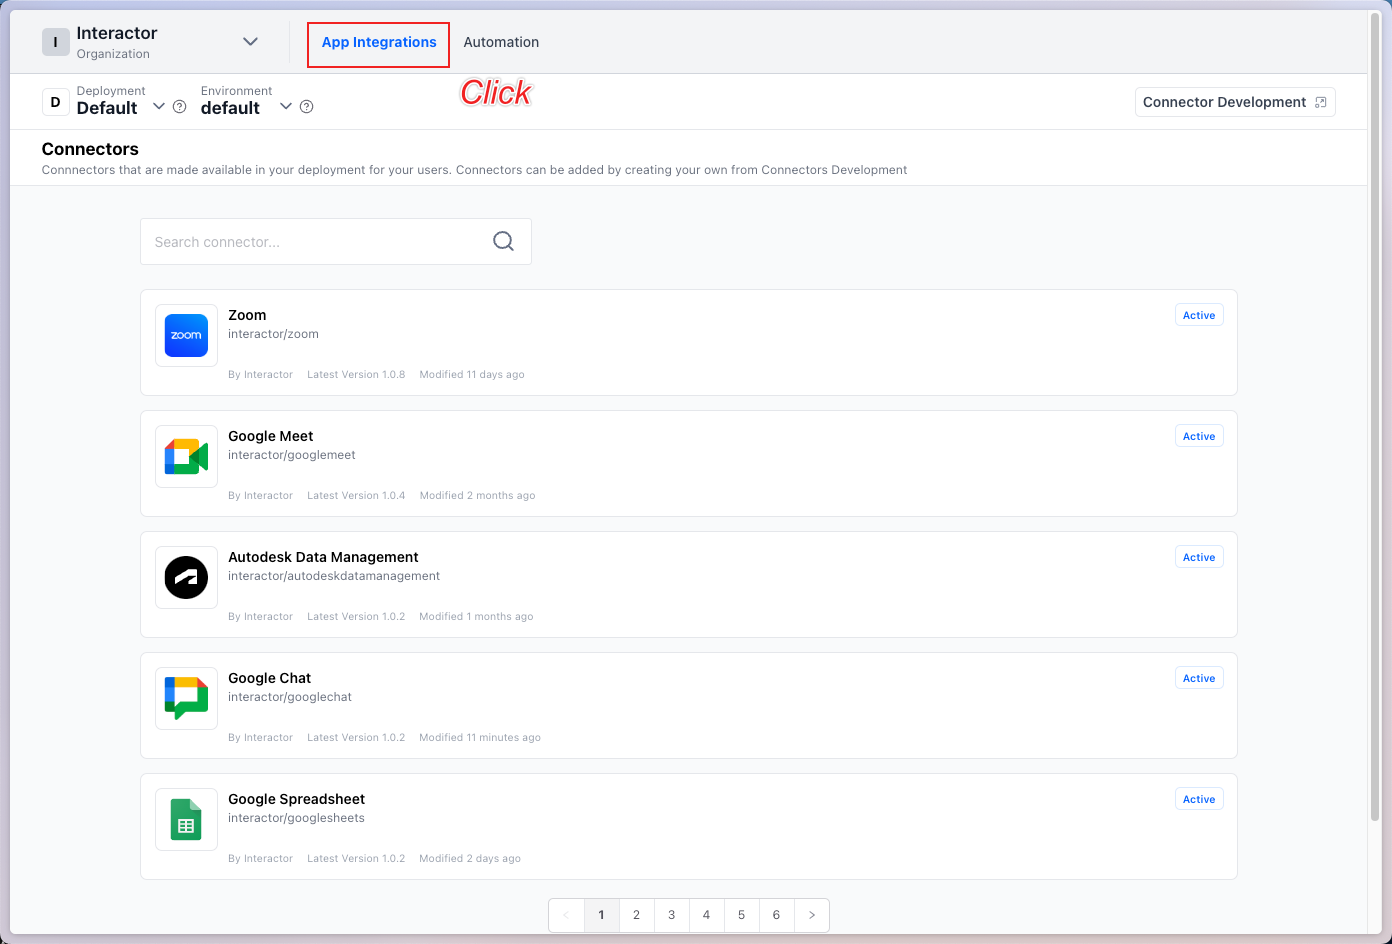
When you click the App Integration navigation, you will see various Connectors, as shown below.
To issue an API Key, select the Environment at the top and click the Settings button.
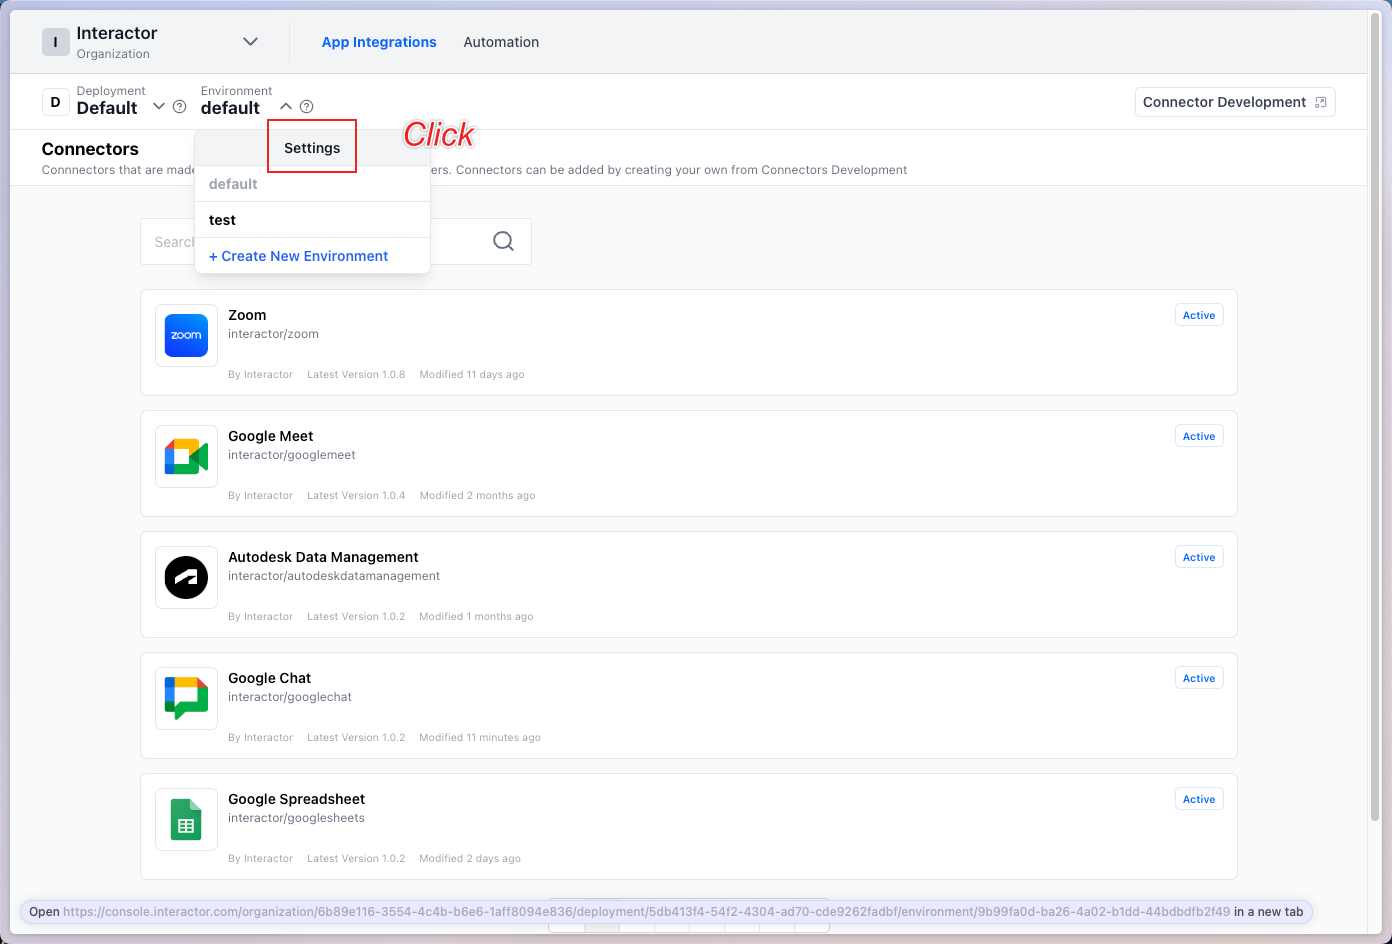
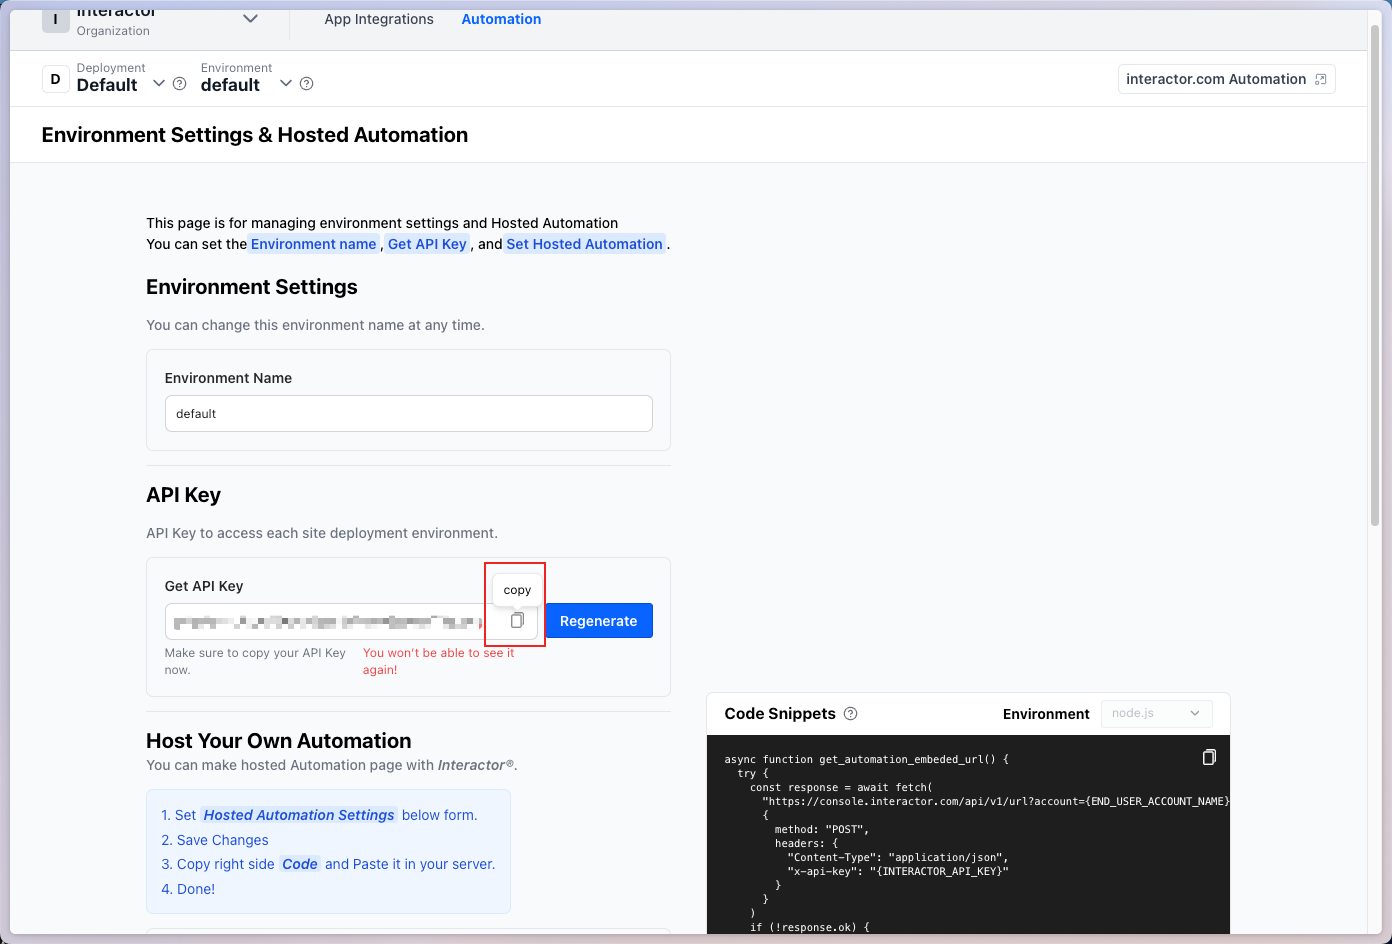
Then a screen like the one below will appear. Clicking the blue Regenerate button in the API Key section issues the API Key.
This API Key is the authentication key for communicating with Interactor.
If you issue a new API Key later, it will be a different API Key.
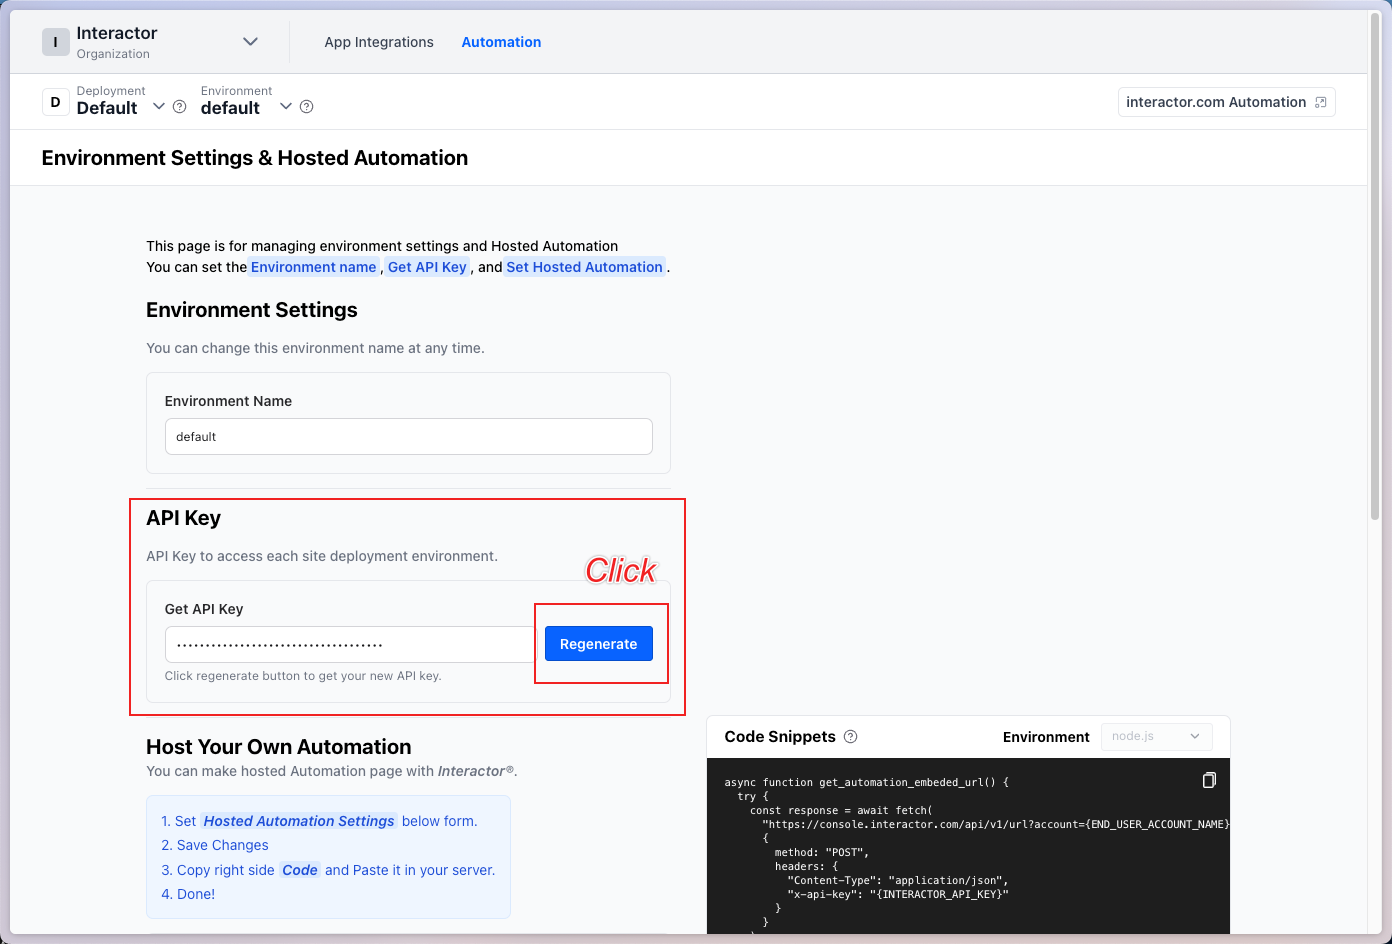
You can copy the issued Key with the copy button on the right.
Always keep your issued API Key safe.
Step 2-2. Testing Trigger Forwarding
Now let’s verify whether the Trigger Forwarding works correctly.
Use a cURL command like the one below to authenticate the desired Connector.
curl --request GET \
--url https://console.interactor.com/api/v1/connector/interactor/{CONNECTOR_NAME}/auth-url?account={END_USER_ACCOUNT_NAME} \
--header 'Content-Type: application/json' \
--header 'x-api-key: {API_KEY}'
Here, replace:
{CONNECTOR_NAME}with the name of the Connector you want to use,{END_USER_ACCOUNT_NAME}with the user account name on your server,{API_KEY}with your Interactor API Key.
Since we are testing Gmail Trigger, I will test with gmail.
I will use Postman for testing.
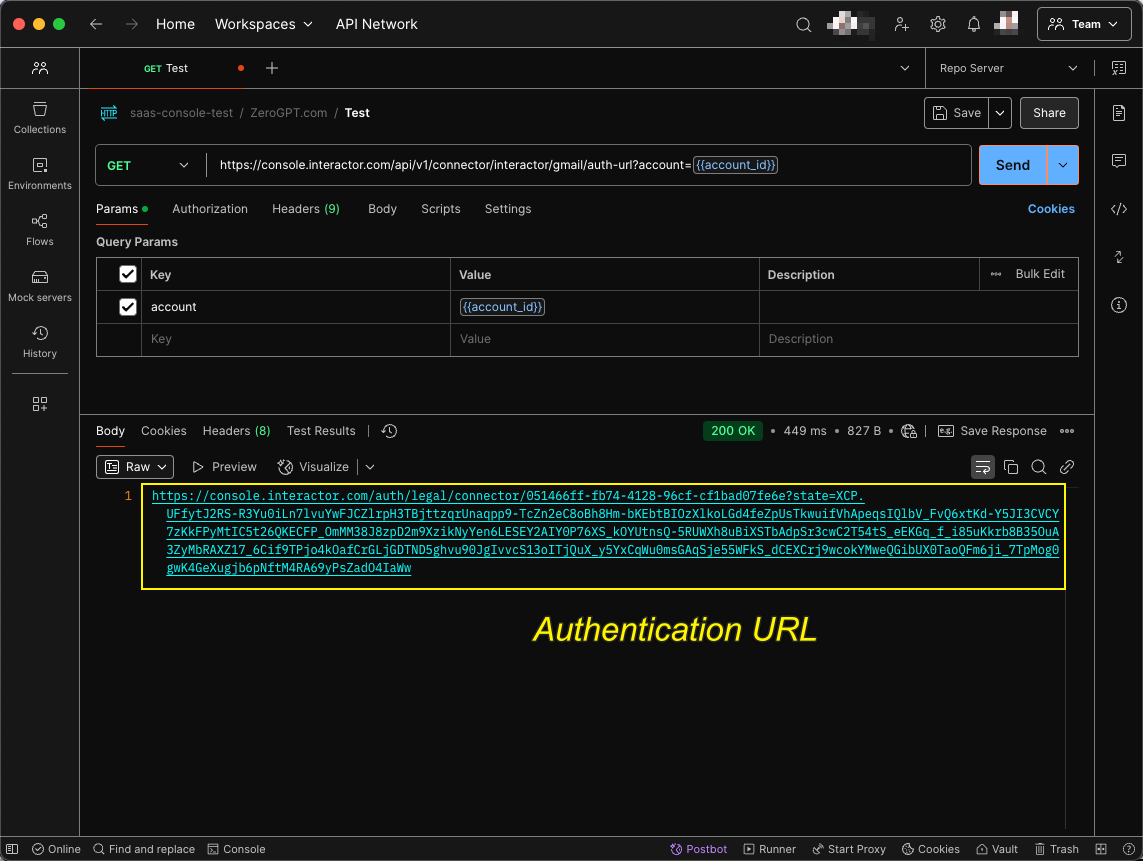
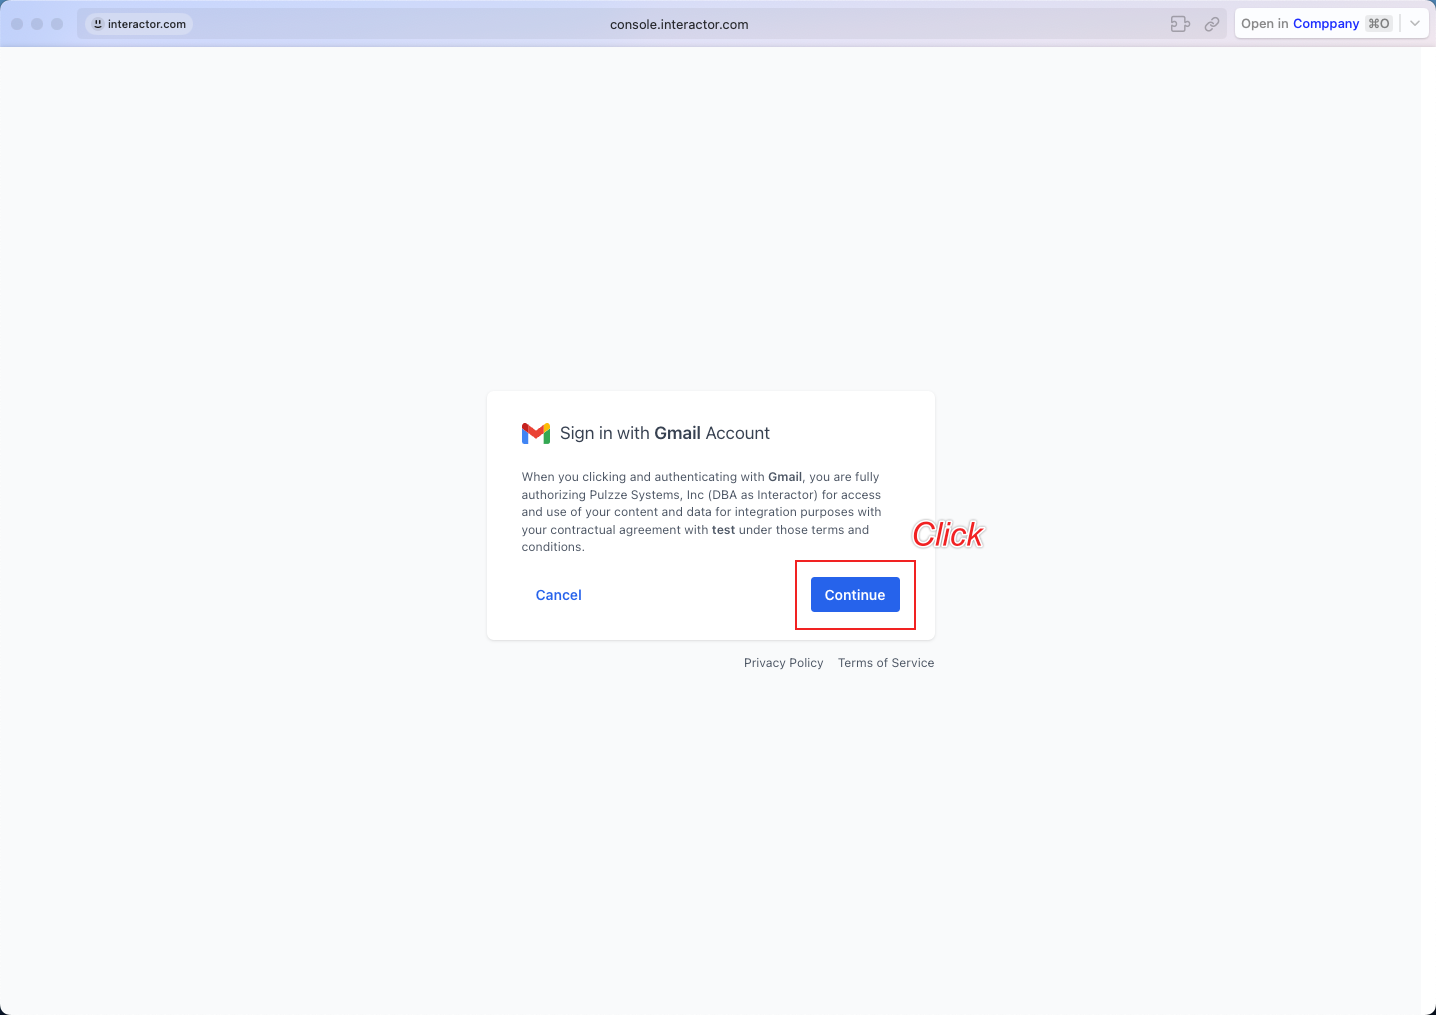
When you access the Authentication URL returned in the response, you will be taken to a page like the one below.
Click Continue.
The page below is displayed using Interactor’s client_id and secret.
If you use your own client_id and secret, you will not see this page.
(Optional Connector client_id, secret modification)
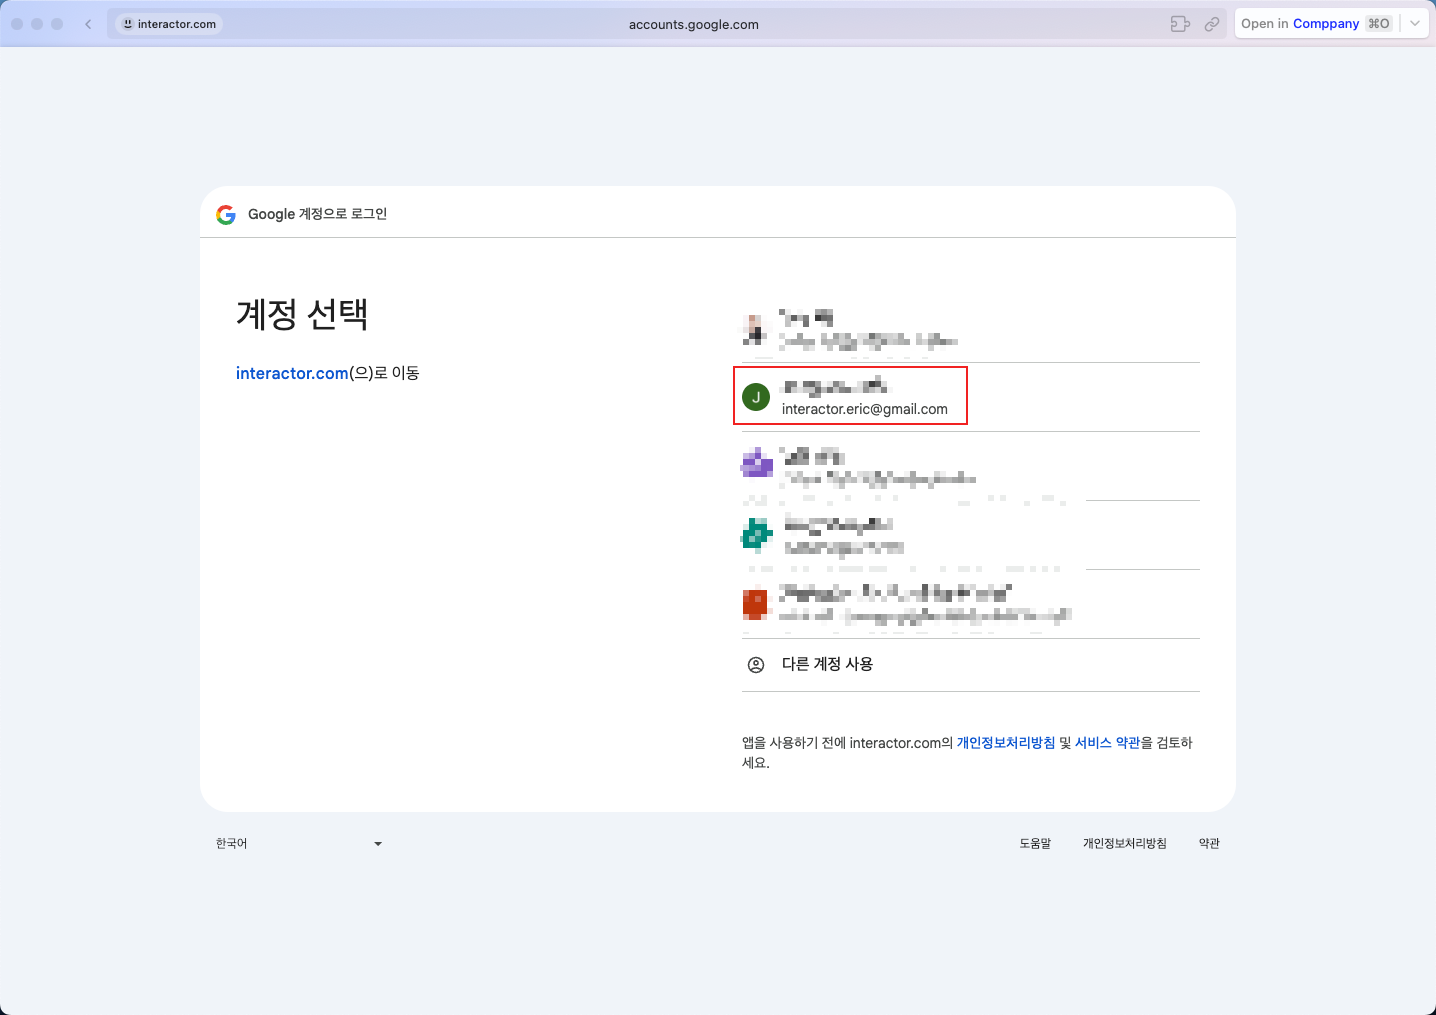
After clicking Continue,
please log in with the desired Gmail account.
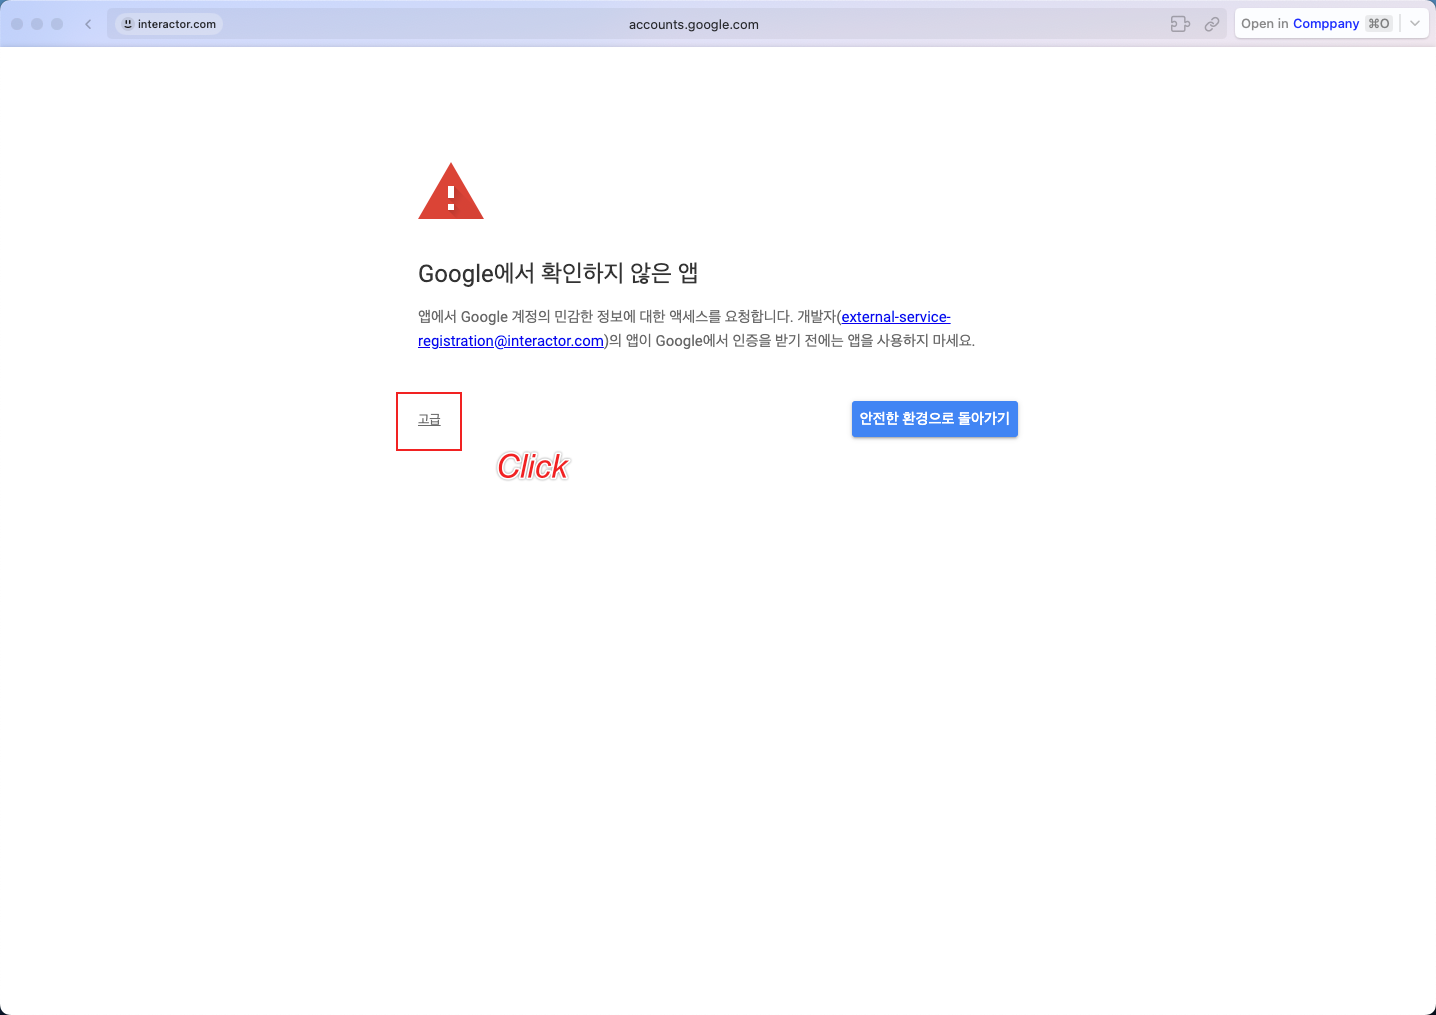
During the authorization process, a screen like the one below may appear. Click the Advanced button on the left to proceed.
This page appears because it is a default environment used for testing.
If you use an actual Google Developer app, this page will not appear.
Now all the steps are complete.
Let’s check if it works.
Go to Gmail and send an email.
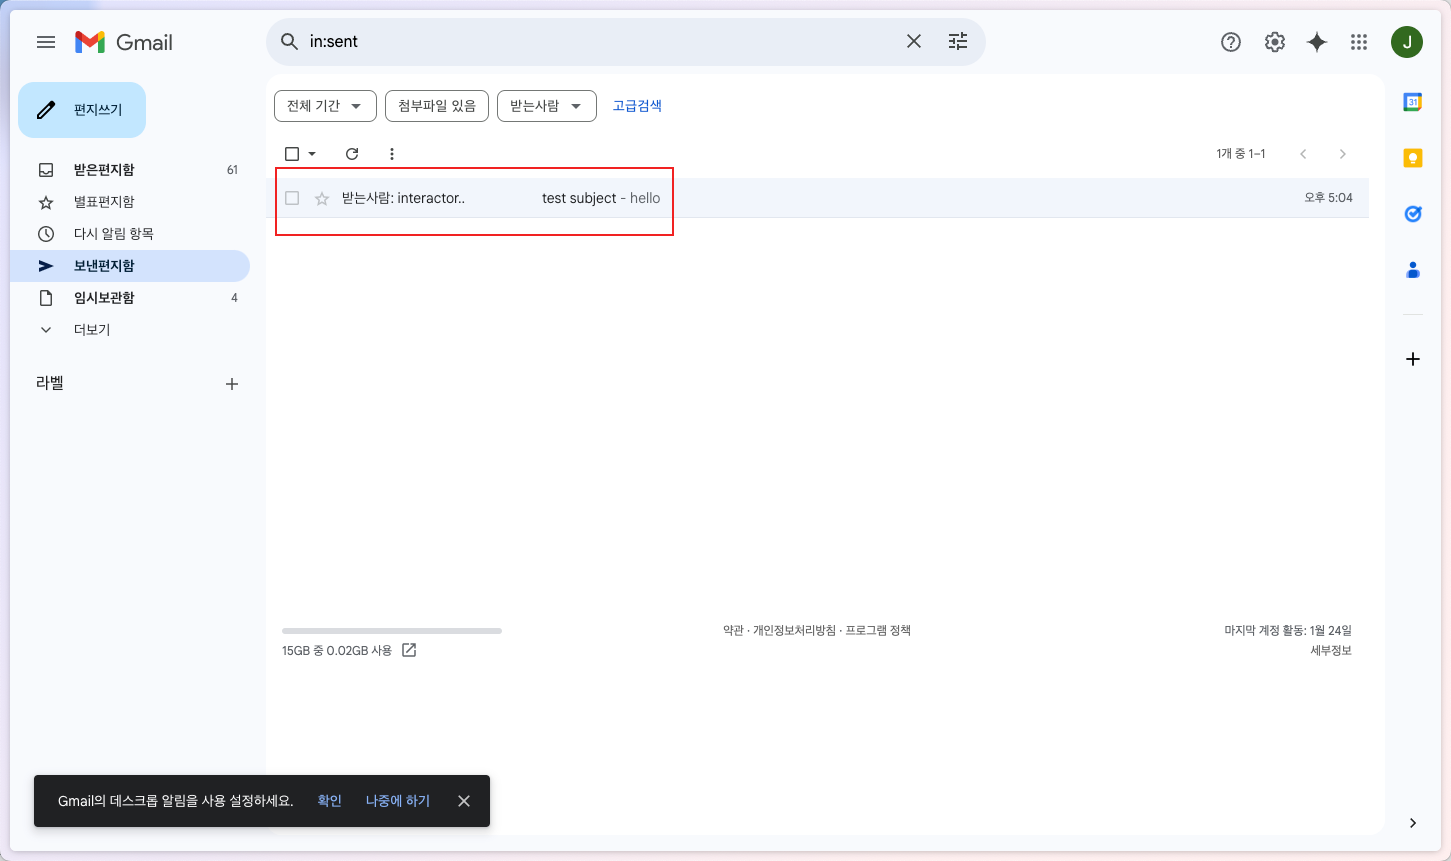
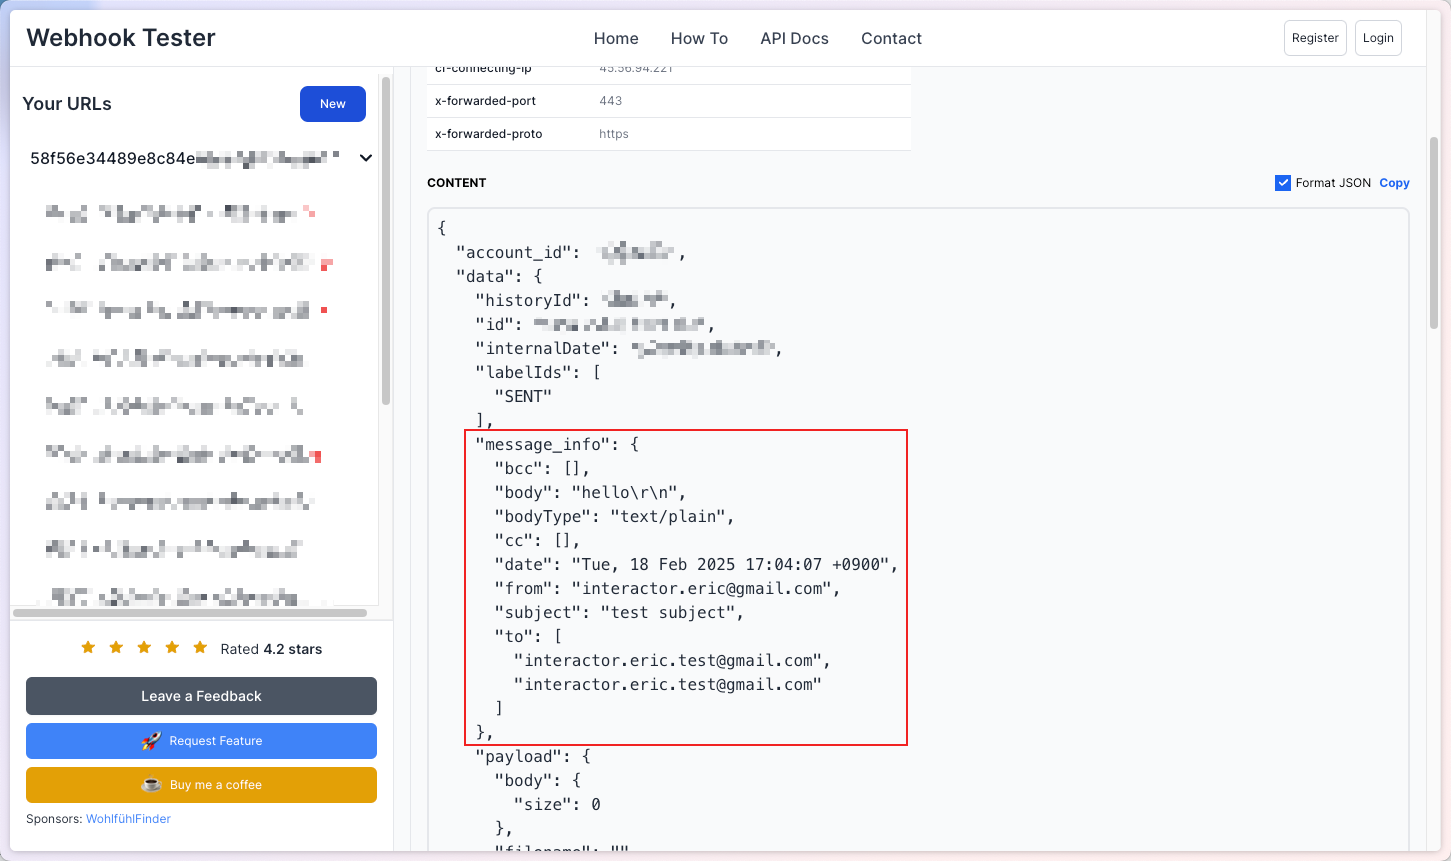
After actually sending the email, check your configured server.
You will see that the webhook information about the email you sent has arrived.
